Mar 31

Master Bedroom Before & After!

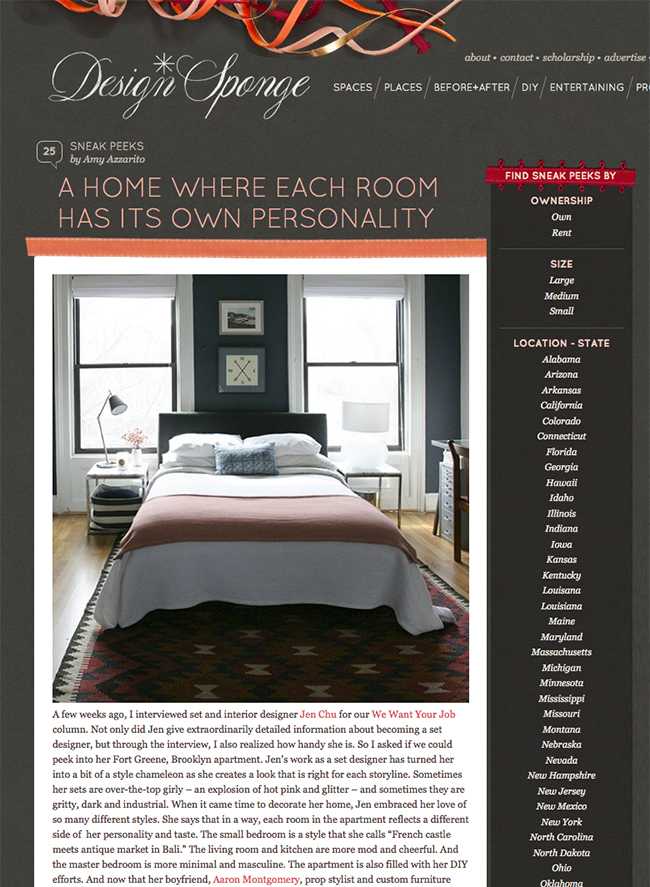
Since Design*Sponge recently posted a house tour of my place, I thought it would be a good time to share some progress pics so y’all can see how the master bedroom has changed over the course of the last 6 years.

My apartment has one tiny bedroom and one really large bedroom. For 6 years, I voluntarily chose to live in the tiny bedroom and I was perfectly happy there until my boyfriend moved in. 78 square feet is not a lot of space for 2 people to share. Sure, people all over the world live in tight quarters, but for the sake of maintaining peaceful relations with my partner, we decided to migrate to the big room.

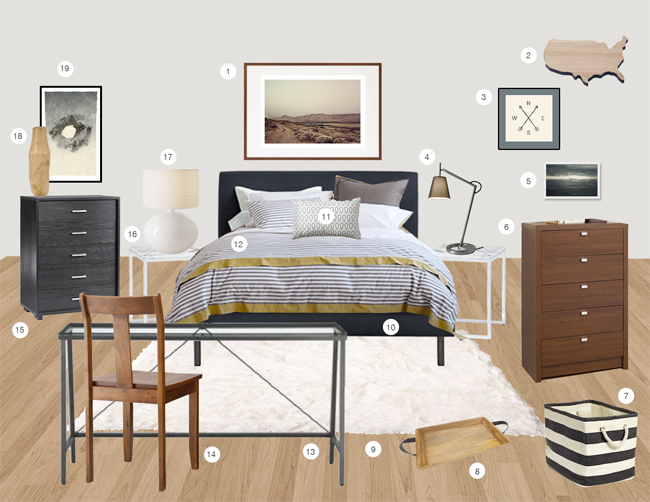
It wasn’t until I had to relocate that I realized there was no usable furniture in the tiny room that I could drag to the big room. Everything in the tiny room is custom made and built-in, so that created a “shopportunity” to start from scratch. I don’t really like decorating slowly—contemplating furniture and decor for years on end. I need a designated place for everything in order to not lose my mind, so I prefer to just make a plan and get everything at once. Of course, I made a really thorough mood board, and blogged about what I wanted to buy in this post, which you should definitely check out because there’s also an awesome picture of my mom in it.

numberspin it!

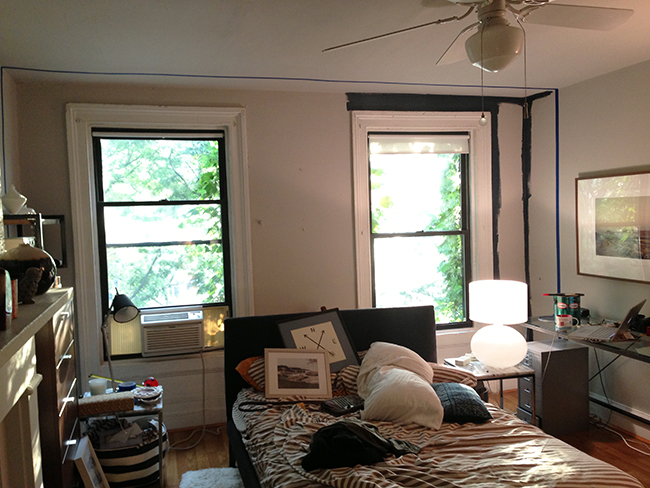
Let’s rewind for a minute. The big bedroom has always had good bones. It’s kinda huge (by NYC standards.) It has 2 big windows, a formerly-functional fireplace, and decent looking laminate floors. However before I moved in, there were a few things that REALLY needed to be addressed before I showed off the space to potential roomies. Exhibit A: weird hodgepodge of retro mirrors.

master-bedroom-makeover-01pin it!

For those of you who have never had the pleasure of ripping mirror off… let me tell you…mirror adhesive is no joke. The only way for me to get these off was to break them. I wore gloves, multiple layers of thick clothing, boots, and safety goggles, then crammed a spackle knife under each mirror until the pressure caused them to crack and hundreds of glass shards went flying across the room. It wasn’t ideal—if anyone knows a better method, please do share. After the mirrors were off, I discovered a little MOLD! I immediately scrubbed the wall with bleach and I haven’t had a problem since.  Now, Exhibit B: lots of cracks in the walls and ceiling.

master-bedroom-makeover-02pin it!

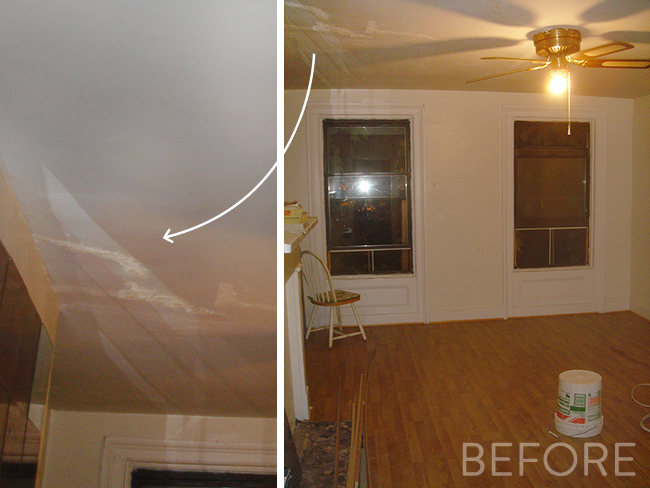
Photos never do a scary room justice. The walls had a lot of lumps, small cracks, and unsanded spackle patches, so I took 3 days to repair those. That was no biggie, just your typical patch/sand/repeat. I also used 2 whole tubes on caulk to fill the cracks around the windows and door trim which was a highly gratifying process. Every crack that disappeared made the room look a couple years younger. The ceilings, however, were a HUGE pain. There were some pretty deep cracks, which I knew would be unappealing to potential roomies. Cracks just make it seem as though rain drops or cockroach poop are going to fall on your in your sleep. I could tell that someone tried to patch the cracks, but they didn’t use mesh tape, so ever the years, the cracks continued to split.

Ceiling repairs are my least favorite home-related thing to do. I hate doing any overhead electrical, anything that requires looking up for hours on end (I’m talking to you, Michelangelo), and I especially hate drilling and sanding ceilings. The process of repairing the cracks was simple: smooth down old spackle, cover cracks in mesh tape, apply more spackle, wait, sand, repeat. Unfortunately, I was dumb and I didn’t have a ladder so I was doing everything on my tiptoes on a chair. I also had no idea at the time that they sell equipment specifically for ceiling sanding. (Such a fool!)

master-bedroom-makeover-03pin it!

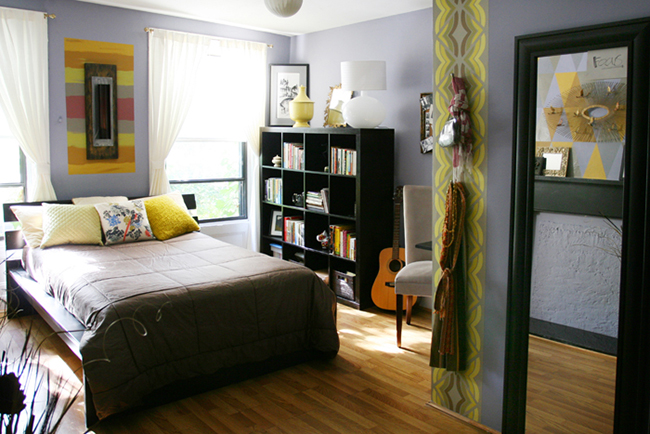
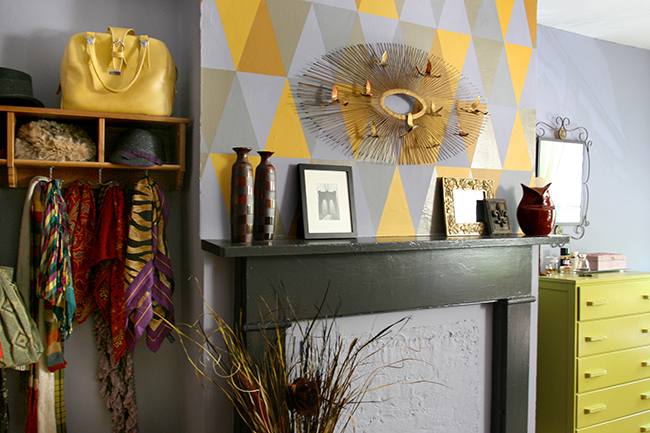
Anyway, the room came together nicely. I rented it to a series of lovely roommates, the last of whom was Katie. I adored this girl so much that when she was out of town, I teamed up with my friend Andrea and we gave her a full-on room makeover while she was out of town (with her blessing, of course.)

master-bedroom-makeover-04.5pin it!

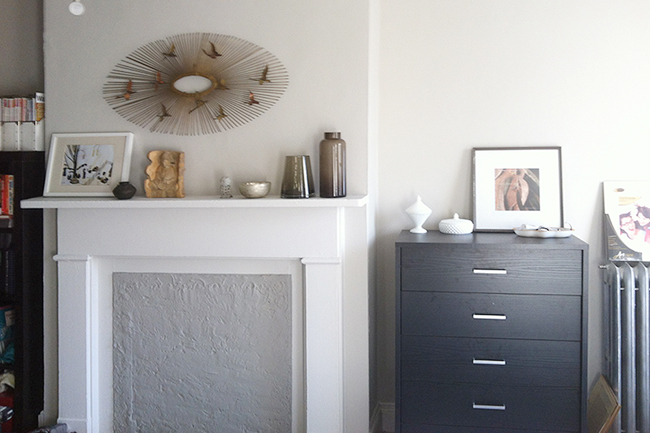
I loved her bright and cheery room, but when she left to move in with her boyfriend, she took her bright and cheery furniture and accessories, and the room just looked kind of sad without her. I decided to start over completely and I started by painting the walls Collingwood by Benjamin Moore.

master-bedroom-makeover-04pin it!

master-bedroom-makeover-05pin it!

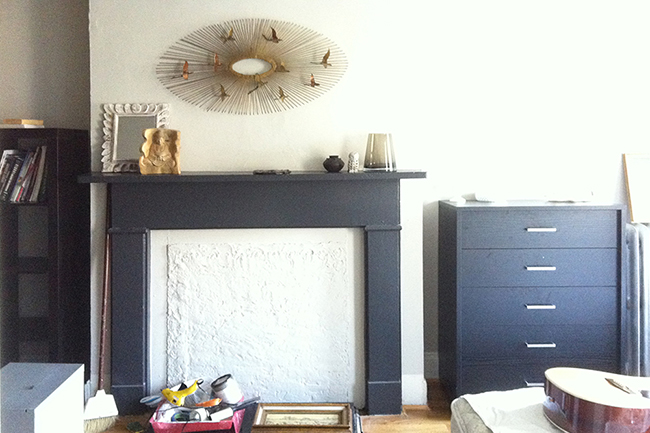
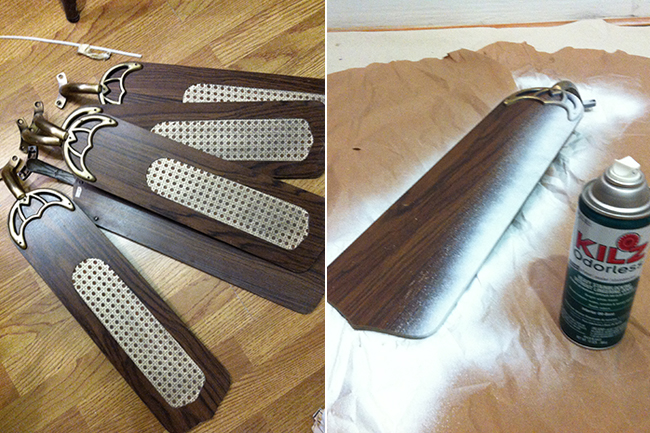
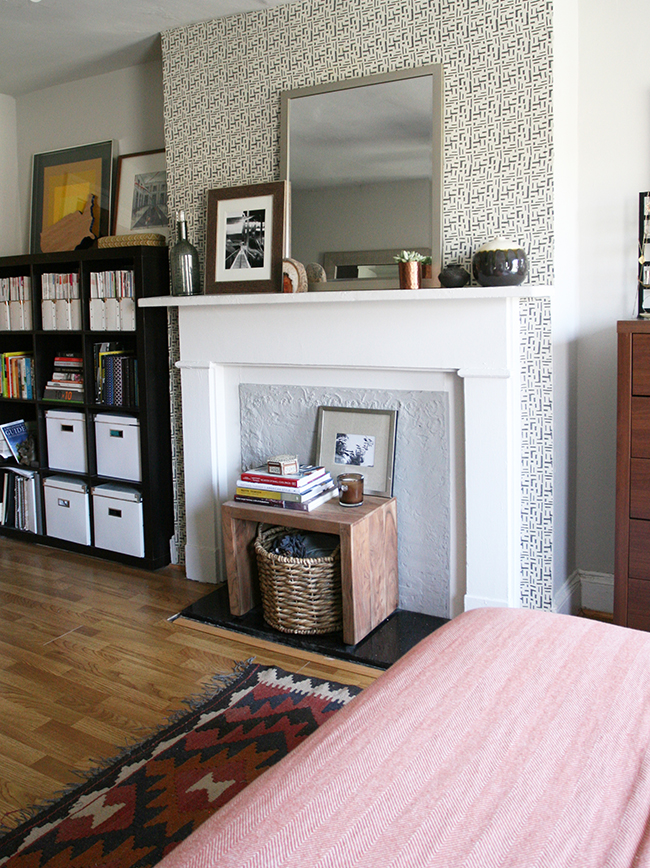
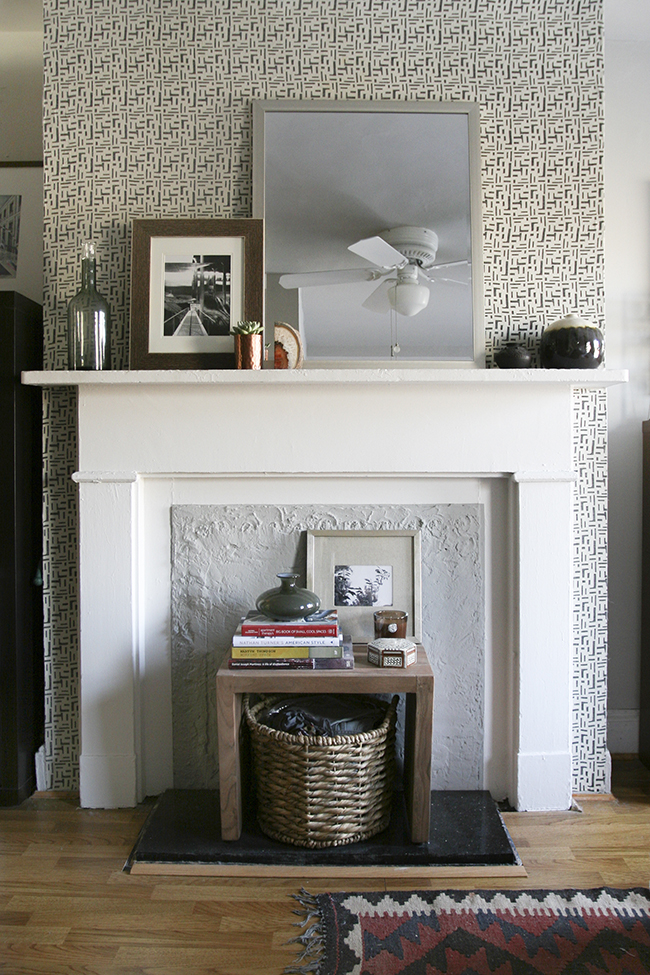
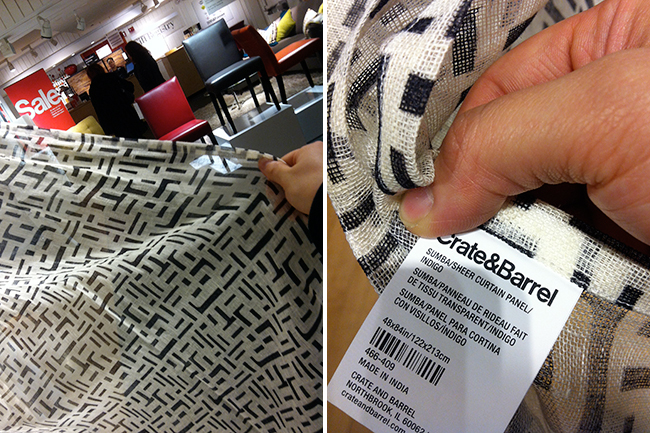
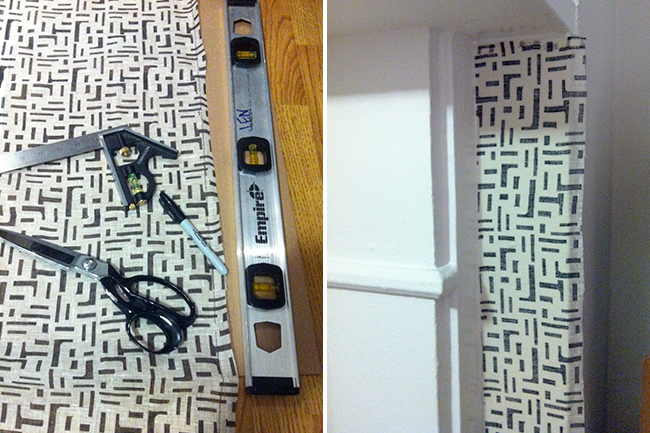
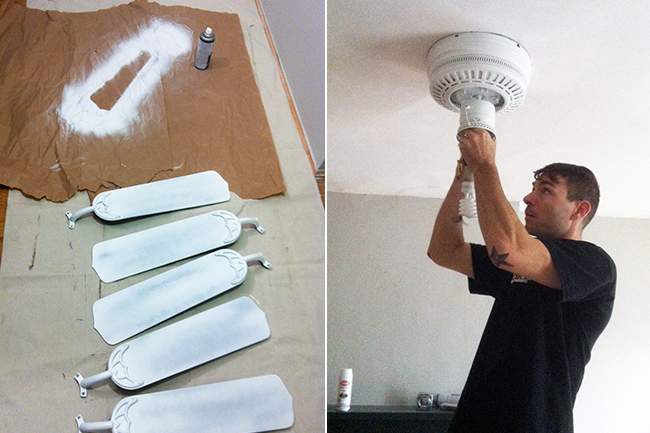
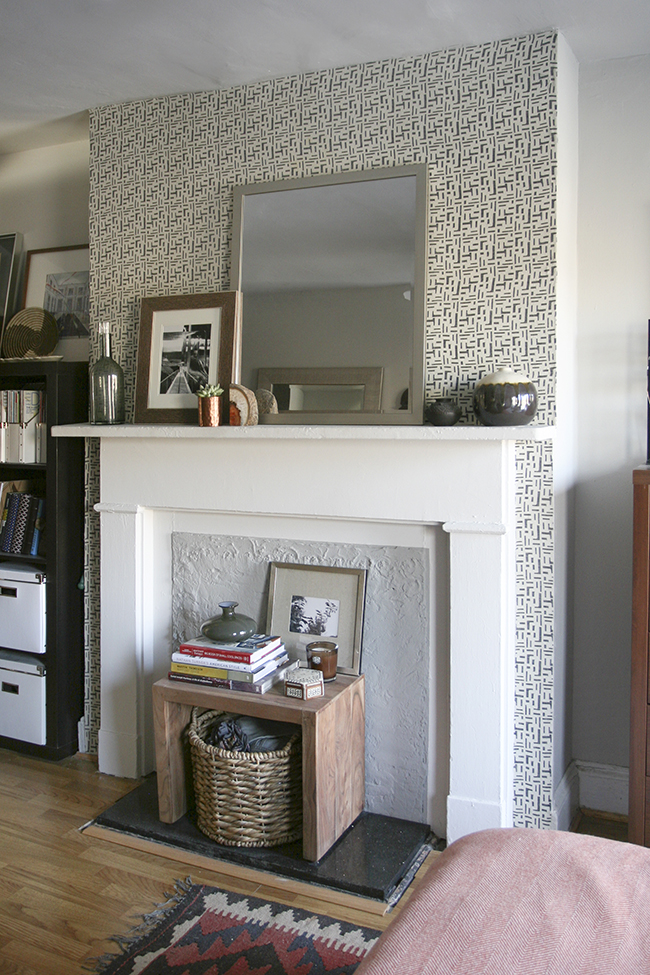
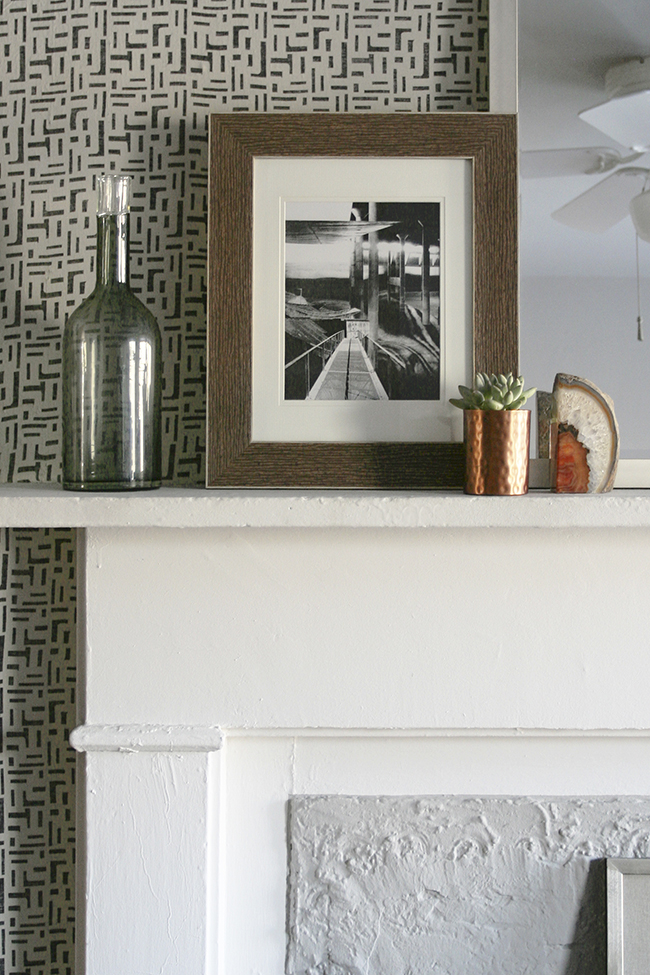
I “wallpapered” the fireplace surround with a curtain and liquid starch. A full tutorial on that process here. I also took down the ceiling fan blades and spray painted them white.

master-bedroom-makeover-06pin it!

master-bedroom-makeover-07pin it!

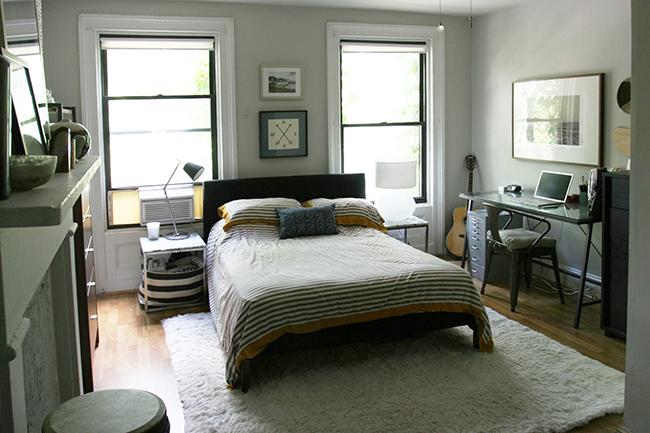
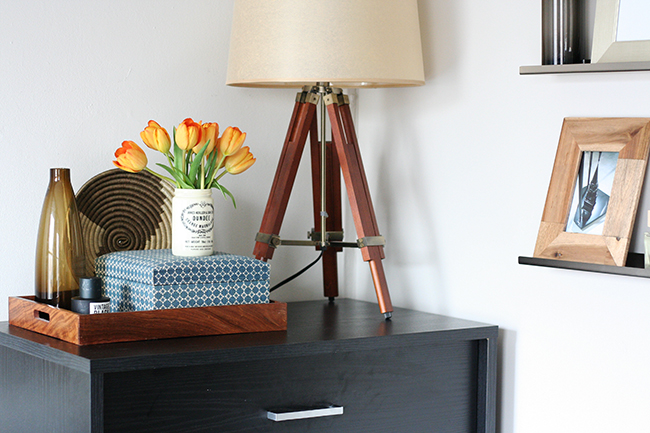
I purchased a bunch of furniture, and shortly after we moved in, the room looked something like this picture above. It was ok but aside from the cool fireplace surround, it was a little bland for my taste. That wall behind the bed needed something, but I didn’t want to clutter it up with junk since there’s so little wall space to begin with. The obvious solution? Accent wall!

master-bedroom-makeover-10pin it!

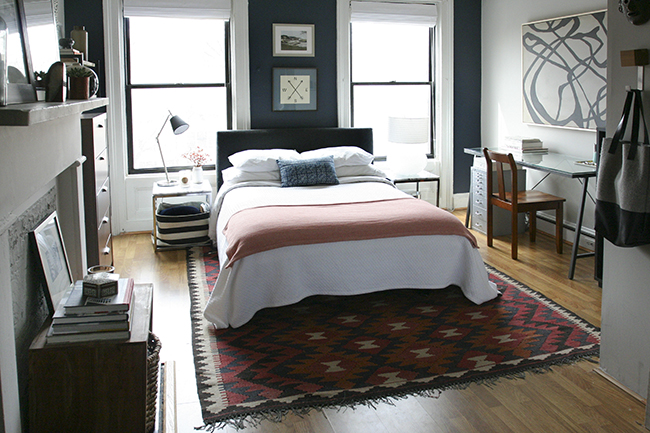
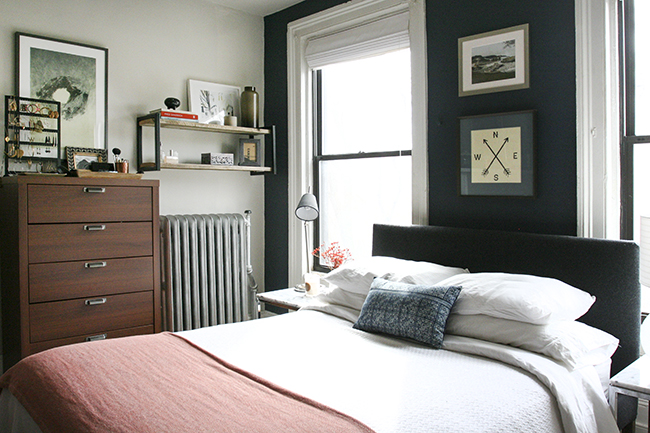
I don’t know where I got the idea, but I was feeling experimental, so I decided to paint the wall navy, but rather than stop the navy at the corner, I would bring the line into the room about 18″. It SEEMED like a really cool, hip thing to do.

master-bedroom-makeover-11pin it!

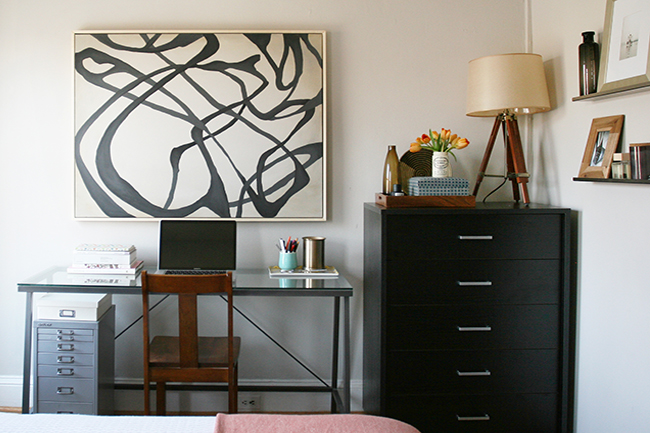
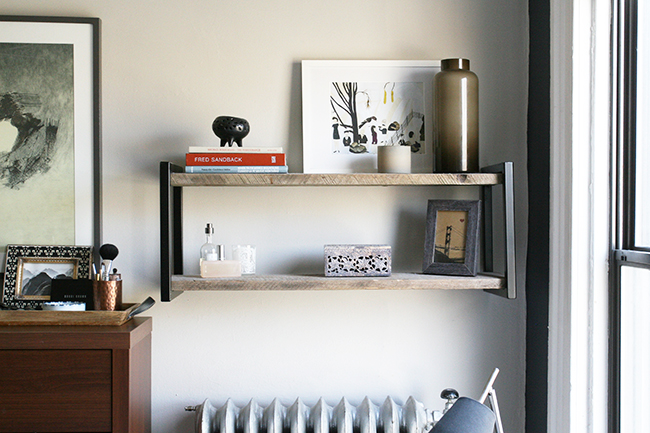
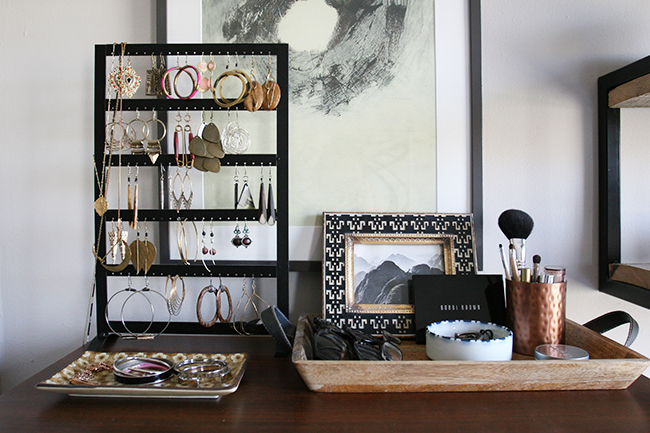
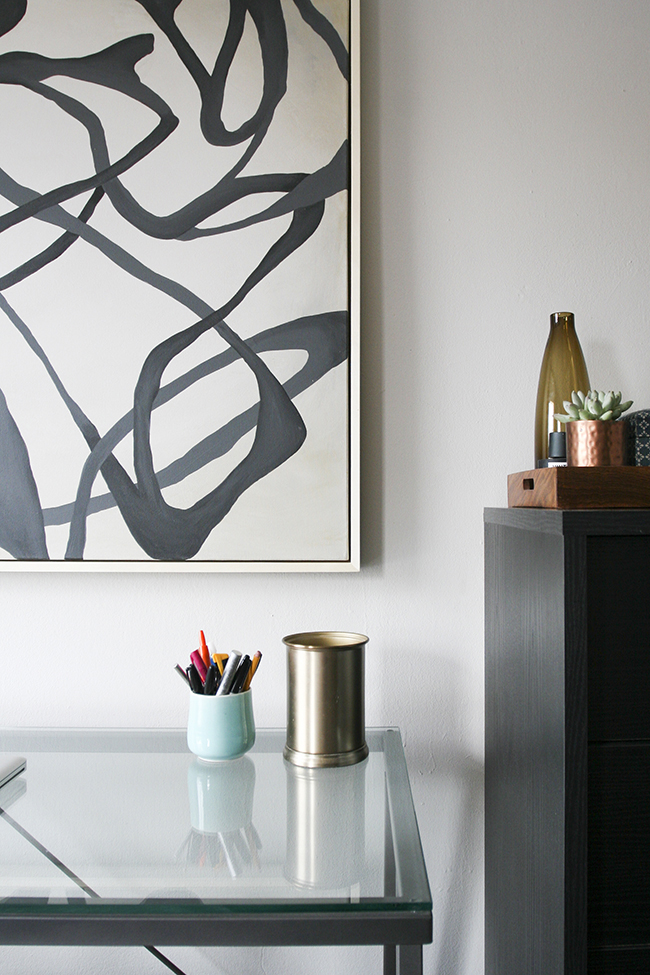
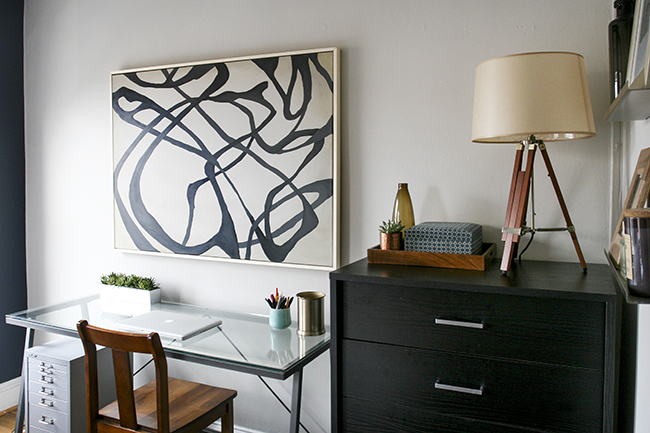
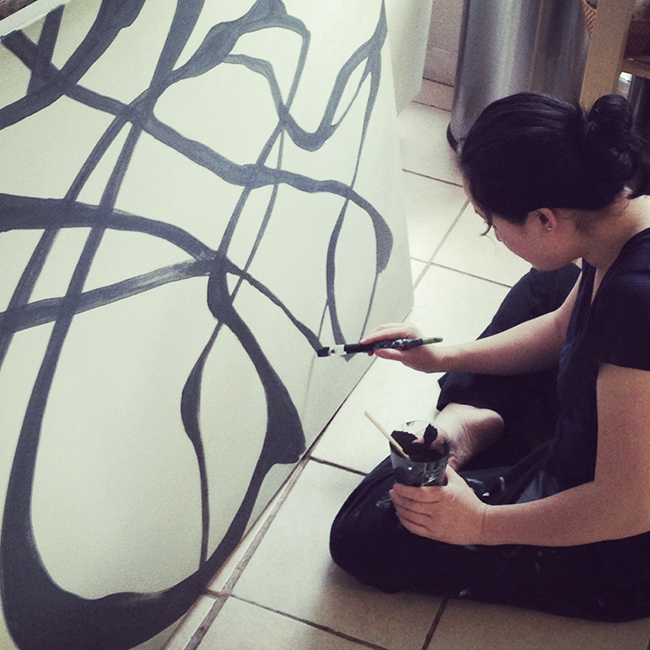
Except when it was done i HATED it. It’s not that it looked terrible, but when I was laying in bed, it felt like there was a dark cloud hovering over me at all times. It was literally making me depressed. I lived with it for a few days, but it drove me nuts, so repainted the 18″ strip and now all is well. After the navy wall done, it motivated me to finish decorating, so I got some roman shades, a new rug, made a big painting, and now the room looks like this!

master-bedroom-makeover-12pin it!

master-bedroom-makeover-00pin it!

master-bedroom-makeover-14pin it!

master-bedroom-makeover-15pin it!

master-bedroom-makeover-16pin it!

For sources, check out my mood board or my Design*Sponge house tour.

Posted by Jen at 10:10 am — 3 comments
Categories: ,
Mar 26

Design*Sponge Sneak Peek!

I had been thinking about approaching Design*Sponge to do a house tour for at least the last 3 years. I always hesitated because I thought my place was too stylistically schizophrenic—each room with a different style. I don’t consider myself a designer with a “signature style,” probably because I create sets, so I just do what is right for the show. As a result, I enjoy experimenting with different styles in my home.

Two weeks ago Amy from Design*Sponge approached me about doing an interview/article about my career as a set designer and I happily obliged. I’m a huge fan of their blog so I was also totally excited (and a little surprised) when they suggested doing a full tour of my humble abode! It’s funny because they wound up titling the post “A home where each room has its own personality,” which is VERY fitting.

I photographed the master bedroom for the first time about a week ago just for this house tour, so in the next  couple days I’m going to do a big blog post on the evolution of the master complete with really scary “before” pics. For now, you can see a few pics of each room here.

design-sponge-sneak-peekpin it!

Posted by Jen at 9:33 am — comment
Categories: ,
Mar 17

Spring Cleaning.

IMG_2102pin it!

I’m not the neatest person in the world. On a scale from 1 to 10 (1 being a frat house, and 10 being Martha Stewart’s pantry) I’d say I’m about a 6-7 most of the time. I’m pretty good about Swiffering, but my problem is that I usually wait till little piles form all around me before putting anything back.

Junior year of college I was renting a really nice, big room in Newport Beach (check out the ridiculous evolution of my room over the years) so I decided for the first time in my life, I would be committed to being a neat freak the entire year. I hung up my clothes every day, my carpet was consistently vacuumed, and my room always smelled faintly of eucalyptus and lavender. Ever since then I’ve gone back and fourth between neat and messy-ish—generally the busier I am, the less willpower I have to keep the house in order. I’ve been working from home a lot lately, so my desk had almost zero usable surface area left before I finally did something about it.

This weekend I spent 3 hours obsessively straightening up my bedroom (I even lint rolled my entire rug) so I could finally photograph it.  It’s basically spotless in here and I’m loving how zen and hotel-like it feels, so I’m making a mid-year resolution to be tidier. Over the next two weeks, I’m going to do a huge purge and start fresh just in time for spring!

IMG_3070pin it!

IMG_3077pin it!

Posted by Jen at 11:20 am — 2 comments
Categories: ,
Feb 24

A Fabric Wall in my Bedroom.

IMG_2830pin it!

As most of you know, I lived in a teeny tiny bedroom for 6 years. My apartment has one big room and one small room and I decided early on that it made sense for me to take the small room because I travel a lot for work. It turned out to be one of the best decisions I’ve ever made—my fancy tiny bedroom received quite a bit of press, I saved money, and I met wonderful roommates along the way.

When my beau moved in with me, we decided to migrate over the big room and use the small room as a home office/guest room. As much as I loved my last roommate, Katie’s room, (which Andrea and I made over years ago), I was excited to decorate and experiment with some new styles and techniques.

curtain0pin it!

Goodbye triangles! (I still love them, but it’s time for a new look.) First things first, I painted the room a light warm grey called Collingwood by Benjamin Moore. This is one of my all time favorite neutral colors. I used it years ago in my client, Sarah’s house, and I mentally bookmarked it as  color I’d like to use in my own room some day. You can’t really tell in these pictures, but the ceiling is kind of lumpy from being patched so many times, so the line between the wall and the ceiling is not straight. It was driving me nuts, so I painted the ceiling Collingwood as well. This made a HUGE difference! It really de-emphasized the imperfect ceiling.

curtain2pin it!

After painting the entire room, the dark grey fireplace mantle felt too heavy. Something about the IKEA shelf on the left and the black dresser on the right just wasn’t sitting right with me. The room felt off balance because there was very little furniture on the other side to balance out the 3 dark pieces. If the mantle wasn’t going to be grey, the next logical option was white. That didn’t feel right either because white mantles are pretty, but a little too preppy for the look I was trying to achieve. I wasn’t sure if black-white-black would look too contrasty. After hemming and hawing for hours and auditioning every paint color that I had in my utility closet, I finally decided to custom mix a color.

curtain3pin it!

I mixed 2 parts Collingwood with 1 part white, and created this really nice light grey. I’m really happy with the way it turned out—the fireplace stands out from the wall, but it’s not a focal point that is screaming for attention. After the fireplace was painted light grey, the square in the middle (that was sealed up and smeared with concrete at some point) started to look naked, so I used the same technique—mixing Collingwood with a squirt of black— to make another custom color just for the center. Overall this wall was looking pretty swell, and any normal person would have just slapped a mirror on there and called it a day. But NOOO…I just HAD to do something zany to the wall. I guess I was used to seeing the triangles there, and without them, it looked a little lackluster. I love high impact wall treatments, like this one and I sometimes get the itch to try out new techniques, just so I can say that I did, so I started looking for a pattern that would go with the “Nate Berkus on a budget” look that I was going for. This involved another afternoon of hemming and hawing. My internal dialogue went something like this: Should I paint something? Should I use fabric? Should I used mud cloth? Is that too ethnic? Are triangles too trendy? Is this pattern going to take 90 hours to paint? Ugh. Sometimes I annoy myself. You know what also annoys me? My bad iphone photos of this project.

curtain4pin it!

I found this curtain panel on Crate and Barrel’s website, and it seemed to fit the bill: not colorful, not too girly, interesting but not indicative of any particular style or period. I went to scope it out at their uptown location and decided that for $44 it was worth a shot.

curtain5pin it!

I heard somewhere that you can use liquid starch to adhere fabric to walls. Some people use this as a substitute for wallpaper because starched fabric is completely removable. I’d been dying to try this for years, so as soon as I got the fabric, I was really excited to start, and never thought in a million years that it would be nearly impossible to find liquid starch in this city! I went to the drug store, the grocery store, Target, and 3 bodegas and had no luck. I finally just picked up 2 cans of spray starch and figured if I saturated the fabric, it would be just fine. I was wrong. My first pass at this project SUCKED. No matter how much spray starch I used, the fabric wouldn’t stick, so there were spots that were bubbling or wrinkling. My boyfriend came home in the middle of my project and had to console me because I was pouting about my botched mission. I decided to leave it up and sleep on it, hoping that it would miraculously look perfect in the morning.

It didn’t. It still looked crappy. The next day, I ventured out and searched 5 more bodegas and FINALLY found a bottle of liquid starch. I scampered home, ripped the wrinkly fabric off the wall (it came off clean!) and dunked the whole thing in a bucket of liquid starch. Let me tell ya, that made all the difference. The rest of the project went relatively smoothly.

curtain6pin it!

Guys, I got SO lucky with this curtain panel. I literally had 2 centimeters left when I was done. The panel was 4′ wide and my wall was 4′ tall. I actually had to take out the hem on the edge so there wouldn’t be a bulky bump and so I’d have just a bit more leeway with the positioning. After I smoothed the fabric onto the upper part, I cut the scrap in half and put one on each side of the fireplace, which made it look a lot more balanced.

curtain7pin it!

Oh, I also spray painted the ceiling fan. It was REALLY ugly, but it does provide a nice breeze in the summer. One thing that sucks about living in a city that has “real winter,” is that you can’t do projects outside. Spray painting indoors is basically the worst idea ever, but I’m impatient and didn’t want to wait till summer so I just did it in the room. I know, I know…loss of brain cells. I should know better . I took this opportunity to try out a new product: Killz odorless primer.   While it is far from “odorless,” it is substantially less horrible smelling than regular spray primer. It goes on super smooth and opaque and the smell dissipates faster than with most sprays, so I’m going to give it my stamp of approval.

curtain8pin it!

I was stoked to discover that the backs of the blades were plain, so I took the hardware off each one and flipped the blade over and sprayed the back side. The picture above left is after just one coat of paint. Pretty impressive, Kilz! I taped around the ceiling mounted portion and sprayed it while standing on a chair. My handy bf helped me re-assemble it.

IMG_2812pin it!

IMG_2786pin it!

Well there she is! You can really see how wavy the ceiling line is and how lumpy the fireplace is, but it honestly doesn’t really bother me that much. I’ve never lived in a room this big and nice, so I’m happy to embrace this 115 year old building, lumps and all!

Posted by Jen at 8:00 pm — 5 comments
Categories: , ,
Feb 2

New Painting in my Bedroom.

I have a ton of wall space over my desk so I decided to dust off the ol’ paint brushes and make something really high impact to eat up the space. The canvas is 36″ x 48″ and it was only $65 at the Blick canvas sale. Aaron made me a skinny frame, which I love because the canvas “floats” inside the frame and it looks high end and fancy. I really enjoyed making this so I went back to Blick and bought 20 canvases (buy 20, save 70%!) I know… 20 canvases sounds nuts, but here’s the secret: if you buy 5 big canvases, you can buy 15 teeny tiny canvases which come out to $1.28 each and that drives the price of your big canvases way down. You’re welcome! Now I need to not be a loser and actually paint these canvases rather than let them sit around for 3 years which is what I did the last time I went to the Blick sale.

IMG_2473pin it!

IMG_2443pin it!

IMG_9437pin it!

Posted by Jen at 1:24 pm — 3 comments
Categories: , ,