As most of you know, I lived in a teeny tiny bedroom for 6 years. My apartment has one big room and one small room and I decided early on that it made sense for me to take the small room because I travel a lot for work. It turned out to be one of the best decisions I’ve ever made—my fancy tiny bedroom received quite a bit of press, I saved money, and I met wonderful roommates along the way.
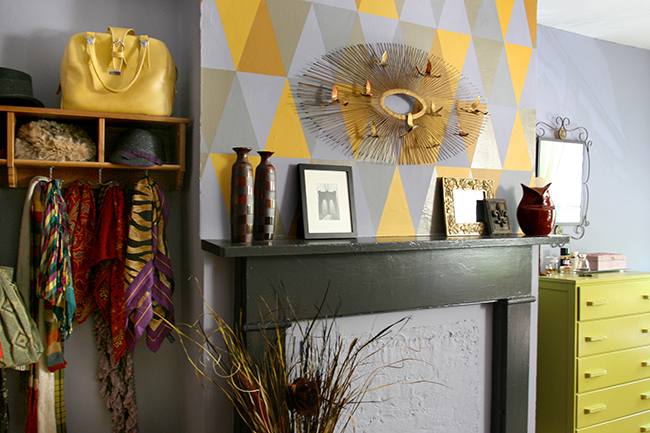
When my beau moved in with me, we decided to migrate over the big room and use the small room as a home office/guest room. As much as I loved my last roommate, Katie’s room, (which Andrea and I made over years ago), I was excited to decorate and experiment with some new styles and techniques.
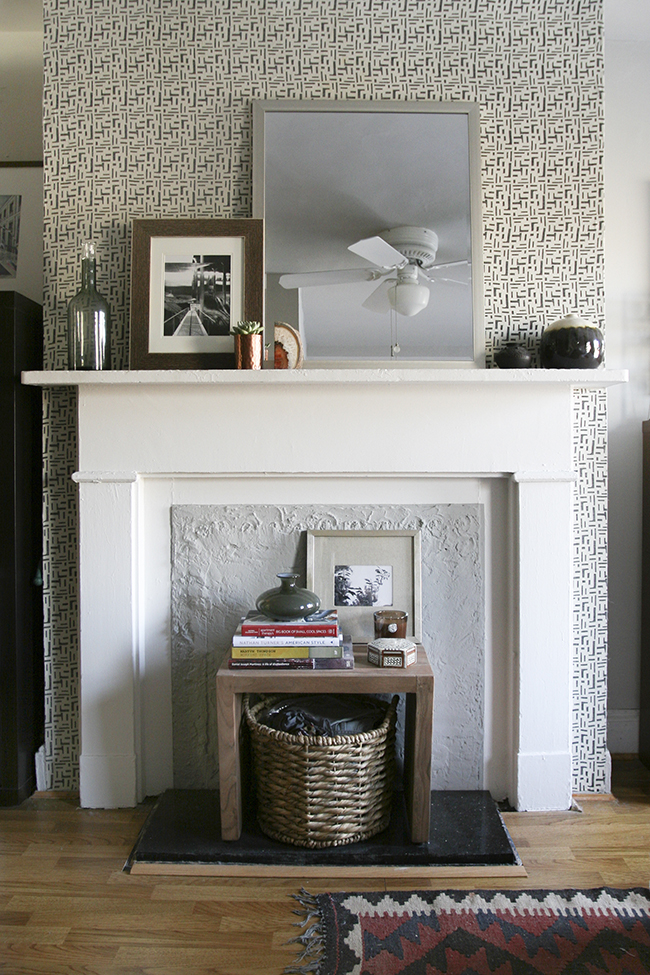
Goodbye triangles! (I still love them, but it’s time for a new look.) First things first, I painted the room a light warm grey called Collingwood by Benjamin Moore. This is one of my all time favorite neutral colors. I used it years ago in my client, Sarah’s house, and I mentally bookmarked it as color I’d like to use in my own room some day. You can’t really tell in these pictures, but the ceiling is kind of lumpy from being patched so many times, so the line between the wall and the ceiling is not straight. It was driving me nuts, so I painted the ceiling Collingwood as well. This made a HUGE difference! It really de-emphasized the imperfect ceiling.

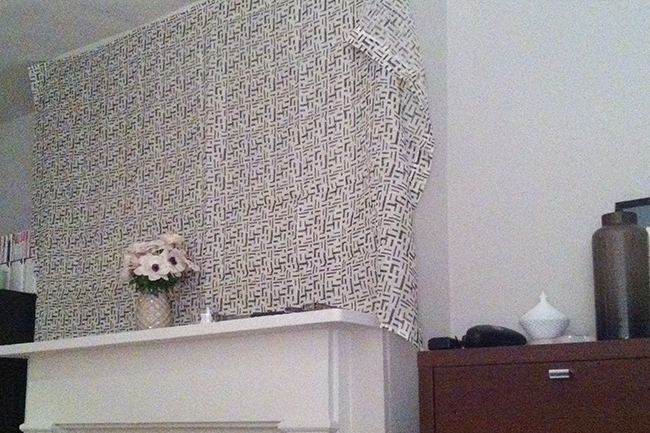
After painting the entire room, the dark grey fireplace mantle felt too heavy. Something about the IKEA shelf on the left and the black dresser on the right just wasn’t sitting right with me. The room felt off balance because there was very little furniture on the other side to balance out the 3 dark pieces. If the mantle wasn’t going to be grey, the next logical option was white. That didn’t feel right either because white mantles are pretty, but a little too preppy for the look I was trying to achieve. I wasn’t sure if black-white-black would look too contrasty. After hemming and hawing for hours and auditioning every paint color that I had in my utility closet, I finally decided to custom mix a color.
I mixed 2 parts Collingwood with 1 part white, and created this really nice light grey. I’m really happy with the way it turned out—the fireplace stands out from the wall, but it’s not a focal point that is screaming for attention. After the fireplace was painted light grey, the square in the middle (that was sealed up and smeared with concrete at some point) started to look naked, so I used the same technique—mixing Collingwood with a squirt of black— to make another custom color just for the center. Overall this wall was looking pretty swell, and any normal person would have just slapped a mirror on there and called it a day. But NOOO…I just HAD to do something zany to the wall. I guess I was used to seeing the triangles there, and without them, it looked a little lackluster. I love high impact wall treatments, like this one and I sometimes get the itch to try out new techniques, just so I can say that I did, so I started looking for a pattern that would go with the “Nate Berkus on a budget” look that I was going for. This involved another afternoon of hemming and hawing. My internal dialogue went something like this: Should I paint something? Should I use fabric? Should I used mud cloth? Is that too ethnic? Are triangles too trendy? Is this pattern going to take 90 hours to paint? Ugh. Sometimes I annoy myself. You know what also annoys me? My bad iphone photos of this project.
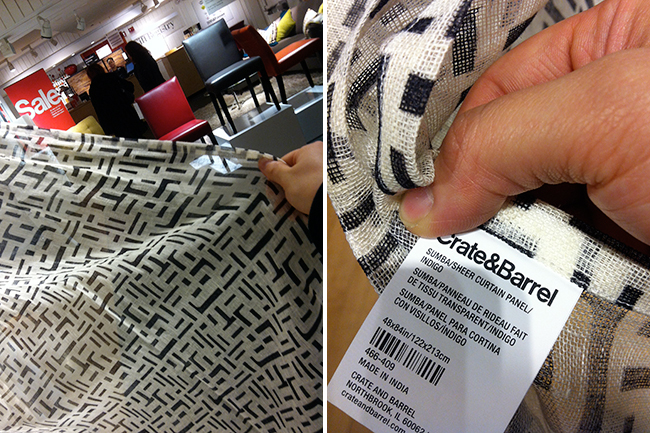
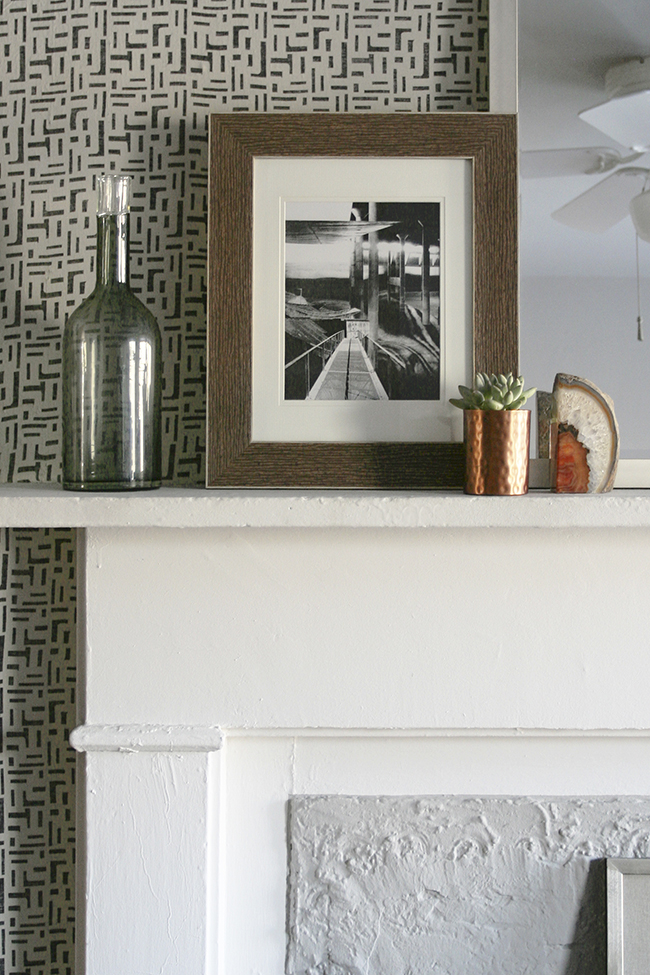
I found this curtain panel on Crate and Barrel’s website, and it seemed to fit the bill: not colorful, not too girly, interesting but not indicative of any particular style or period. I went to scope it out at their uptown location and decided that for $44 it was worth a shot.
I heard somewhere that you can use liquid starch to adhere fabric to walls. Some people use this as a substitute for wallpaper because starched fabric is completely removable. I’d been dying to try this for years, so as soon as I got the fabric, I was really excited to start, and never thought in a million years that it would be nearly impossible to find liquid starch in this city! I went to the drug store, the grocery store, Target, and 3 bodegas and had no luck. I finally just picked up 2 cans of spray starch and figured if I saturated the fabric, it would be just fine. I was wrong. My first pass at this project SUCKED. No matter how much spray starch I used, the fabric wouldn’t stick, so there were spots that were bubbling or wrinkling. My boyfriend came home in the middle of my project and had to console me because I was pouting about my botched mission. I decided to leave it up and sleep on it, hoping that it would miraculously look perfect in the morning.
It didn’t. It still looked crappy. The next day, I ventured out and searched 5 more bodegas and FINALLY found a bottle of liquid starch. I scampered home, ripped the wrinkly fabric off the wall (it came off clean!) and dunked the whole thing in a bucket of liquid starch. Let me tell ya, that made all the difference. The rest of the project went relatively smoothly.
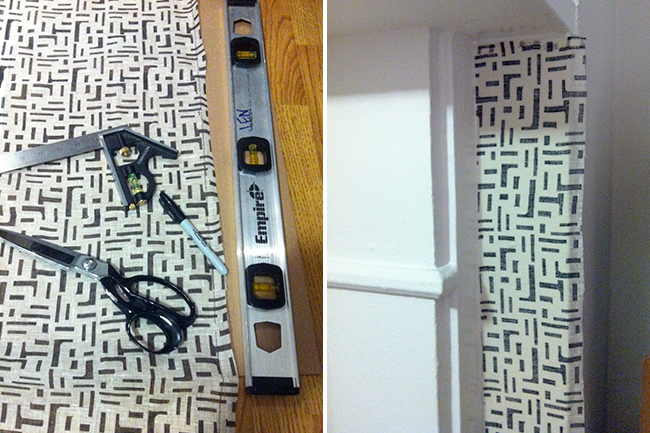
Guys, I got SO lucky with this curtain panel. I literally had 2 centimeters left when I was done. The panel was 4′ wide and my wall was 4′ tall. I actually had to take out the hem on the edge so there wouldn’t be a bulky bump and so I’d have just a bit more leeway with the positioning. After I smoothed the fabric onto the upper part, I cut the scrap in half and put one on each side of the fireplace, which made it look a lot more balanced.
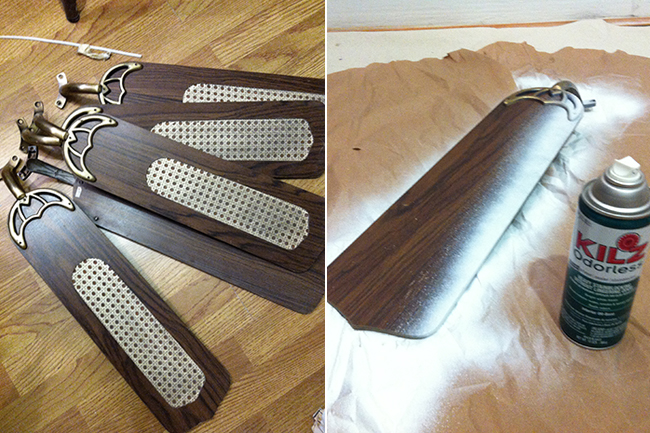
Oh, I also spray painted the ceiling fan. It was REALLY ugly, but it does provide a nice breeze in the summer. One thing that sucks about living in a city that has “real winter,” is that you can’t do projects outside. Spray painting indoors is basically the worst idea ever, but I’m impatient and didn’t want to wait till summer so I just did it in the room. I know, I know…loss of brain cells. I should know better . I took this opportunity to try out a new product: Killz odorless primer. While it is far from “odorless,” it is substantially less horrible smelling than regular spray primer. It goes on super smooth and opaque and the smell dissipates faster than with most sprays, so I’m going to give it my stamp of approval.
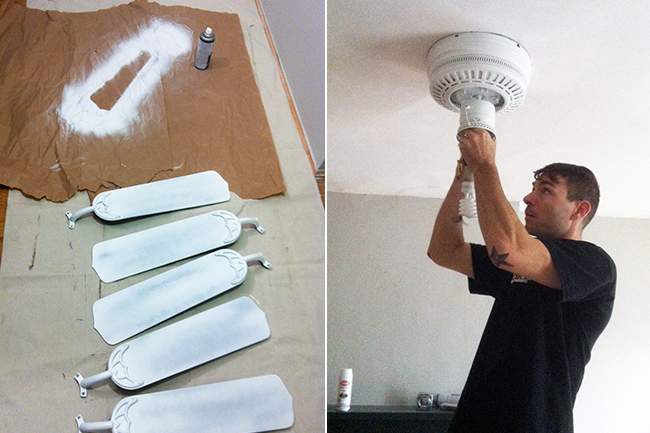
I was stoked to discover that the backs of the blades were plain, so I took the hardware off each one and flipped the blade over and sprayed the back side. The picture above left is after just one coat of paint. Pretty impressive, Kilz! I taped around the ceiling mounted portion and sprayed it while standing on a chair. My handy bf helped me re-assemble it.
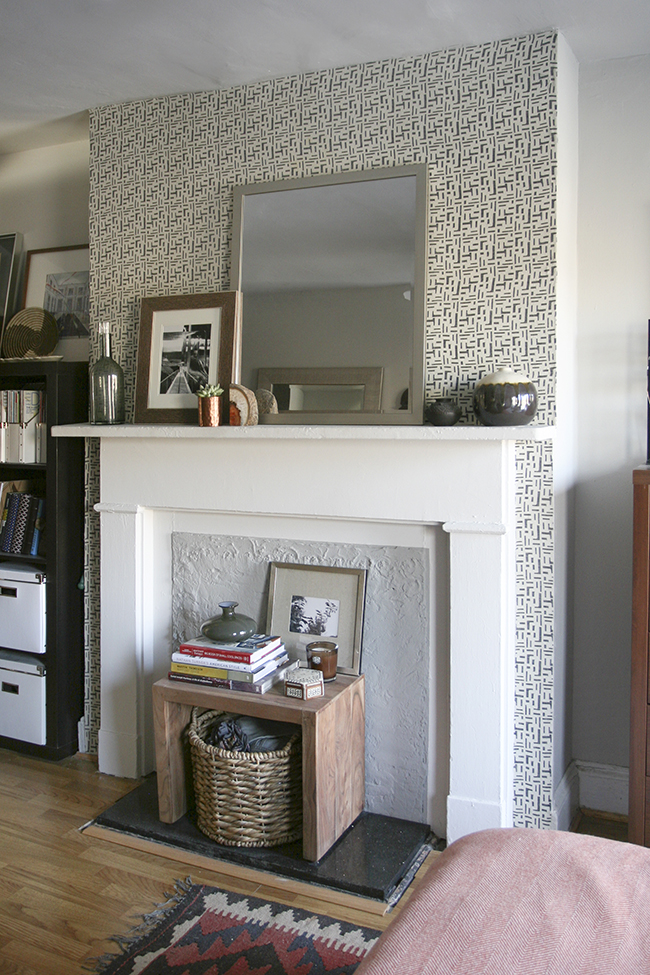
Well there she is! You can really see how wavy the ceiling line is and how lumpy the fireplace is, but it honestly doesn’t really bother me that much. I’ve never lived in a room this big and nice, so I’m happy to embrace this 115 year old building, lumps and all!


Perfect fabric! Looks awesome!
About the liquid starch–so you soaked the fabric and it just stuck to the wall? You didn’t have to tack it into place or anything? And it dried flat to the wall?
I have fabric up in my living room and it is held in place with thumbtacks. I’m pondering this method you’ve used, but I’m skeptical…
jen – this looks so so good! Love the fabric and the way you’ve designed/styled the fireplace
Hallie, it’s SO easy! You just soak it, squeeze out some excess, then smooth the fabric to the wall. No pins needed. This fabric had a very open weave so the starch got into every nook and cranny. It dried completely flat. If you don’t put enough starch, you might get bubbles. You have to make sure it’s soaked pretty evenly.
Thanks DK! I might do a full house tour on Design Sponge next weekend!
Thanks, Jen!