 pin it!
My friend Christine is always right. I often ask for her input on everything from relationships to design to what snacks to get at Trader Joe’s and somehow, she always nails it with the analysis and feedback. She is bad-ass/hilariously dorky/good at everything and she just GETS IT. She gets the situation, she gets ME. Christine and I met in NYC but now she lives in Richmond, Virginia. She had been telling me for a couple of years that I should visit. She promised I would like it, and as usual, she was right.
I’ve traveled to a good number of cities around the world and it’s interesting how certain places tug on my heart strings a so much harder than others. It wasn’t until recently that I’ve been able to pinpoint the 2 things I that just get me every time: big old trees, and pretty old houses. And Richmond is full of both.
 pin it!
source
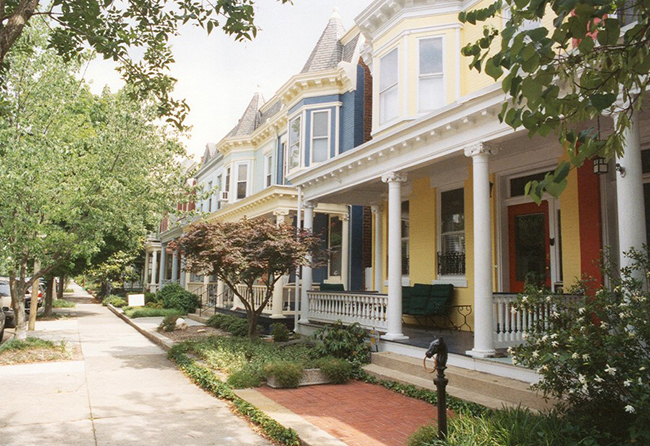
Christine lives in a spectacularly charming neighborhood called Church Hill. It is in fact named after a 275 year old church perched on a hill overlooking the James River. The neighborhood is approximately 15 square blocks of gorgeous-house goodness. When I visited Christine’s home for the first time, I burst out laughing because her place is ridiculously lovely and enormous. It’s a 1600 sq foot apartment on the top floor of a historic home with 11’ ceilings and 10 windows drenching the whole place in sunlight. I recall scurrying around her place taking photos and texting them to my friends living in over-priced urban hubs with lots of heart-eye emojis.
 pin it!
source
 pin it!
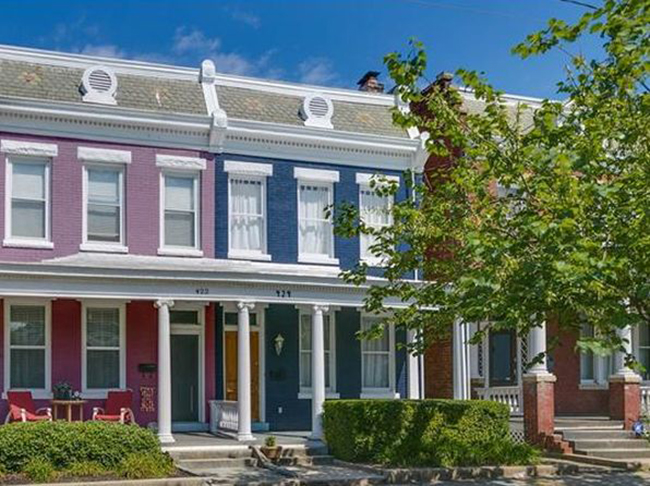
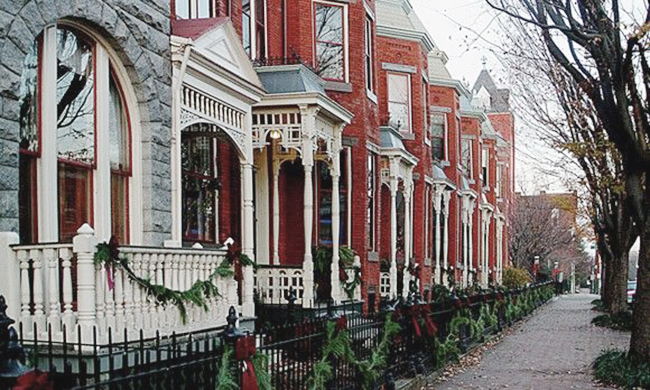
Christine and her boyfriend Miguel were dreamy hosts. Every day we would eat some kind of delicious pastry from some charming neighborhood joint, and stroll down one of the hundreds of beautiful blocks — each one seemingly lovelier than the last. I couldn’t help but notice the occasional “for sale” sign, and it wasn’t long before I became addicted checking Trulia 5 times/day and planning daily walking tours based on what homes were on the market.
 pin it!
source
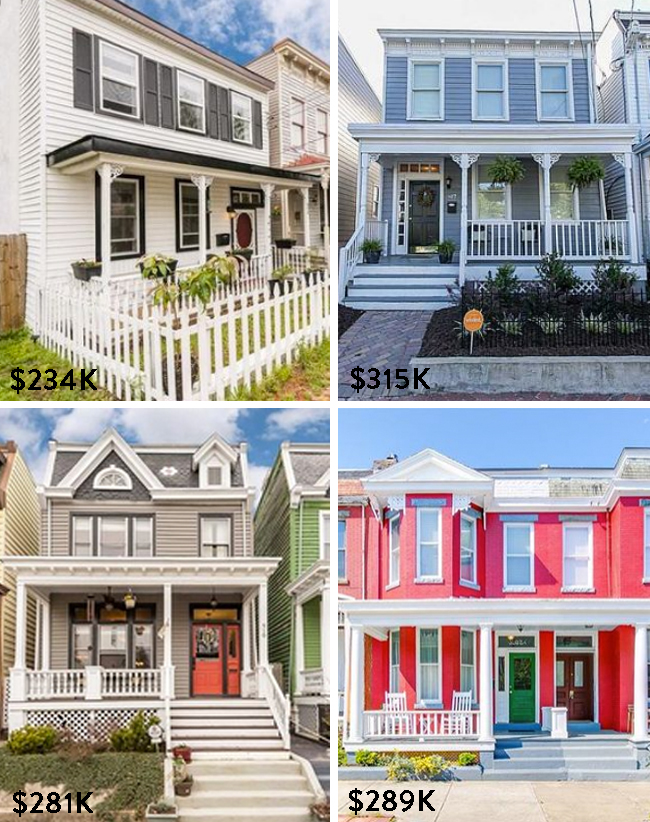
I’m from the San Francisco Bay Area where a one bedroom bungalow can run you almost a million dollars, so when I realized that I could acquire a relatively large property in a neighborhood of this caliber for less than $300k, I became obsessed. I contacted the first agent I found online and started going to open houses.
 pin it!
Over the course of a week we saw at least a dozen houses in varying states of disarray, and there were 3 or 4 times that I came very close to putting in an offer.
 pin it!
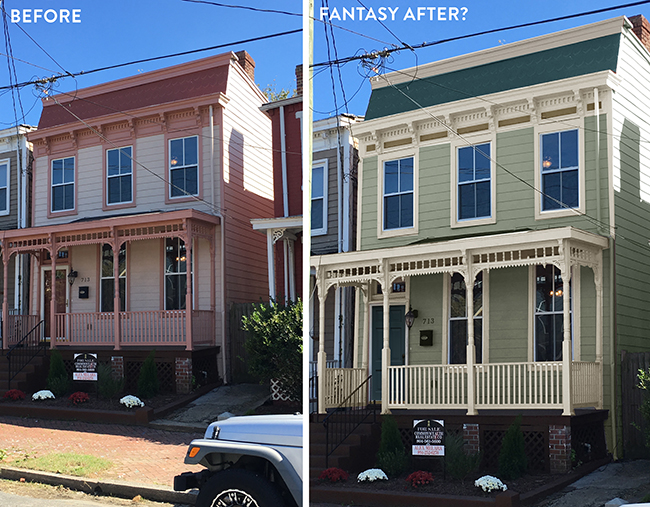
This was was a contender. It reminded me of a San Francisco Victorian and I couldn’t help but photoshop a new color palette that was more “me” just to see how it would look. I didn’t end up getting this one because Christine didn’t approve of the overly-modernized interior and the insufficient number of windows.
I was definitely overly-excited by how affordable everything was compared to NYC and California. Christine was with me every step of the way, politely putting me in check, telling me when I should calm down and hold out for something better. I didn’t want to buy a house that Christine didn’t approve of. After all, Christine is always right.
I had only intended on visiting Richmond for 6 or 7 days, but I wound up staying for 14 — on a mission to find an old fixer. I eventually left Richmond without buying anything. A part of me thought that if I left empty handed, I would lose momentum and lose interest in buying an investment property altogether, but that never happened.
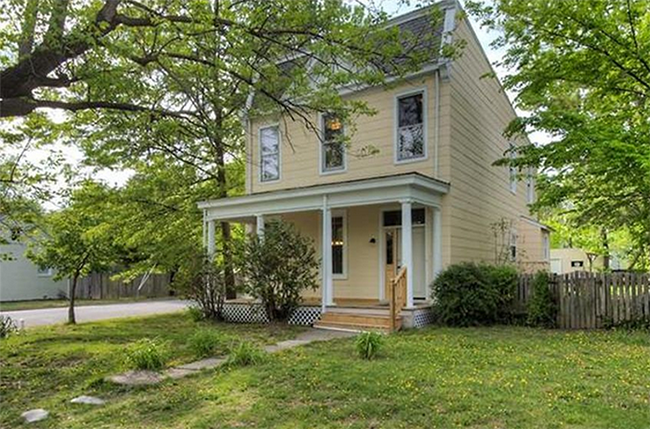
A couple weeks later, back in Cali, I noticed a new house pop up on MLS. It was a 2000 sq ft 4 bedroom, 2 bath house on a 7000 sq ft lot with a garage in Montrose Heights, just 5 minutes from Church Hill. And get this… it was HALF the cost of the other houses I had been looking at. I really started to think that this could be perfect because I didn’t want to max out my budget on a home in an ultra-hot neighborhood leaving little or nothing in the budget for renovation. After all, I’m a designer and I’m doing it mostly for the experience, and not just for the financial pay-off.
This house was on a lot and a half with a huge front, back, and side yard. It’s was on a street corner and had 19 windows so it was super bright (right, Christine?!) And there was a garage! Very few homes built before 1920 have garages. If they do, it’s usually a freestanding structure near the alley, which is what this one is. I was super excited and texted Christine to see if she could cruise by and check it out asap.
 pin it!
The neighborhood is not as majestic as Church Hill because the homes are more spread out and modestly sized, nevertheless the neighborhood is charming and quiet. Christine mentioned that she saw “gay pride flags and solar panels” so that was a good sign. She said that it was a really good house and that we should ask for a tour.
I called my agent and she was able to meet Christine at the house right away. They face timed me and I put in an offer immediately. The house had only been on the market for 4 or 5 hours, and I was the only person to view it in person. The selling agent must have thought I was nuts, but hey…that’s how we do it in California — early bird gets worm.
The seller accepted my offer right away and before I knew it, we were in the process of getting the property inspected. I’ll spare you all the super boring details, but in summary, here’s were the major problems with the house:
-Termite damage under the joists in the living room. The only way to repair this is by removing the (original) living room floors
-Somewhat old roof that may or may not need to be replaced
-A big hole in the ceiling caused by moisture from an improperly insulated a/c duct
-A few pieces of siding and trim chewed up by squirrels on the exterior of the house
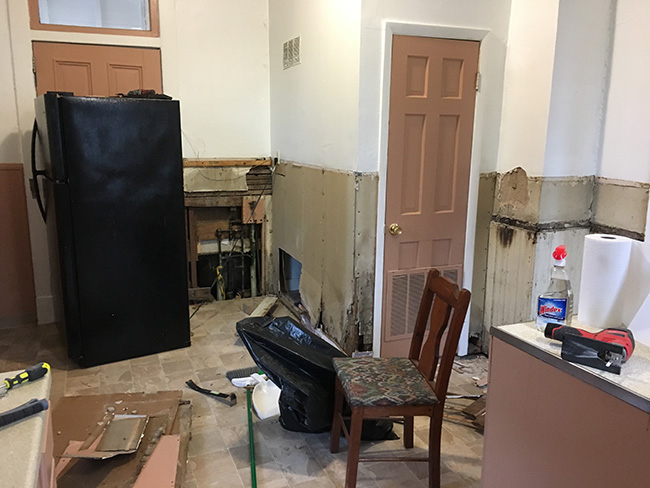
Honestly, not a bad report card for a 106 year old house. Despite these issues, I decided to proceed with the purchase anyway. After a long-ish closing, I finally flew to Richmond to see the house for the first time, and to sign my name on a thousand papers. Here are some pics and some notes room-by-room.
 pin it!
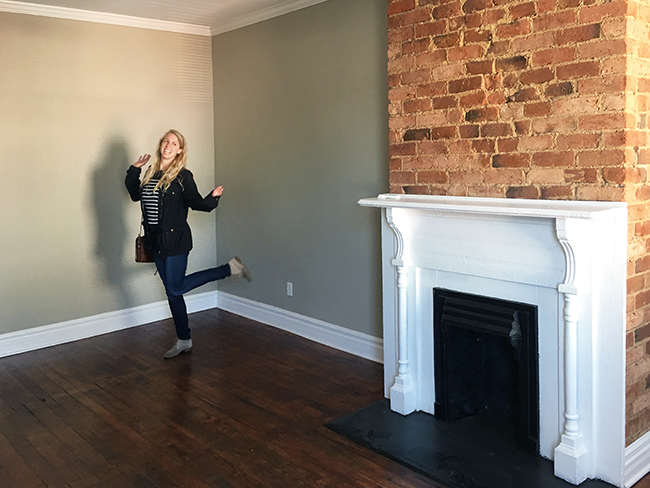
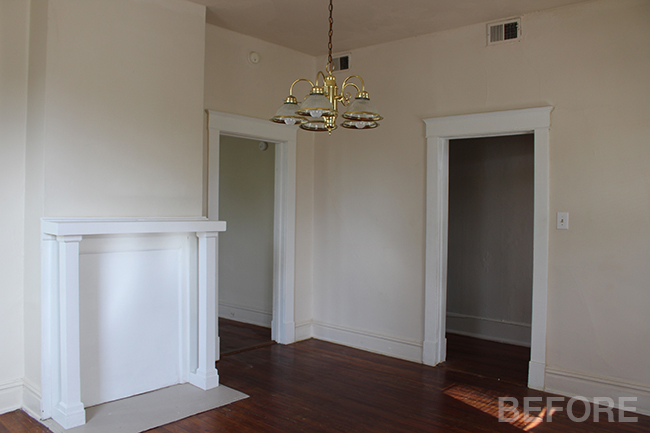
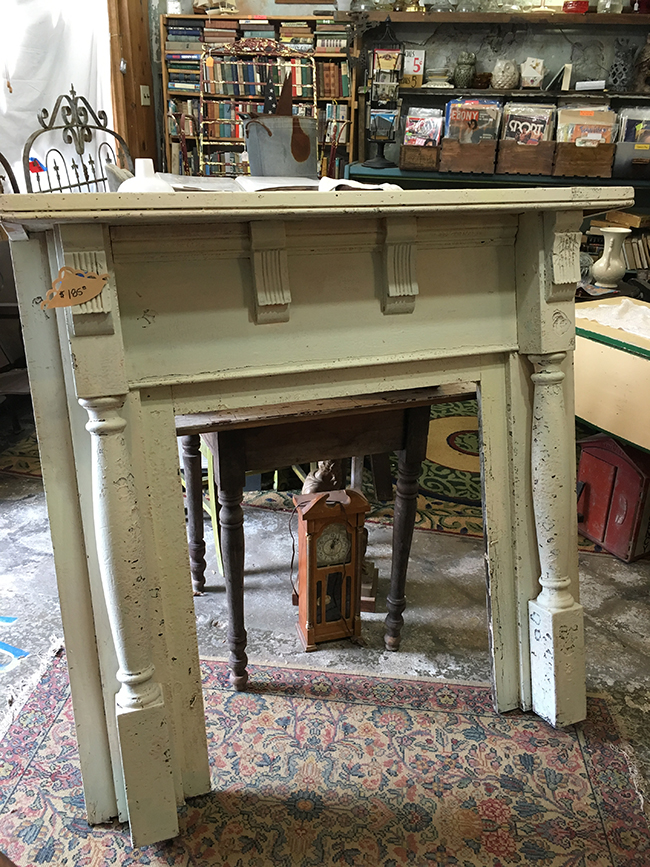
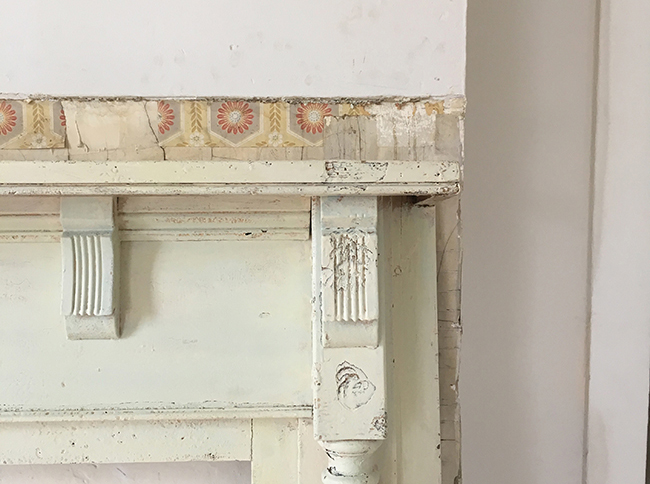
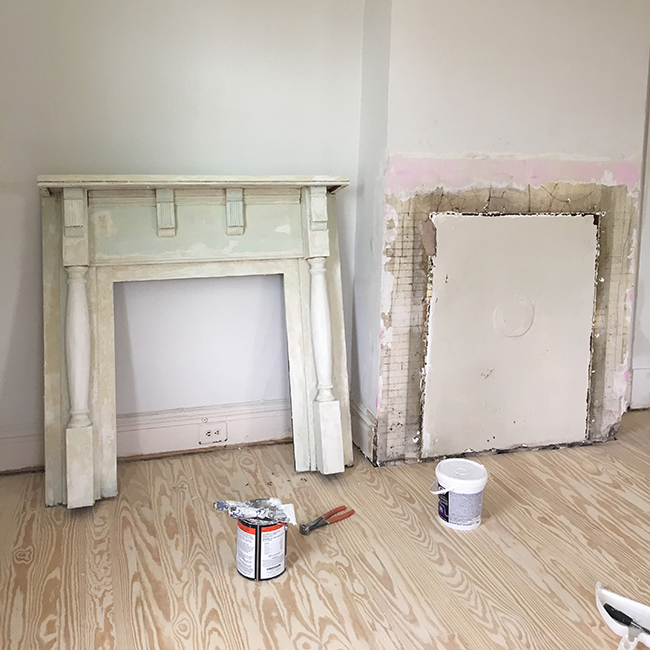
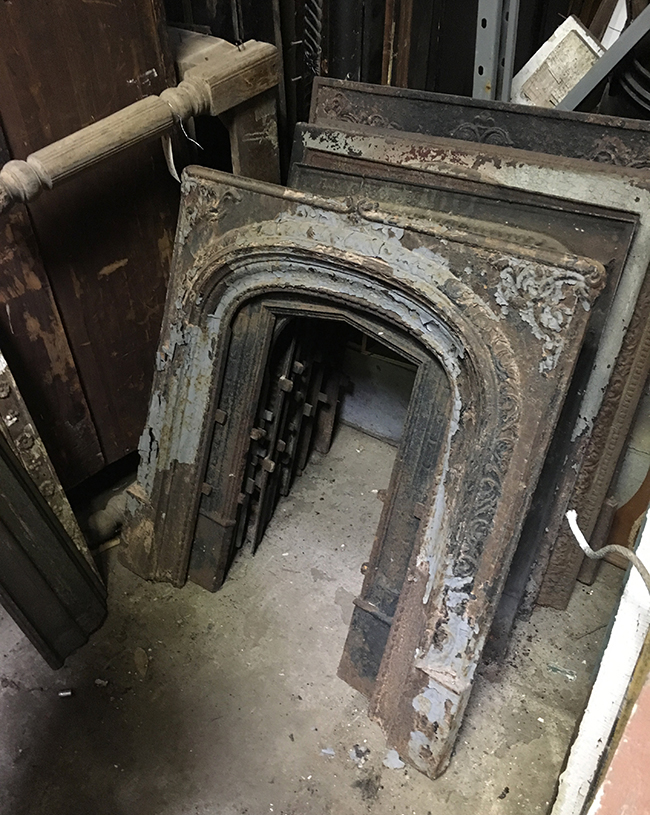
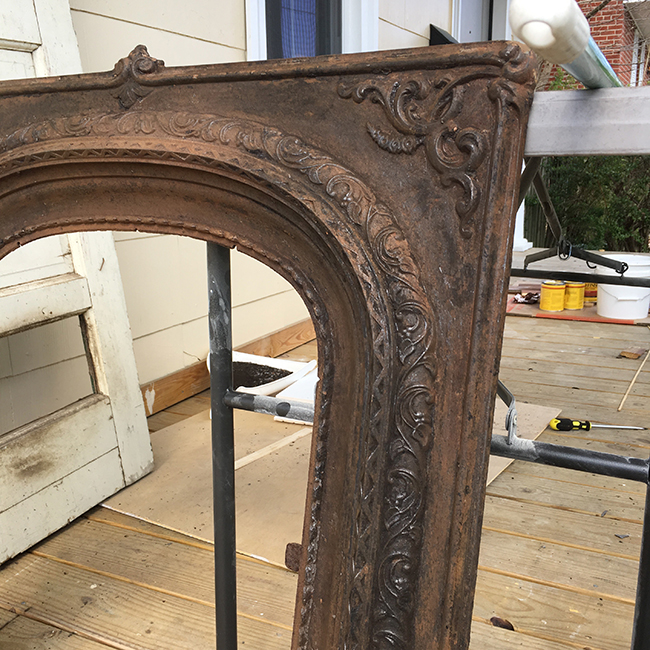
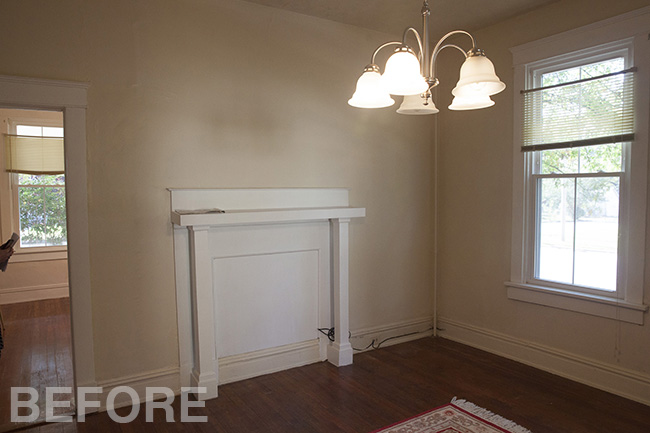
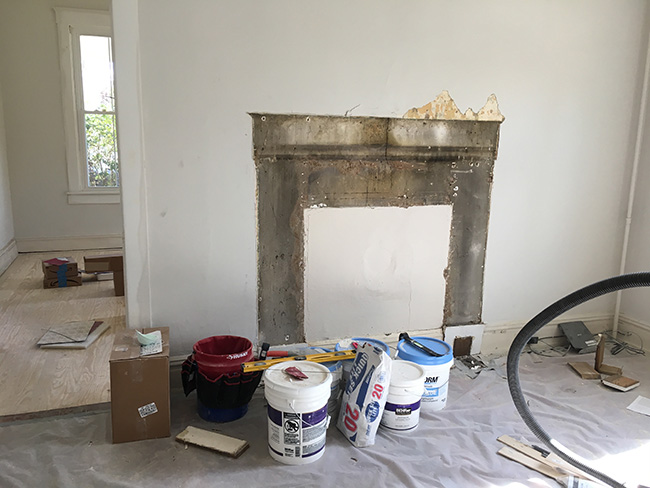
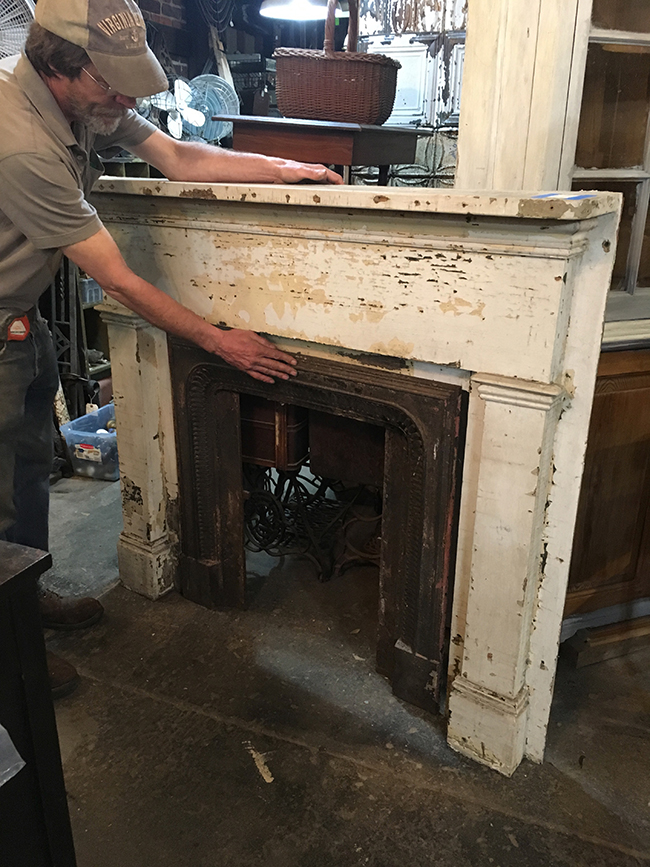
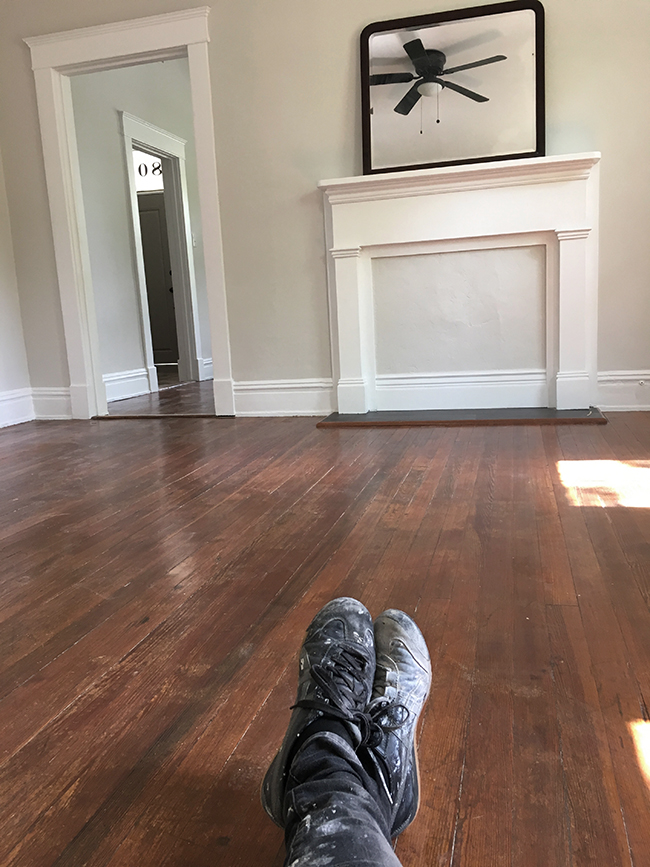
Living room – It’s not terrible, but that light has to go. I plan on installing ceiling fans throughout. Because this is the first room you see when you walk in, I want to demolish that fireplace and replace it with something more elegant and period-appropriate.
 pin it!
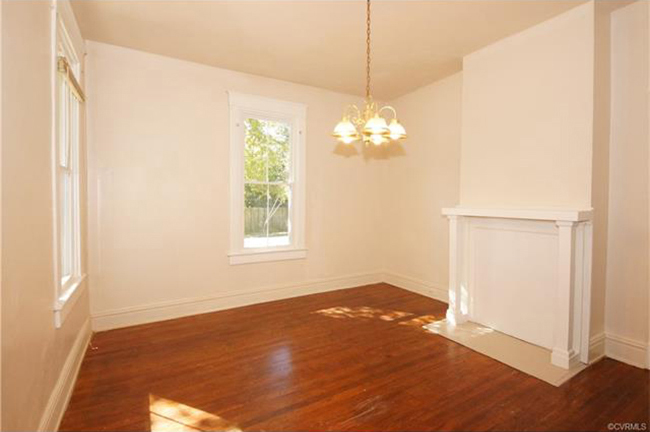
Dining room – This room is very similar to the living room, but it’s actually even bigger. It also has a pretty ugly mantle which I plan on replacing. The dangling pendant has to go.
 pin it!
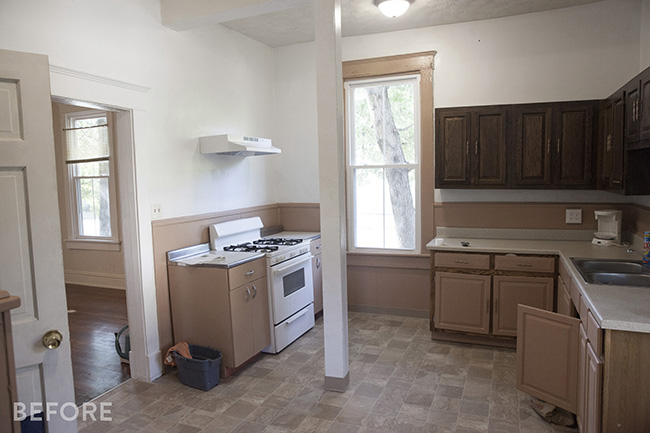
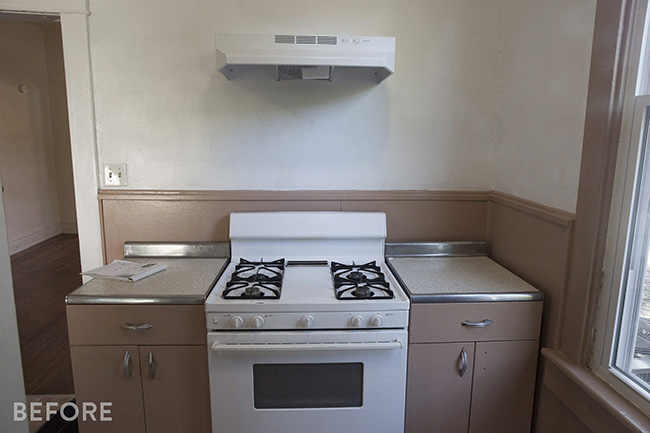
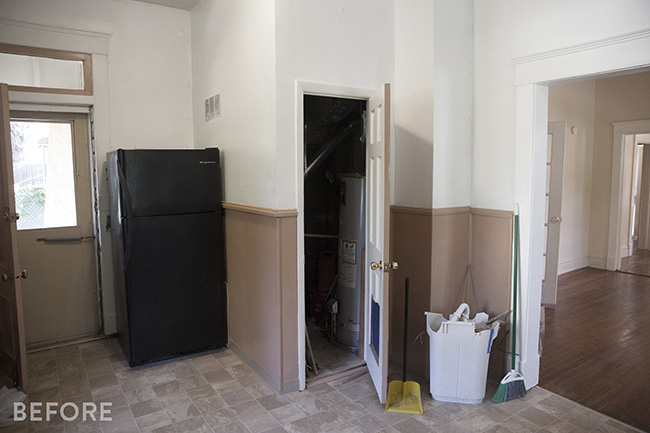
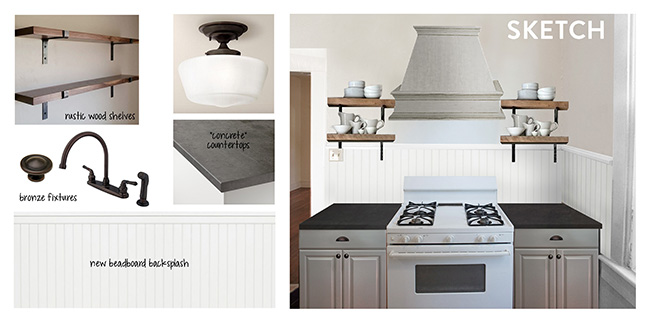
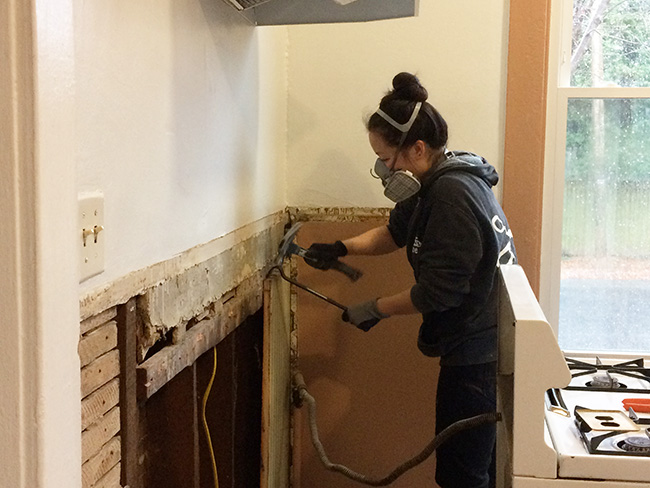
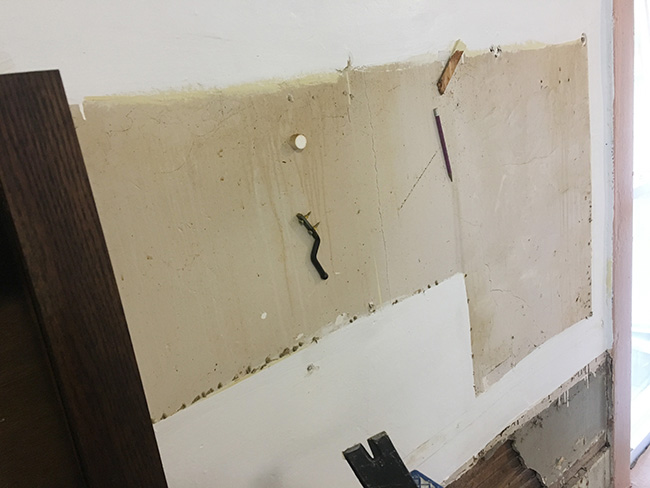
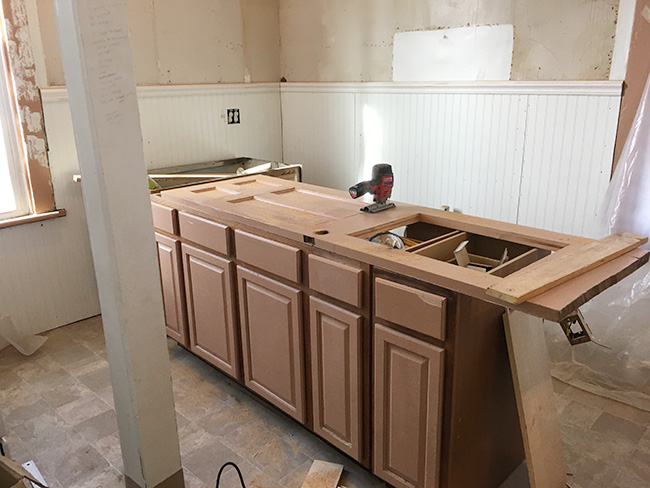
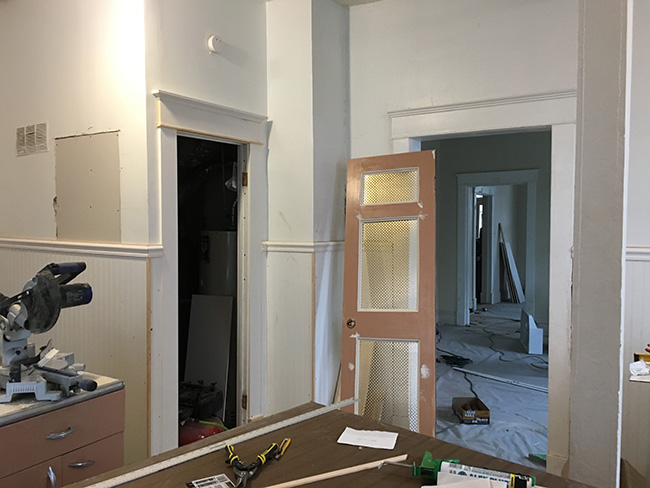
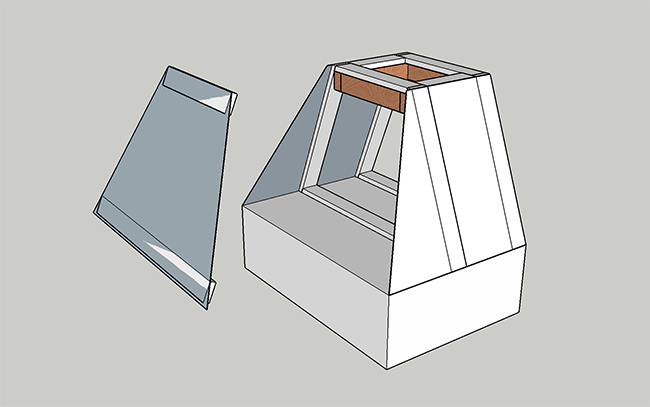
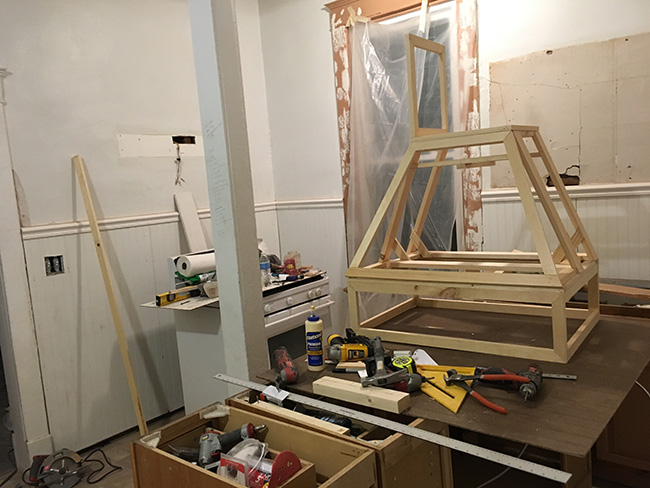
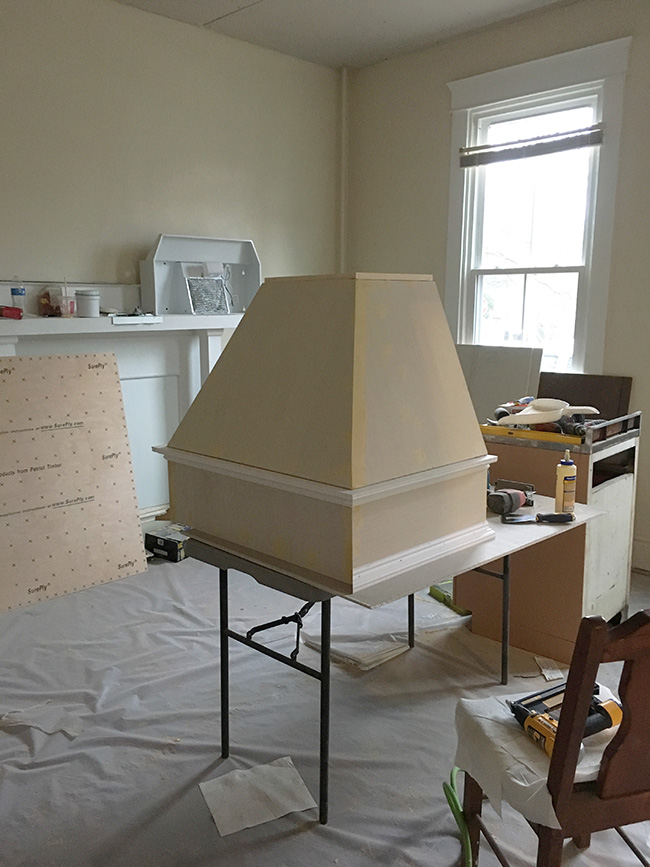
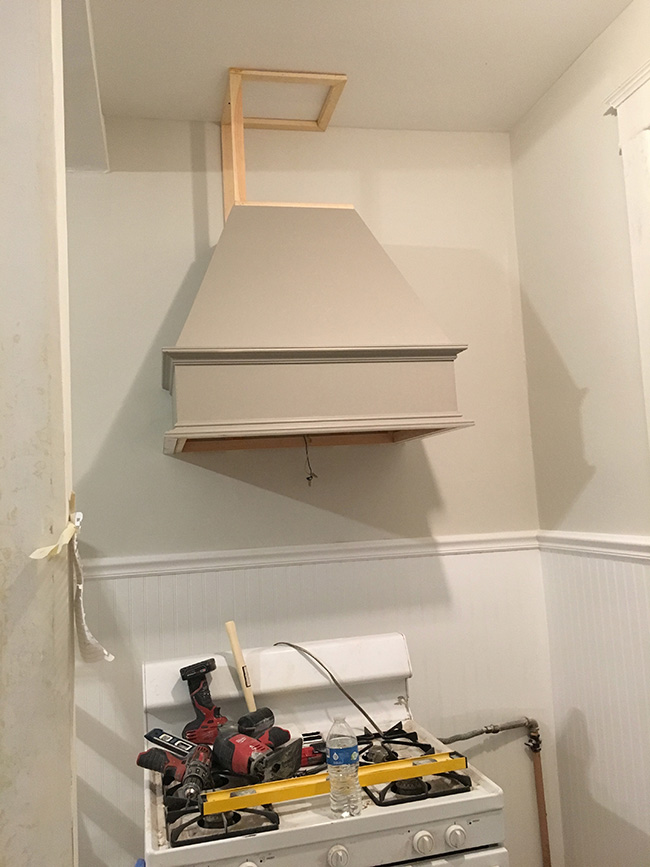
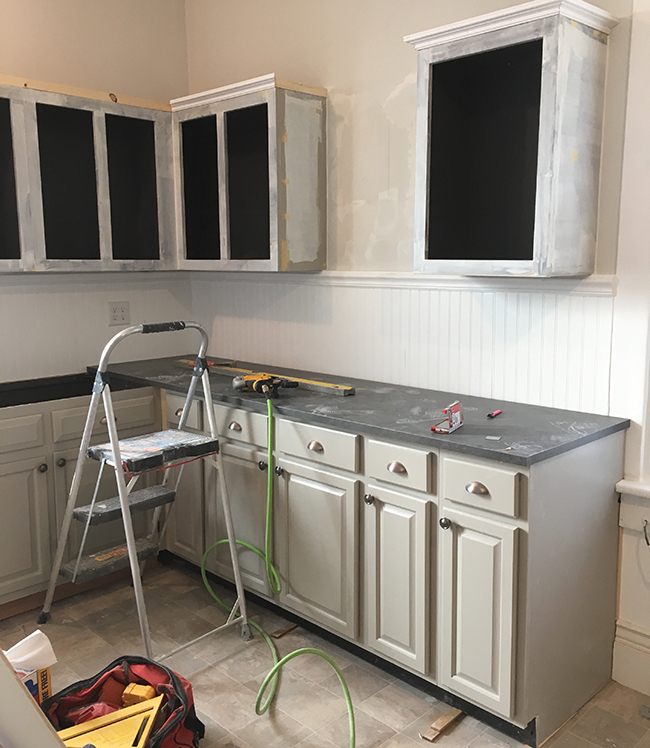
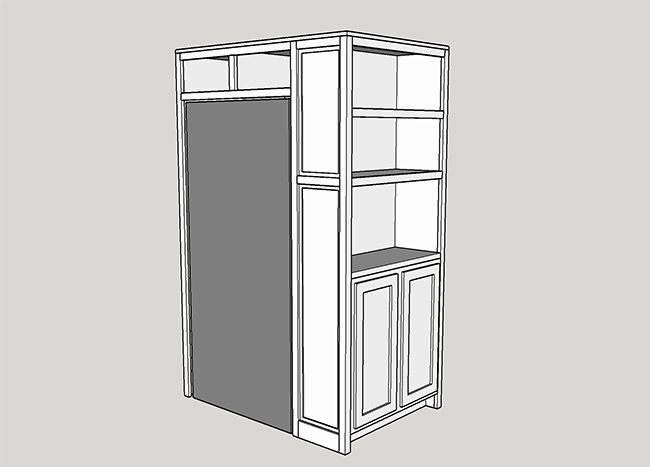
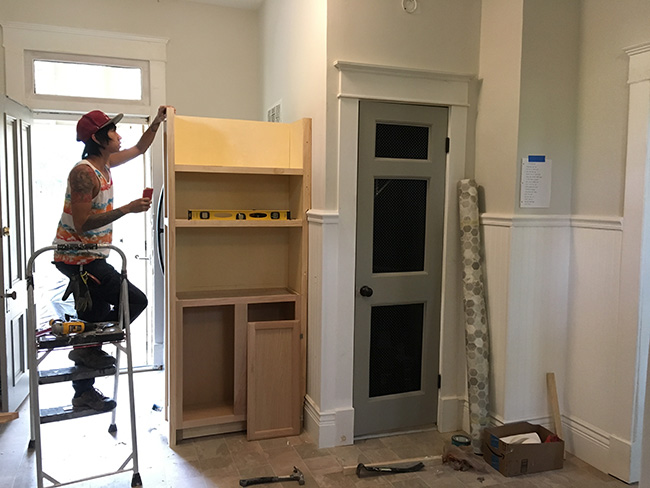
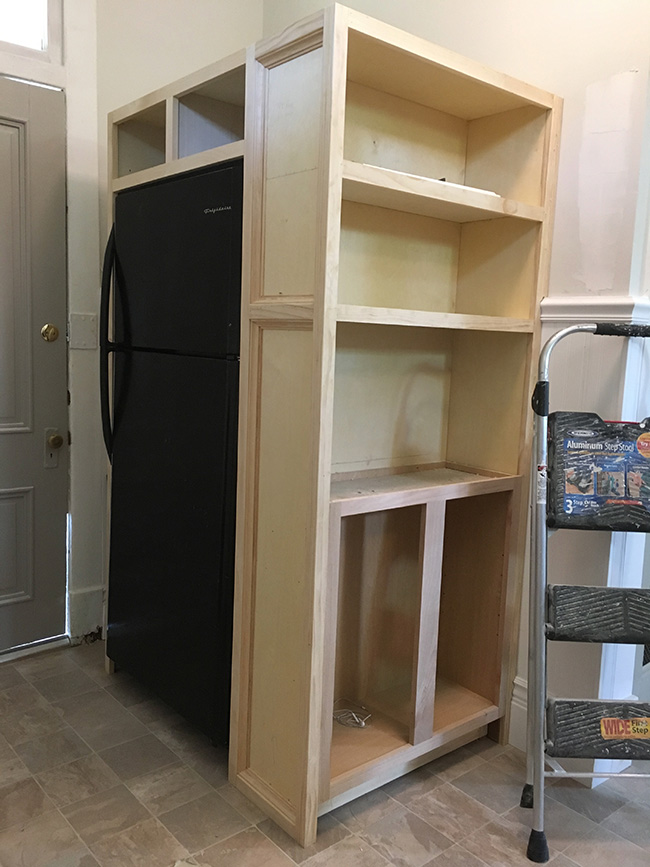
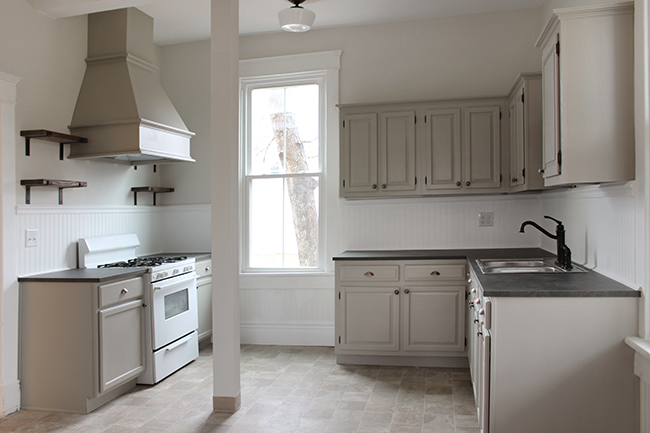
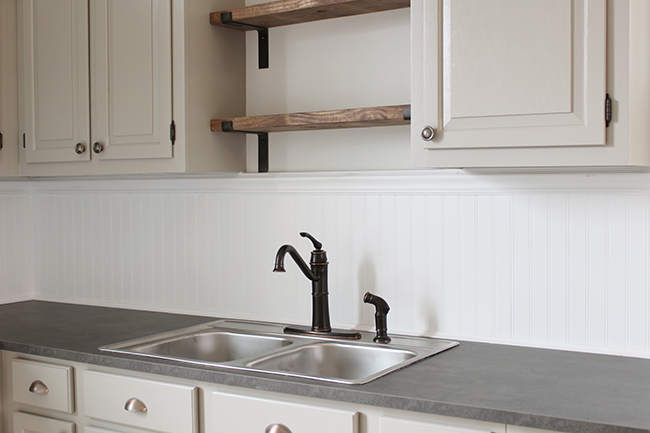
Kitchen – The layout is going to stay. I plan on demolishing some cabinets and keeping others. That range hood is S.A.D. I’ll bring in some rustic wood shelves and new beadboard to freshen up the space. The floor is kind of ugly, I’m considering replacing it.
 pin it!
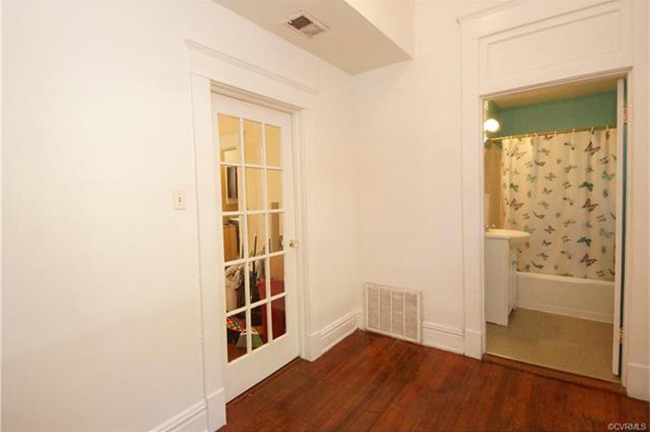
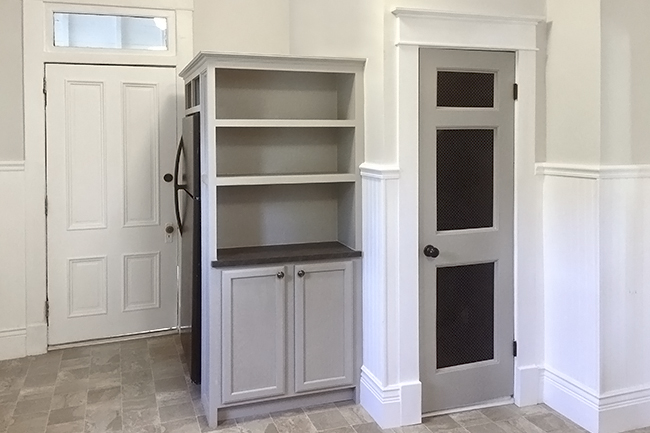
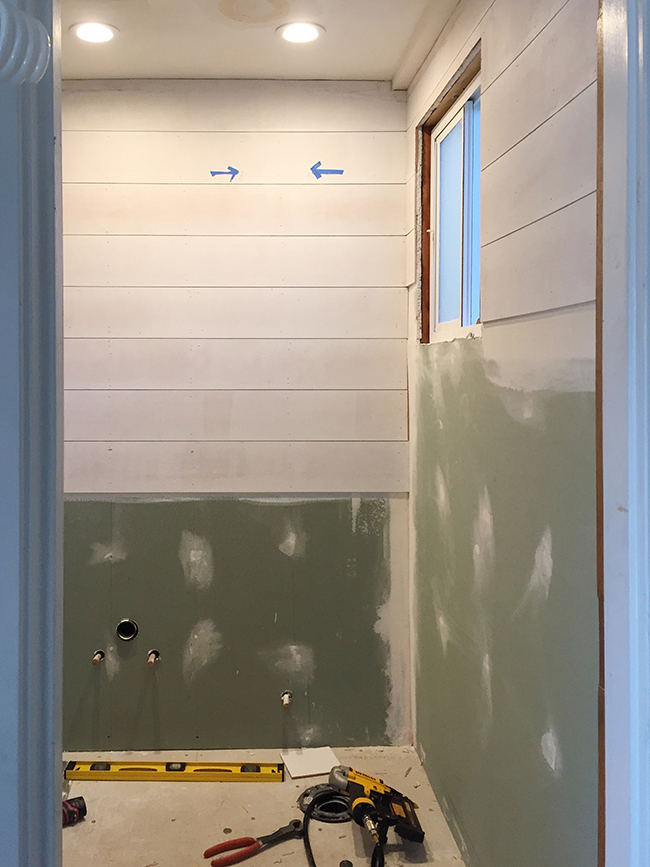
Downstairs hall and bathroom – This is where the washer and dryer went (pretty much right where I’m standing.) That’s going to be a huge eyesore so I’m going to build a new closet to hide them.
 pin it!
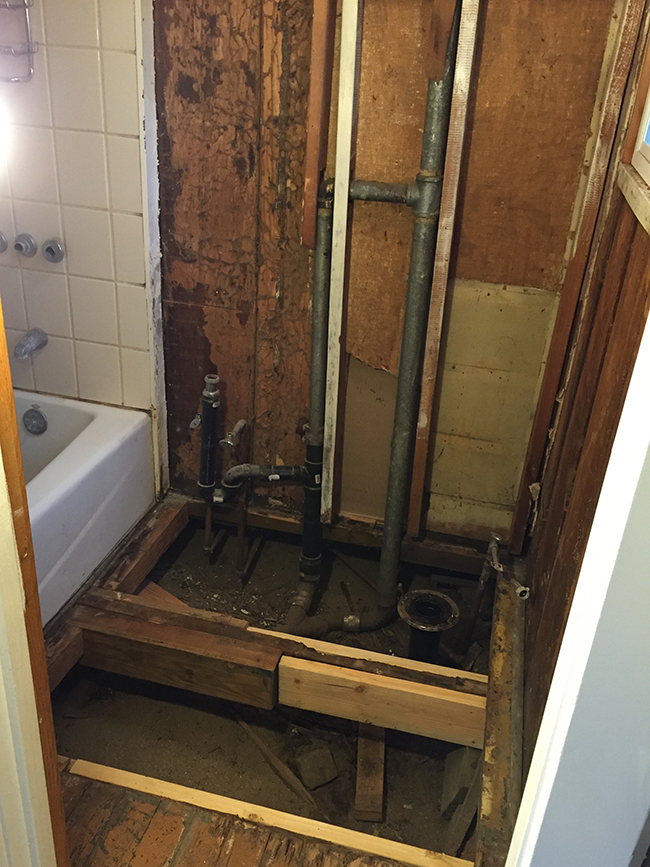
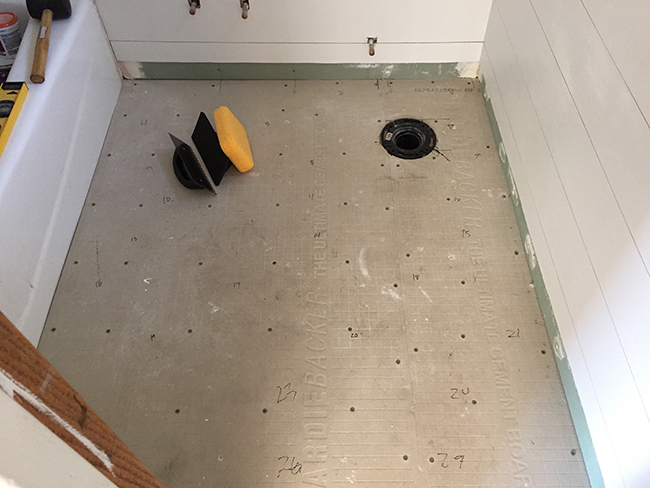
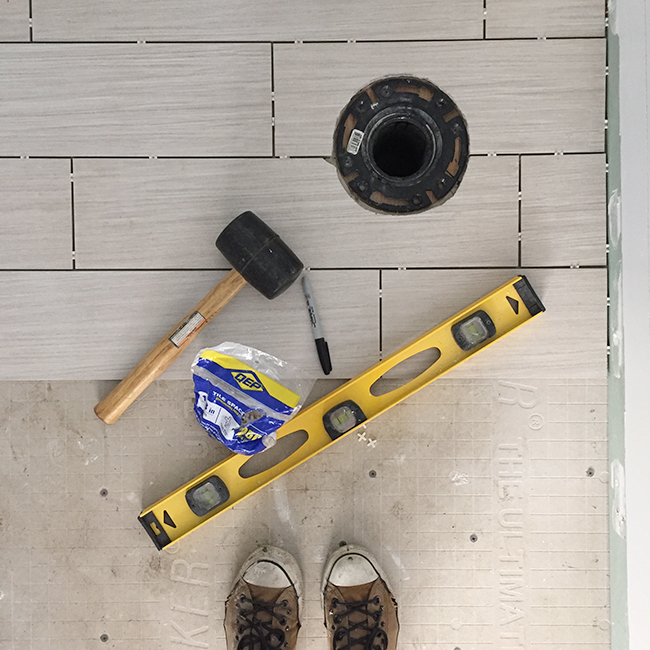
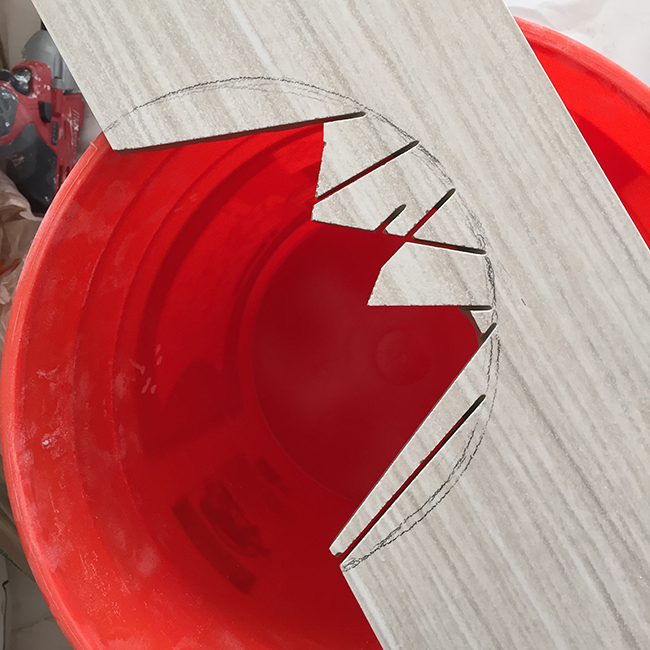
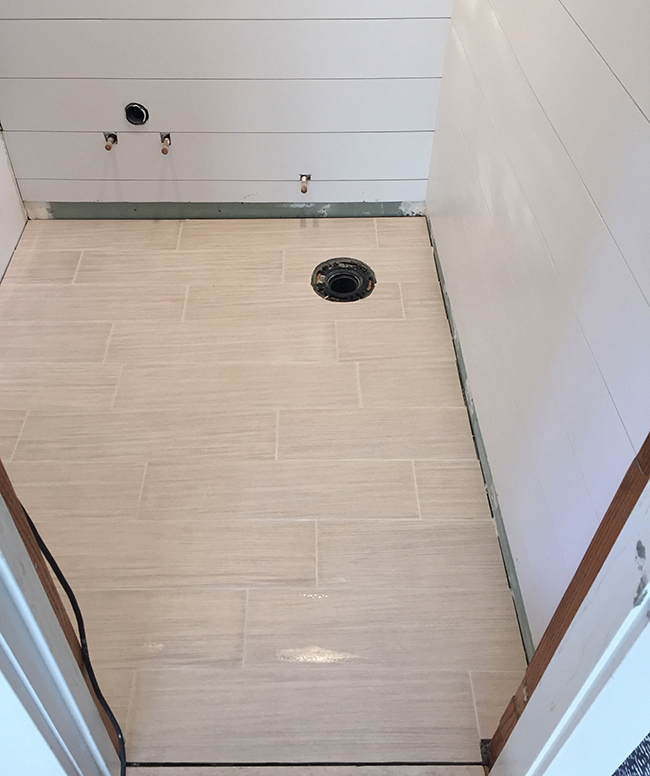
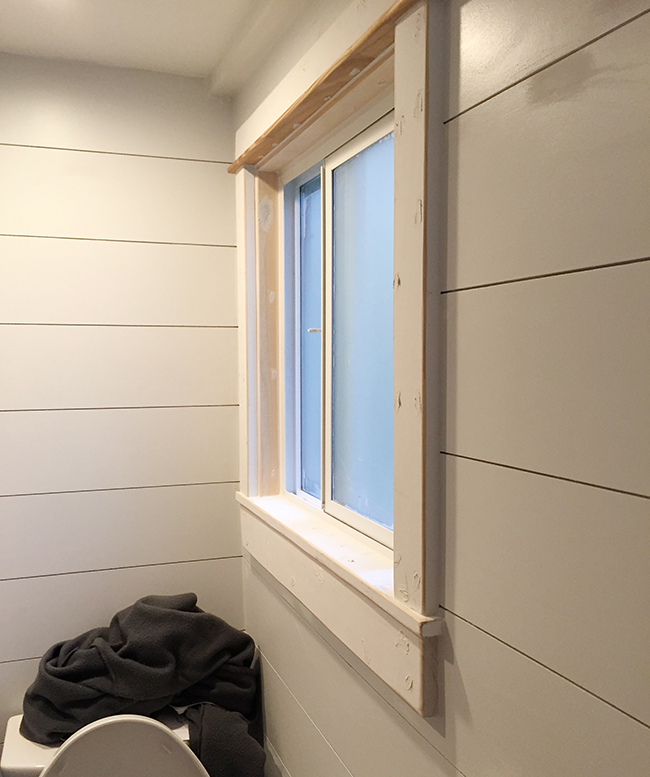
This bathroom is pretty hideous. At first I was hoping to save the tile around the tub, but it’s cracking because the divider wall is built so poorly that it moves when you put pressure on it. Everything but the tub must go.
 pin it!
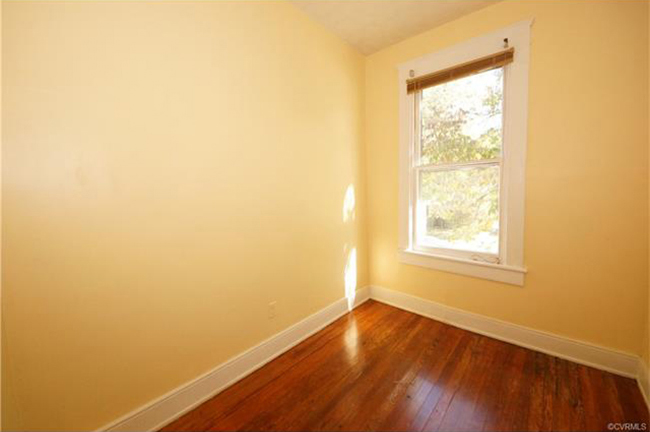
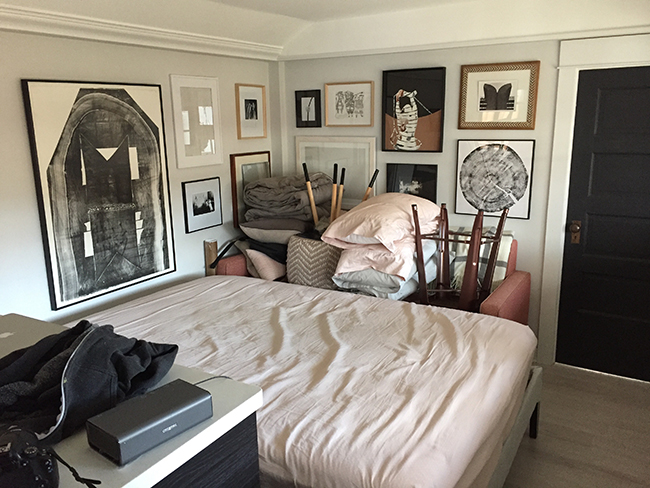
Bedroom – Best room in the house. Patch/paint/new trim and we’re good to go.
 pin it!
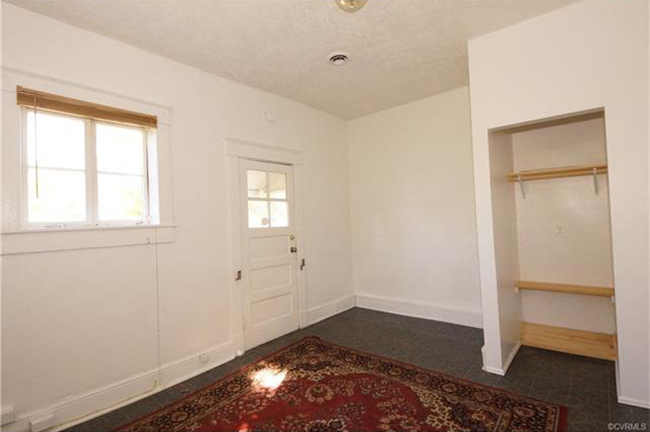
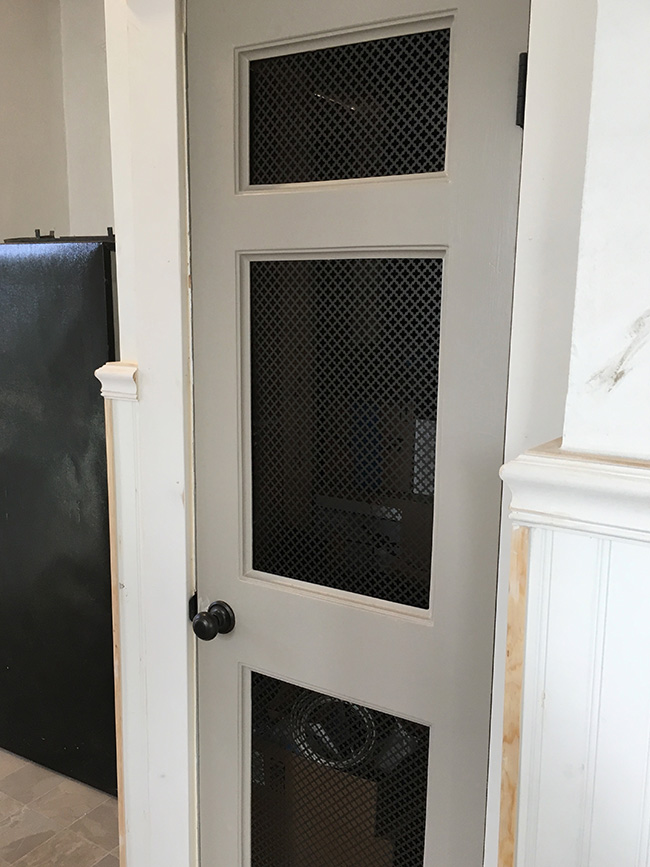
Office – This weird little room used to be an upstairs kitchen back in the day when the owner converted this house into a duplex. I’m going to rip up this linoleum, restore the floors, and put a door on that little closet.
 pin it!
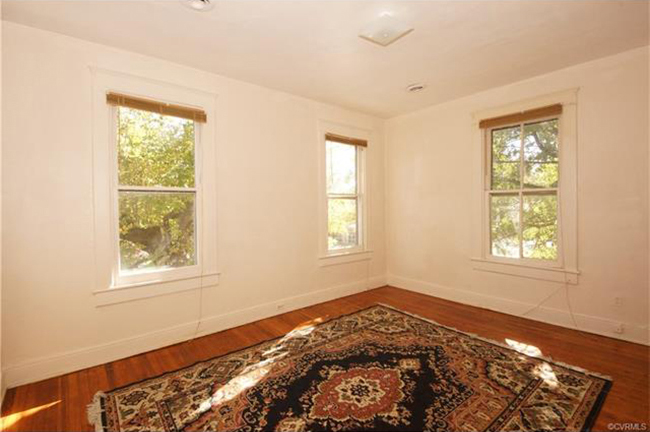
Tiny room – This one is easy. Patch/paint/new trim and we’re good to go.
 pin it!
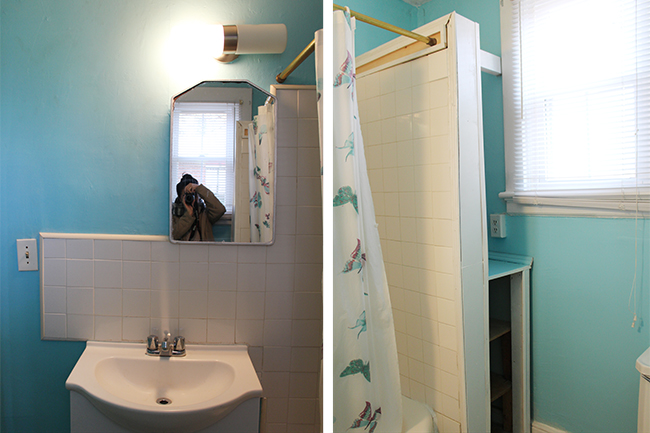
Upstairs bath – This room looks better in the pictures that it does in person. This beadboard is ROUGH, and the tub is very damaged. The floor is depressing. The only thing it has going for it is the big window that lets in tons of light.
 pin it!
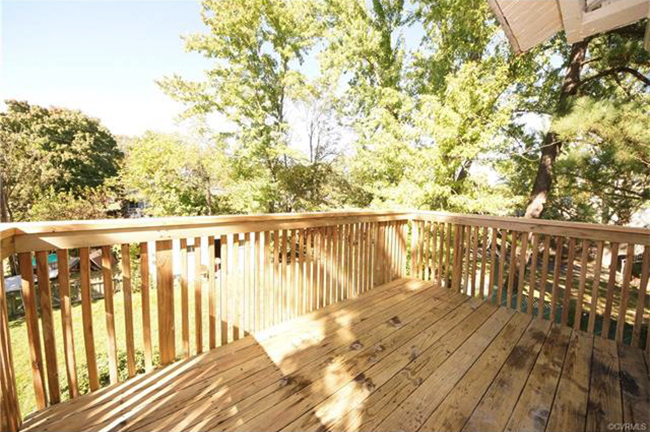
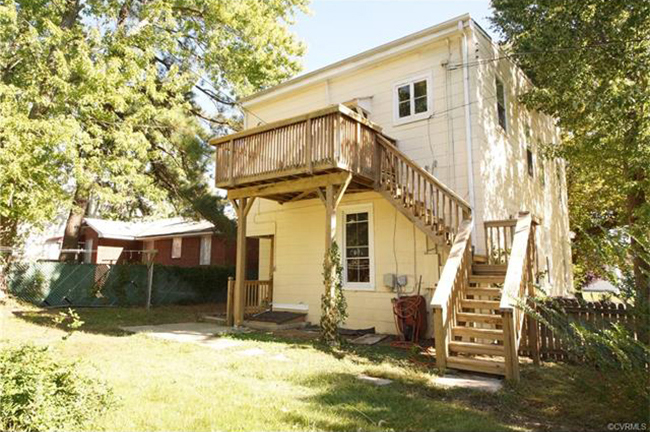
Balcony – Even though the previous owner did all kinds of weird things to the house in order to turn it into a duplex, the one good thing that came out of that was this balcony. I’m assuming it was built as a second form of egress. It’s well-built and one of my favorite features of the house.
 pin it!
Yard -The yard is pretty massive. Aside from a bit of fence repair, and a good mowing, I’m don’t plan on doing much.
 pin it!
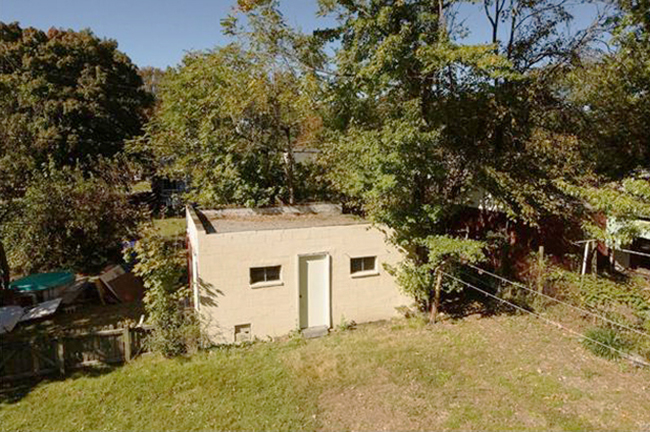
Garage – Also known as “tiny Alamo prison.” This garage is probably not going to be used to house cars any time soon because the door is a GIANT, 1000 lb sliding barn door and not one of those nifty modern doors that go up at the touch of a button. I’m just going to clean it out and call it “storage.”
 pin it!
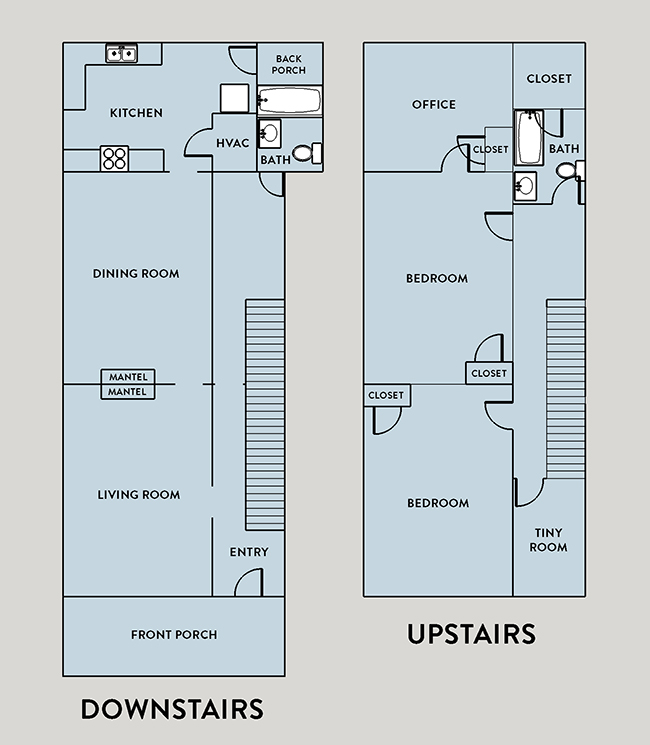
The layout is pretty typical for a home in Richmond — sort of narrow, really long, common areas downstairs, and sleeping rooms upstairs.
A few things that are a total bummer that don’t really affect the inspection process, but I really need to change for aesthetic reasons:
-The ceilings in almost every room are cracked/textured/stained and just hideous overall. The house needs new ceilings throughout
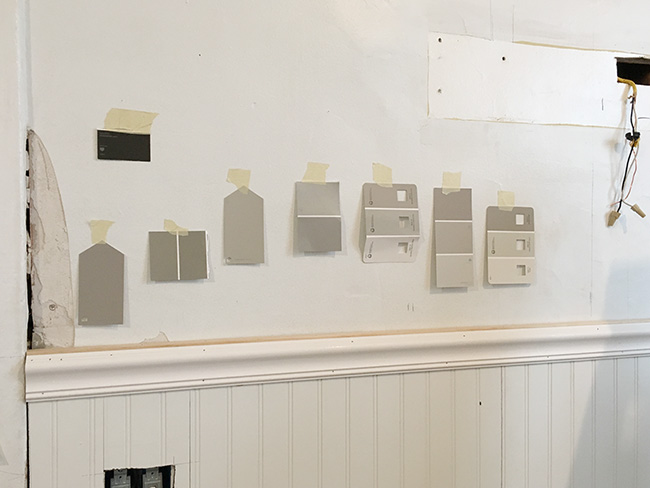
-A lot of the walls have cracked plaster that was poorly patched. I’m extremely OCD when it comes to smooth walls, so I know there will be many days and nights of patching/sanding ahead.
-The kitchen is a hot mess, but some of it should be salvageable. This is going to be the first project and I have a huge kitchen reno post on the way!
-Both bathrooms need a lot of cosmetic work. The linoleum is terrible, the claw foot tub is chipped and scratched in a million places, and there’s a lack of storage.
I consider this a “light fixer” and I plan on working on it in between TV gigs. I know it’s going to be challenging, and probably twice as expensive as I would like it to be, but I could not be more excited. No, I am not planning on moving to Richmond. As wonderful as it is, my heart lives in Brooklyn, and my paychecks live in Los Angeles, so I’ll just enjoy my time in Richmond for the next few months until I finish the reno and rent this out.
I’m so grateful for my dear friend Christine who helped me make this happen. Her enthusiasm for her neighborhood was contagious and I would never have taken on something this huge without knowing that my wise little sister-from-another-mister would always be nearby. Most of the time, I’m totally stoked and confident that this is going to be amazing, but every now and then I wonder if I’m quickly draining my life savings for the sake of having a big project to fill my art void. But then I think about how Christine says that it’s a great house and it’s a good investment. She better be right…she’s always right.
 pin it!
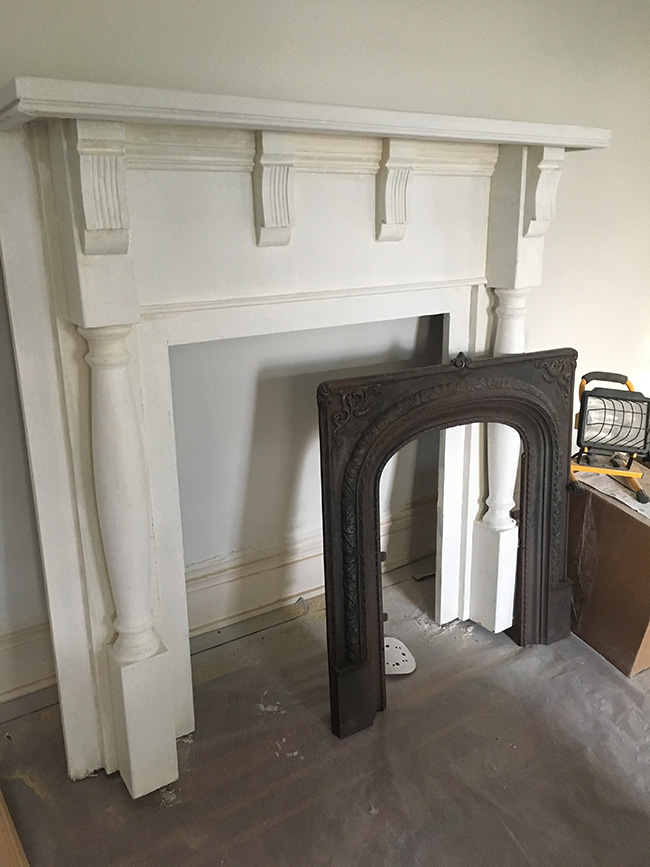 pin it!
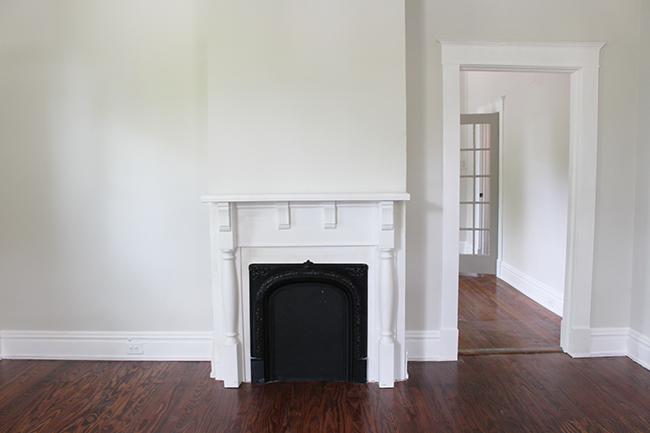
 pin it!
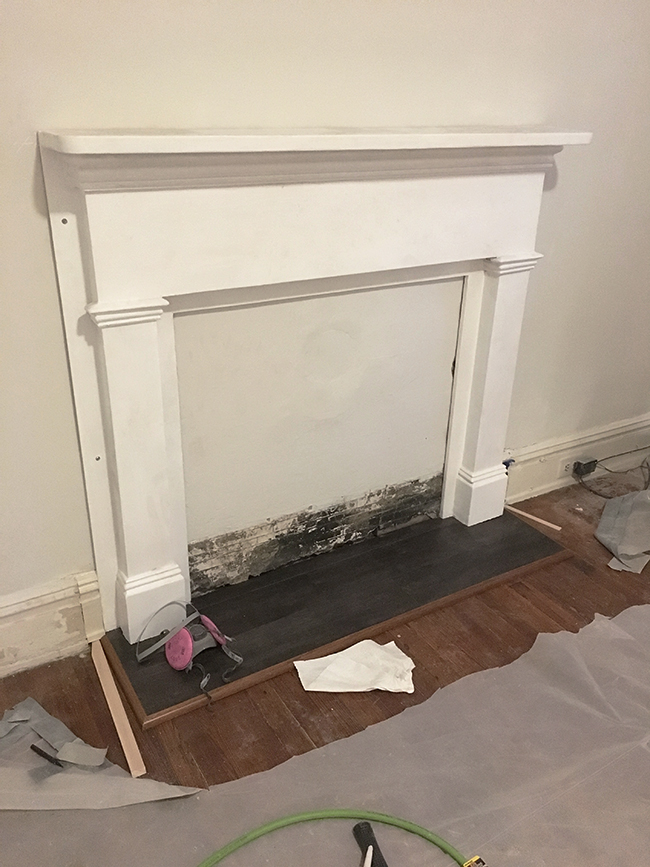


