I’ve always said that kitchens are my favorite room to design. I love sourcing cabinets, tiles, and appliances. I love to space plan for hours on end. I love the permanence of them — you have to make decisions really carefully because for the most part, once a design choice has been implemented, there’s no turning back! It just so happens that I also spend 75% of the year art directing Food Network shows and designing kitchen sets. Funny…I basically never cook.
I bought this house without seeing in in person first, so I didn’t have a great idea of exactly how much work needed to be done. Fortunately, my amazing friend Christine went to check it out for me. I trust her judgement 100% and she gave the house her seal of approval. The price was right and the bones were good.
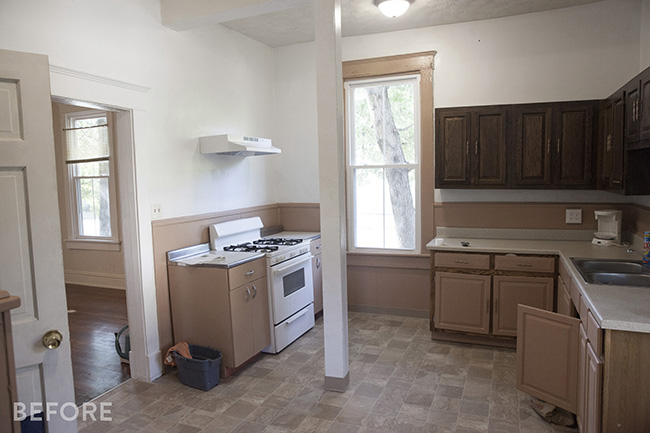
This kitchen had a few things going for it. It’s a generous size, it has big windows that let in a ton of natural light, and the cabinets are old but solid.
There were a few things I was definitely not a fan of. That column in the middle of the room was a bummer. At some point this space was actually 2 smaller rooms, and someone knocked down the wall and added the column for support. If I were doing a full overhaul on this space ($25-$30k) I would have considered hiring an engineer to help me figure out how to make the column go away, but honestly, when you’re in the space, the column is not terribly offensive. I knew that something like a column wouldn’t be a deal breaker for a renter considering how great the rest of the house was, so I decided that the column was going to stay. The linoleum flooring was not particularly attractive, but it was brand new and in perfect condition so I decided going to keep it.
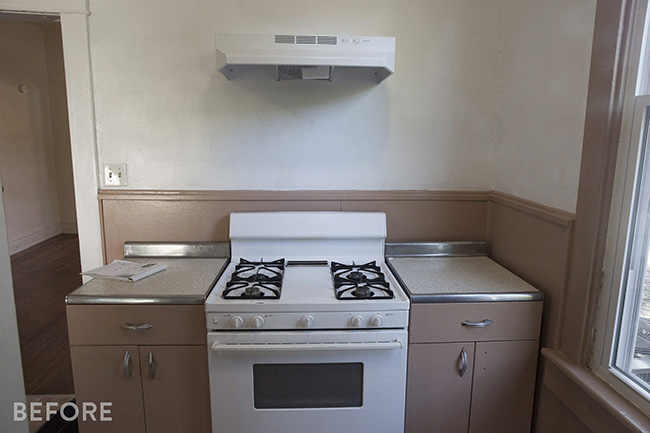
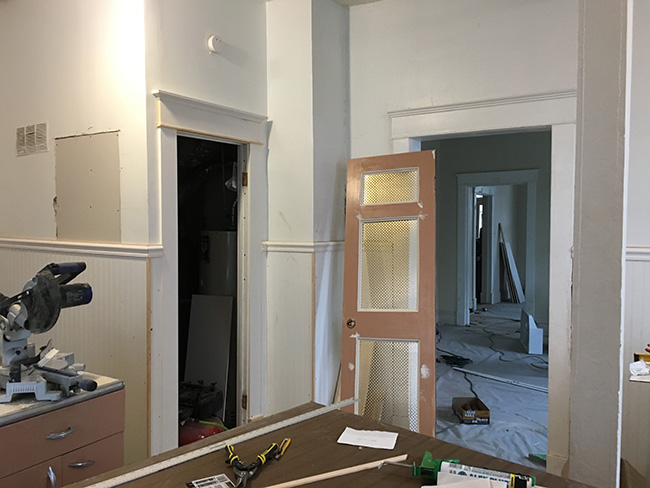
The stove was in fine working condition (I actually have this exact stove in my apartment in NYC and I love it even though it’s very basic.) The cabinets on either side were made out of metal that had been dented over the years. Wood cabinets are more appropriate for the age of the house, so I got rid of the metal cabinets. And that range hood. SIGH. What a sad, sad little guy…all alone on that big wall.
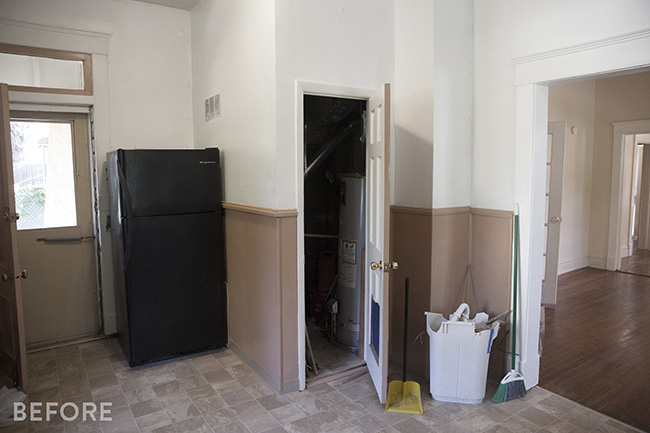
The other side of the kitchen was a mess. There was a closet that housed the HVAC system and a big black fridge that was weirdly disconnected from the rest of the space. I spent hours thinking of ways to make the fridge seem less awkward. Do I move it forward? Do I turn it 90 degrees? Do I buy a sexier fridge and just leave it where it is? More on that later…
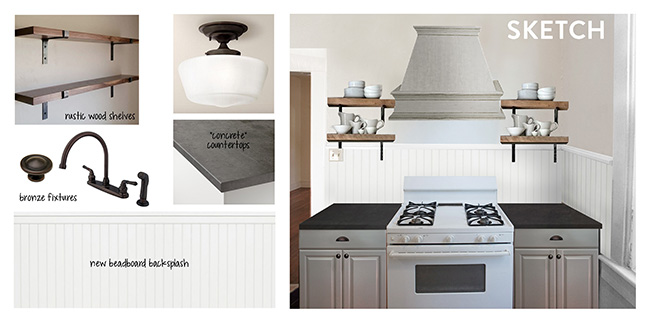
I whipped up this moodboard in LA while anxiously waiting for the house to close — fantasizing about how this simple kitchen renovation could be done in a week or so. In theory, my plan was simple:
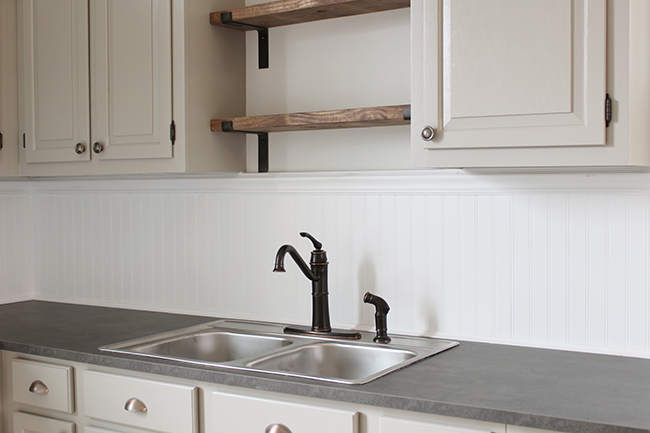
-Install new (faux) beadboard and bring it up higher so it reached the bottom of the cabinets
-Replace the metal cabinets, clean up the existing wood cabinets, and repaint everything to match
-Install a new dark laminate countertop
-Build a big range hood for drama
-Switch out all hardware and add bronze accents throughout
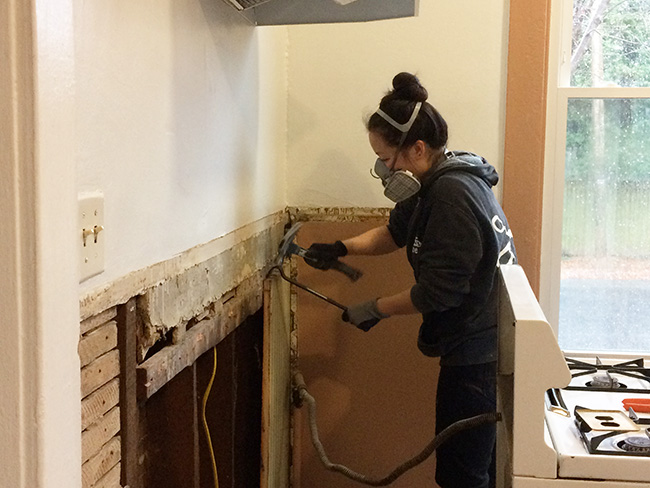
Oh, but it’s NEVER that simple, is it?! I was surprised to discover that the most time consuming project in the entire house turned out to be the beadboard in the kitchen. The story is so boring I almost don’t want to talk about it…but I’m going to talk about it anyway.
When I bought the house, there was some poorly installed trim and cheap, crappy panels on the wall. Once I ripped those off, I discovered that there was already original, authentic 3/4″ thick beadboard on the original walls of the house, but not on the walls that were added later. My initial plan was to take all the beadboard off and just start over so it would all match. I started yanking all of it off until I realized half way through that some of the beadboard was actually insulating the exterior walls of the house. I had a bit of a freakout, put all the beadboard back and went with plan B.
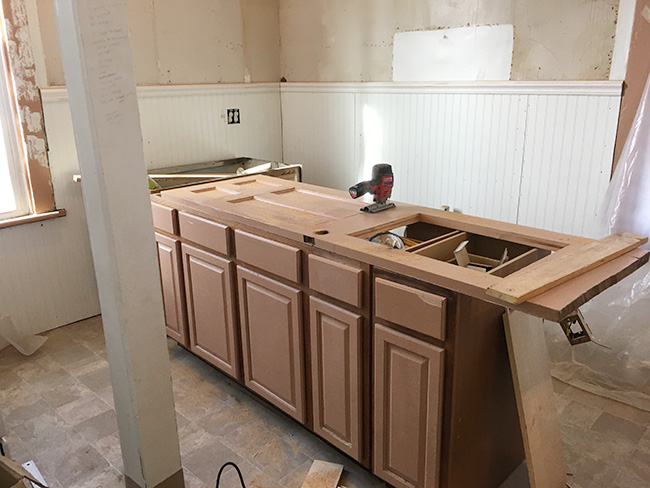
Plan B was to add some furring strips across the entire room so I could run the beadboard higher, then go over what was already there. Let me tell ya – it’s not an easy task to install beadboard in an old wonky house with plaster walls. Beadboard basically adds a subtle vertical striping to a room, and it has to be installed SUPER level in order to look right. If it’s even the tiniest bit off, you can really tell.
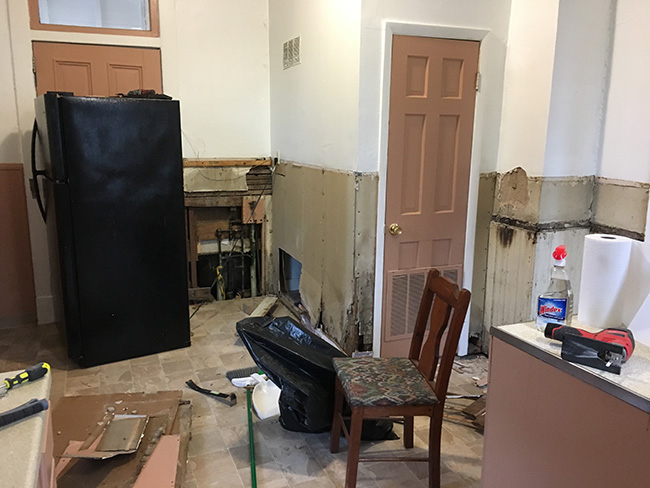
This was definitely one of those situations where it got a lot worse before it got better. Apparently the awkwardly placed refrigerator was hiding the plumbing to my downstairs bathtub. When I rolled it to the side and ripped off the flimsy paneling, I found this mess behind it. Some of the old drywall cladding the HVAC room was dried out/water-damaged/crumbling and needed to be replaced. Every time I removed a big nail from the original plaster, a huge chunk of wall came out with it. And can I just point out that hideous vent on the little door to the furnace room?
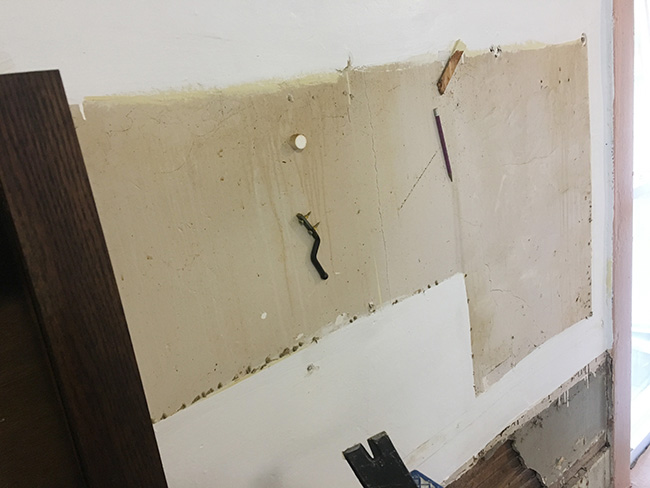
A bit of hilarity — I removed the upper cabinets in order to sand/prime/paint, and I found all kinds of weird stuff smashed into the wall, stuck on by 70-year-old kitchen grease.
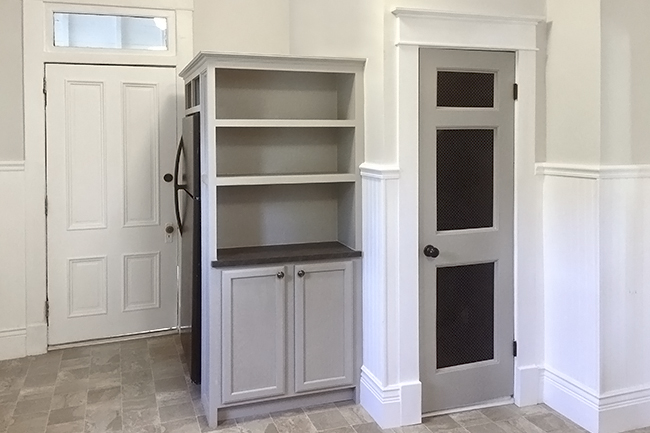
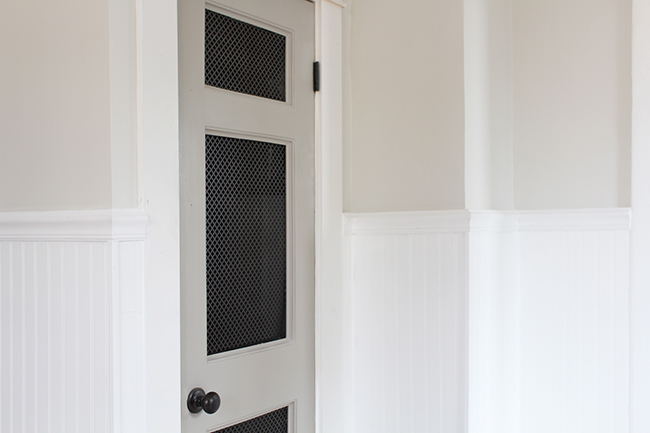
Remember that dumb little door with the vent leading to the HVAC room? I kept the door, but decided to give it makeover. I cut out all 6 of the recessed panels and added metal radiator grates so it would allow for plenty of ventilation.
Even though this little door was leading to basically a closet, it was located right next to the doorway to the dining room which had pretty original trim on it. I decided to build out the trim around the HVAC room doorway to match. Original trim on the right, new trim on the left. It’s not exactly the same, but it’s pretty darn close. I’m obsessed with moulding. I spent 10x what I had initially planned on moulding because I kept finding different places that I wanted to add it.

White caulk is my best friend! I’m seriously considering doing an entire post on caulk because I am so passionate about it.
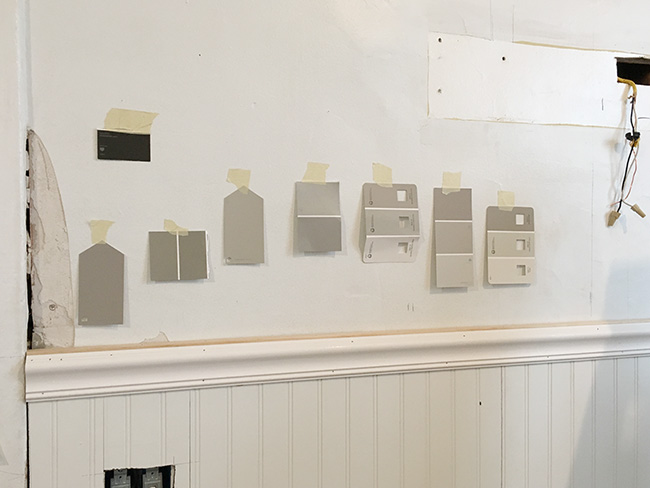
I’m sure you are all shocked that I chose gray for the cabinets! This color is Valspar Montpelier Ashlar Gray (6004-1C) It has a lot of warm undertones and I liked it so much in the kitchen that I ended up painting every single interior door in the house this color.
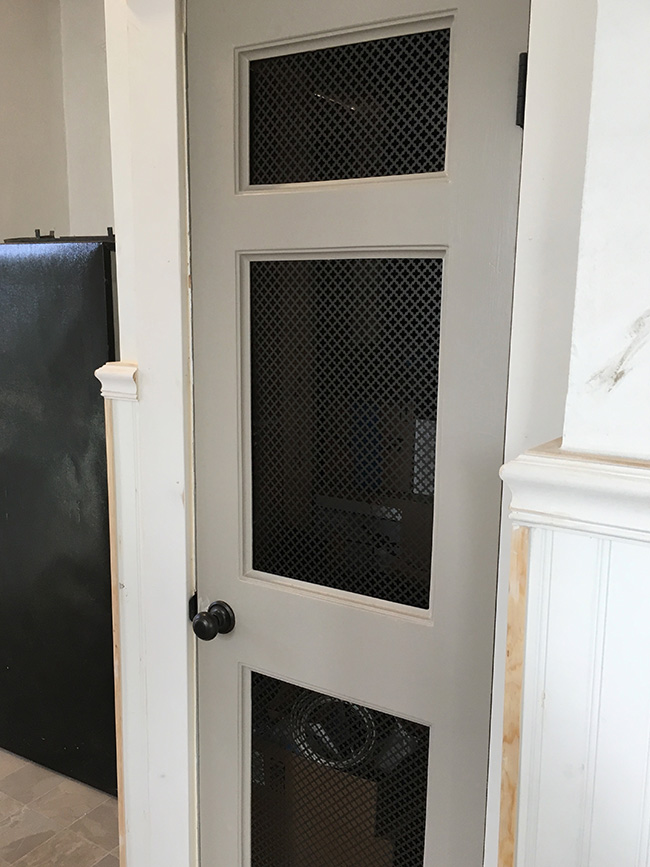
A closeup of my little furnace room door. New bronze hinges and knobs for the whole house, y’all!
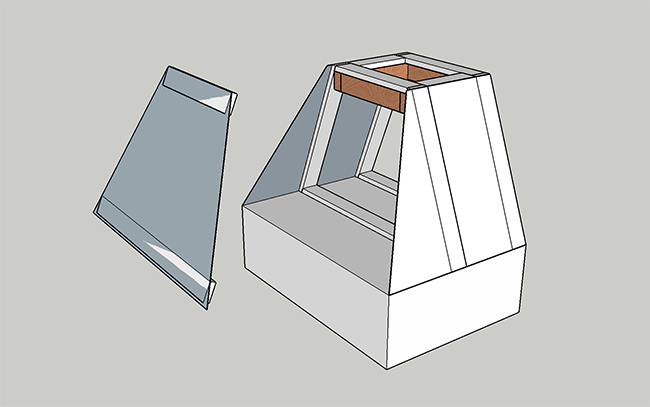
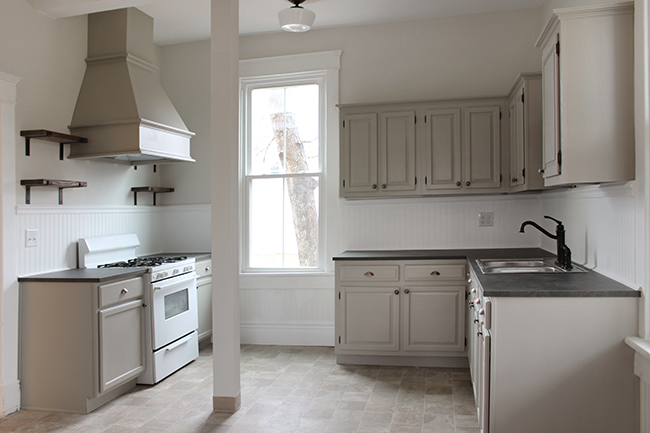
Remember the cheap white range hood over the stove? I built a big dramatic wood hood to go over it! The design was relatively simple, but it had some crazy angles, and I didn’t have a table saw at the time, so it definitely took some ingenuity to engineer.
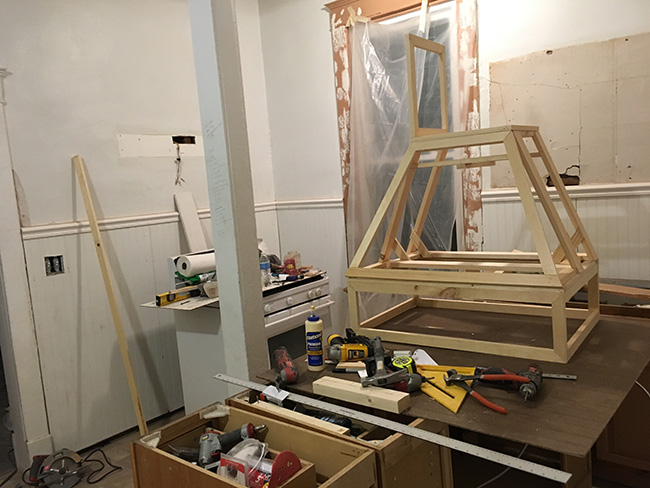
I built the frame out of light-weight pine and wrapped it in 1/4″ plywood. It’s been a while since I had to build something with weird angles. It was nice to use my brain in that way again.
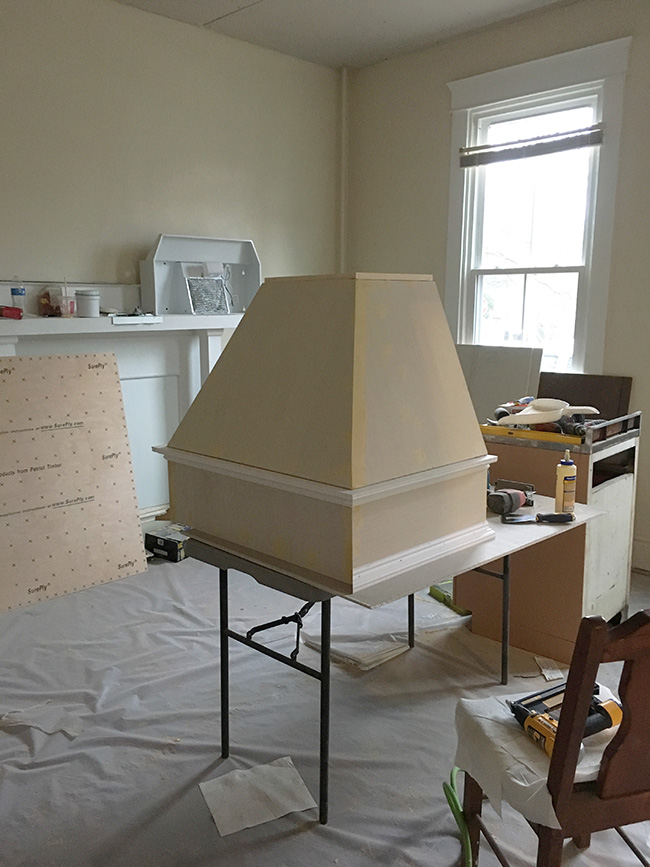
A little crown moulding, and BAM. Instant impact and drama! Only cost me about $100 for materials.
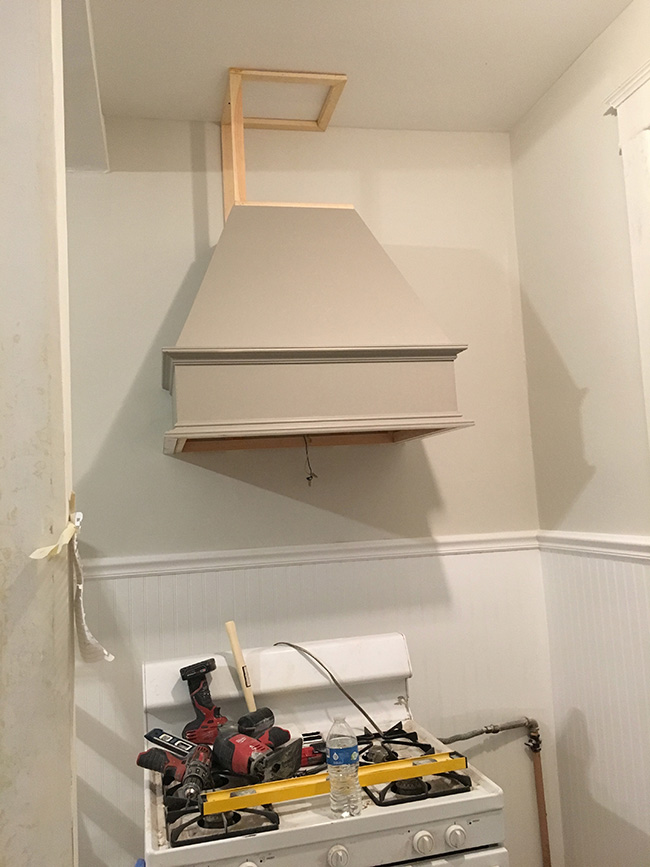
I built the bottom part of the hood first, then I mounted that to the wall and added the vertical shaft separately so all the side panels would be super flush with the wavy plaster wall.
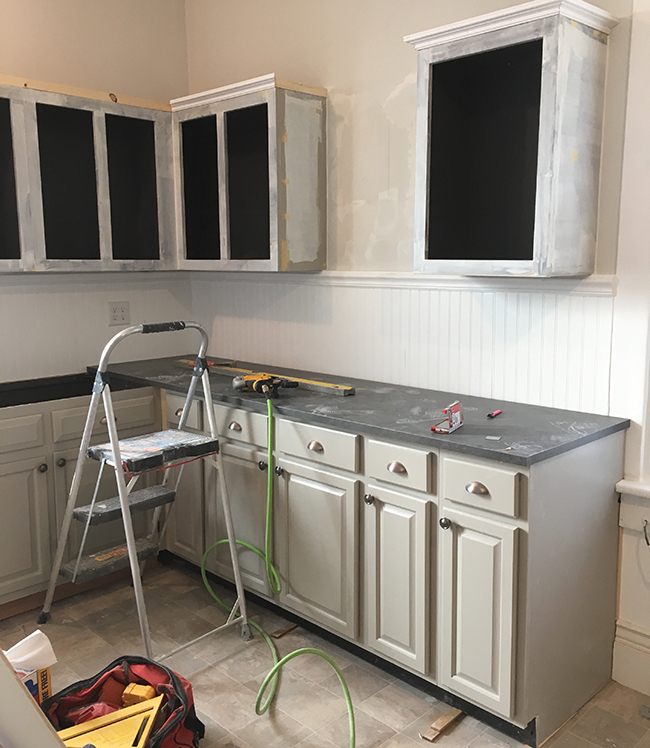
Because I am a perfectionist, rather than paint the cabinets while they were in place, I took all the cabinets off the walls, lugged them to the garage, removed all the doors and hardware, cleaned them with degreaser, sanded, puttied, sanded again, primed, and painted. Then I hung them back on the wall and added the same crown moulding that I used on the hood to give them a more high-end look.
Earlier in the post I mentioned that I had the hardest time figuring out what to do which the fridge which was positioned awkwardly in the corner of the room.
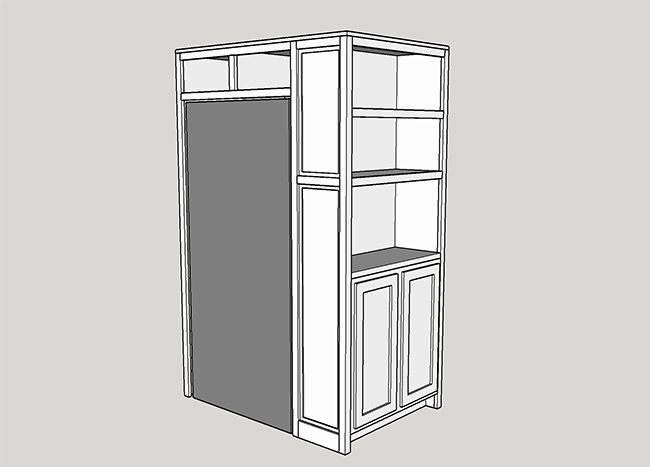
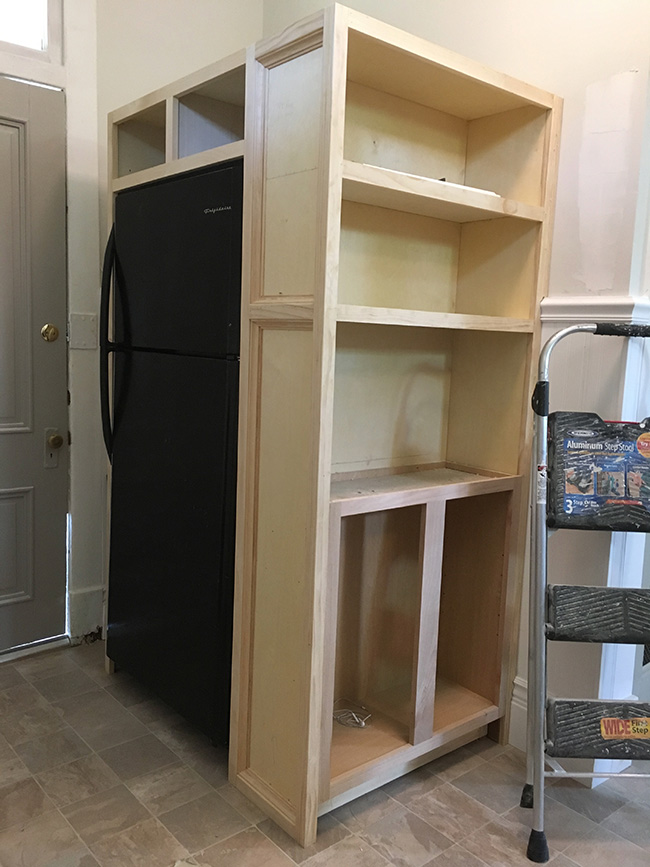
After considering about 5 different solutions, I finally landed on this sketch. I created a shelving unit that faced the kitchen, then turned the fridge 90 degrees so you access it from the side. You basically don’t even really realize the fridge is there, which is great because the fridge is in good condition but kind of dated.
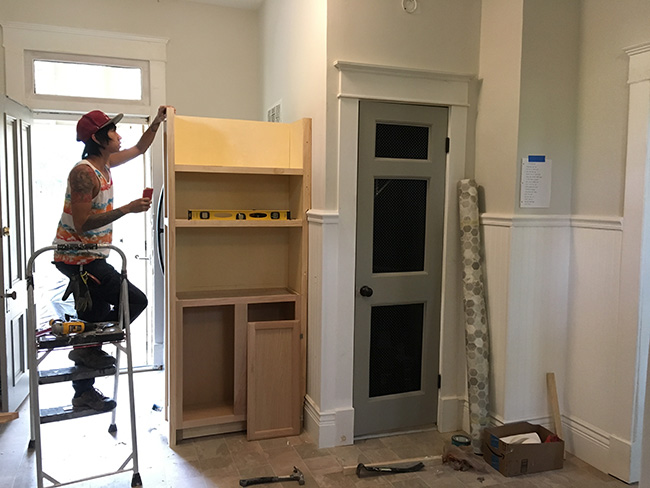
After working on my house alone for 6 weeks, I was pretty exhausted so I flew my amazing art assistant, Jef out to Virginia to help with the last leg of my project. I couldn’t have wished for a better apprentice to help me get everything done! YOU ARE MY HERO, JEF! I owe you a thousand steaks and bowls of macaroni and cheese.
In the end, the kitchen alone took me 2.5 weeks, working 16 hours/day. It was definitely a very time consuming project and I spent about 35% more than I had budgeted. Once I started, I was 100% committed and couldn’t stop until everything was pretty much perfect. It was totally worth it though. I didn’t want to show the house to potential tenants and feel embarrassed by the kitchen. Since the kitchen was the first room that was (mostly) finished, I spent the most time in there of any room in the house and became really attached to it. Here are some “after” pics!

Jen – this is beautiful!