This house was built in 1908. Who knows how many people have lived here/died here/made breakfast here/celebrated Christmas here. This house will outlive me by decades…maybe even centuries. It’s a good thing I don’t really believe in ghosts, because if I did, I’d be surrounded by them.
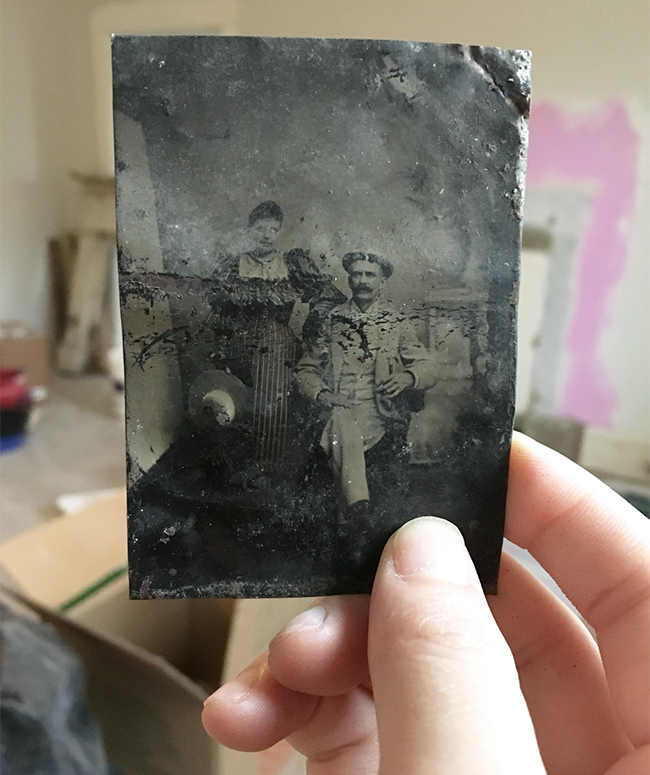
A few months ago I was demolishing my old dining room fireplace mantel, and I found this wedged in the baseboard — a tintype that could date back as far as 1850. I would love to know more about who these people are — did they own the house? Did they build the house? Were they family? For now, I have named them Alfred and Gertrude. I plan on leaving them in the house forever because it seems like it would be bad luck to take them out of the home they’ve lived in for over 100 years.
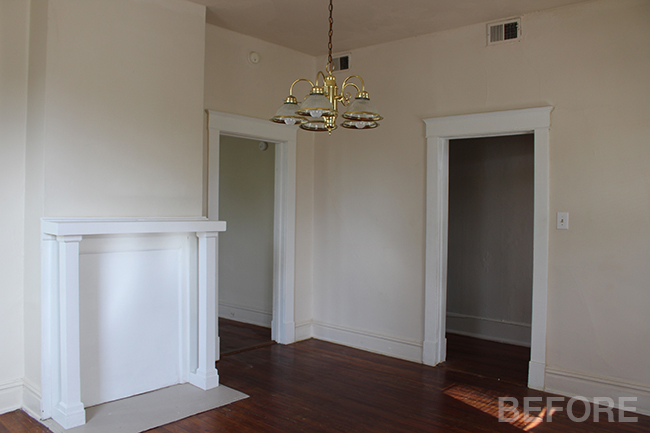
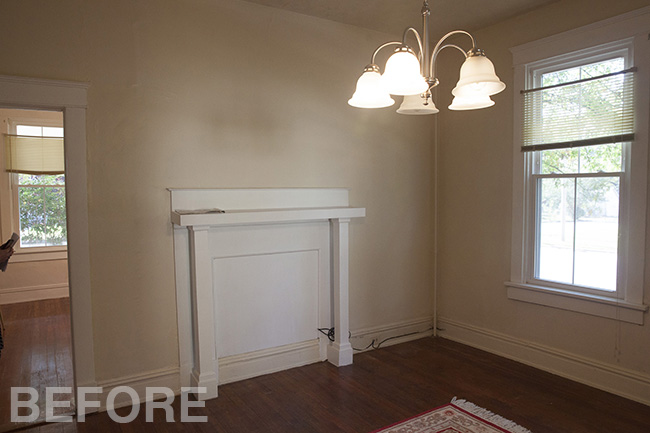
Aaaanyway, back to design. This is a pic of the living room. The old mantel doesn’t look that bad in this photo, but it was actually very poorly made and stylistically arbitrary. It was also slightly out of level, which drove me nuts. I wanted to find something more appropriate for the age of the house since this living room/sitting room is the first thing you see when you walk into the house. I was in California during most of the planning process for this house, so I started my search on Craigslist.
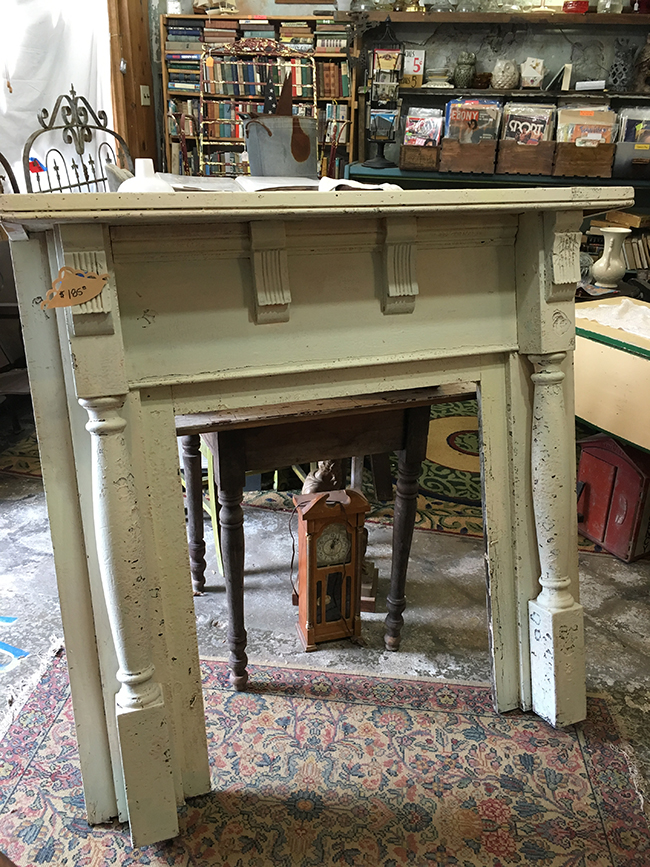
Praise the internet, for within minutes I found this little guy. I can’t say that is was love at first sight, but I definitely noticed it was proportionately similar to my old mantle. I emailed the shop and asked the sales lady to send me some dimensions. I was looking for something that was 49 1/2″ or less. She came back to me with this photo.
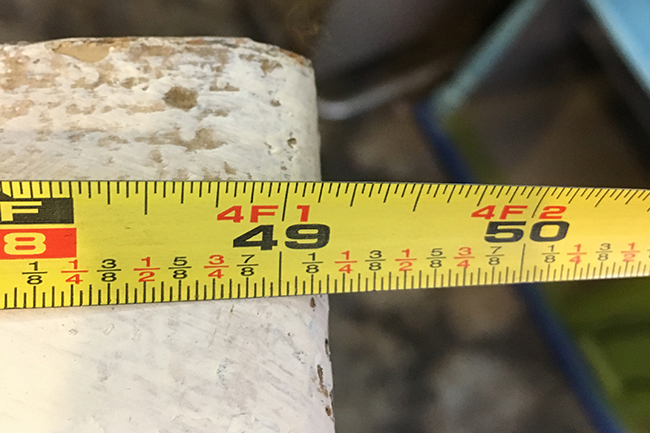
49 1/4?! Literally perfect. At that point I wasn’t even going to overthink it. Even though parts of this mantel looked like it had been chewed by a hungry squirrel, I called the lady and arranged to have it dropped off at the house.
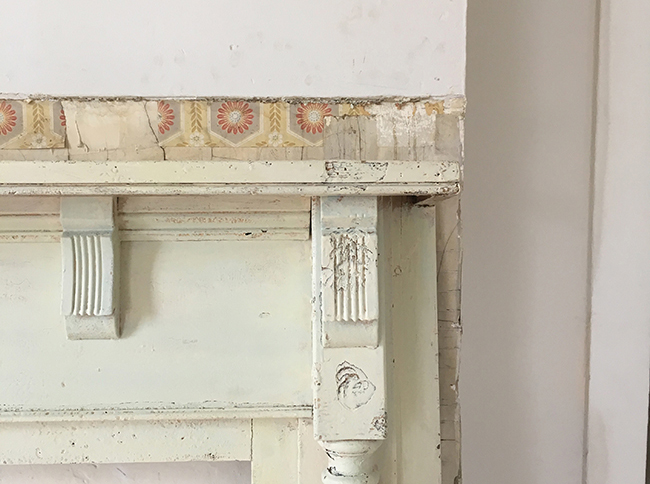
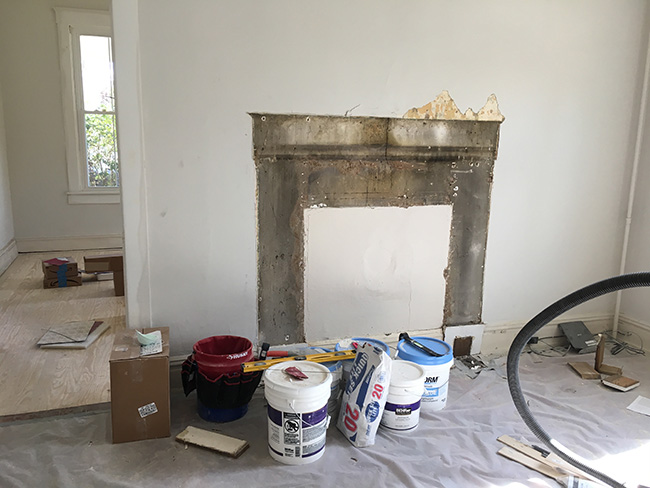
When I demolished the old mantel, I uncovered little bits of this vintage wallpaper from back-in-the day. I love uncovering little surprises like this. It makes the process of renovating feel more soulful.
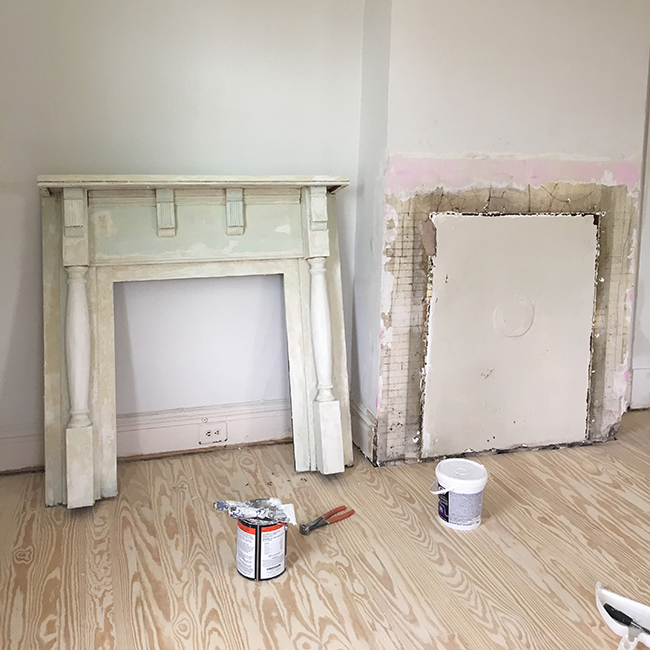
The mantel needed a ton of patching, priming and painting. I re-built all the damaged area with Ready Patch, my favorite patching compound in the world. When I’m patching raw wood, I use wood putty, when I’m patching painted wood, I use Ready Patch. At this point I’d estimate that half of my house is made out of putty and joint compound of some kind.
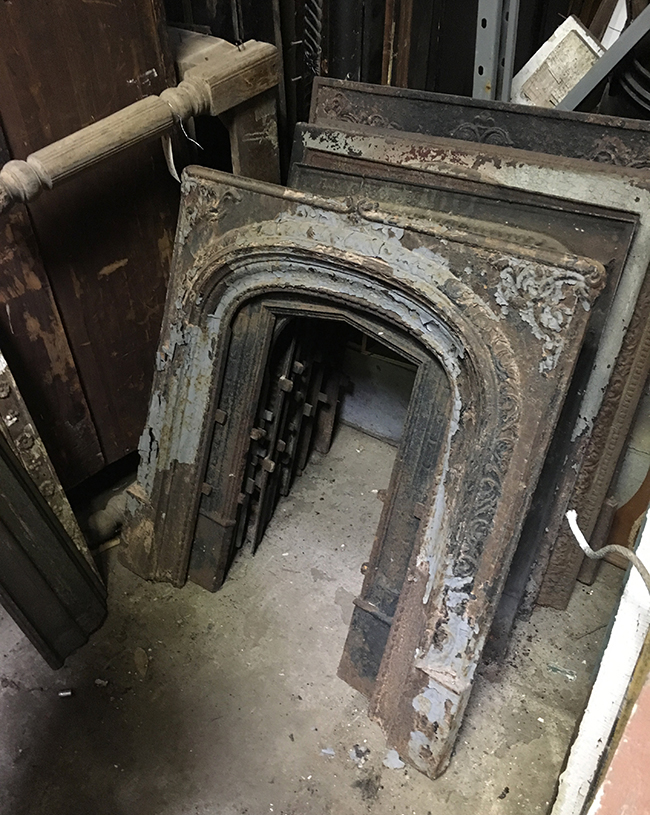
Next, I needed to find a fireplace insert. I had the hardest time figuring out what these things are called. Fireplace surrounds? Firebacks? Even after extensive searches on Google, I’m still not sure what these things are called. Fortunately, local thrift store owners understood what I meant when I said I was looking for “iron things that go inside the mantle.” One store in the outskirts of town had a ton, and I found one that was a pretty close match size-wise, but it need a TON of clean-up work. 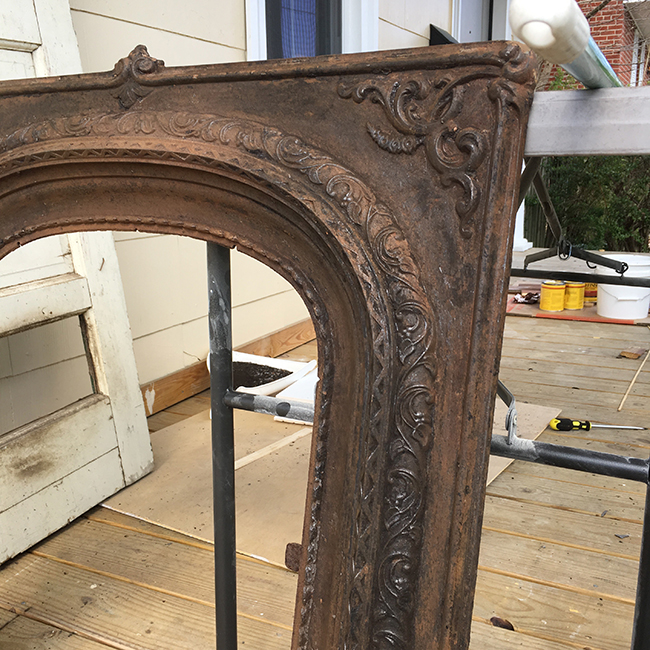 pin it!
I spent 4 hours brushing flakes of paint off with a wire brush, polishing with an attachment on my drill, and manually picking little bits out of the crevices with various sharp tools. 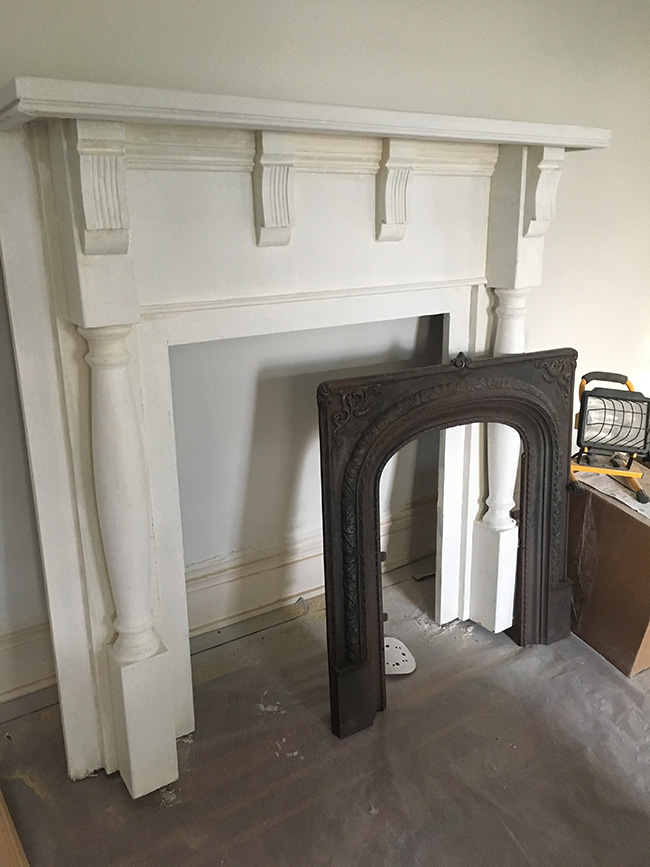 pin it!
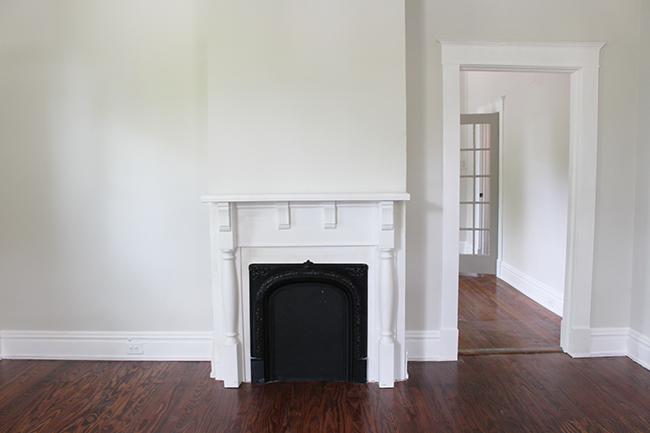
I considered just waxing the iron fireplace surround so I could preserve the rich brown color, but the surface had a lot of scratches and splotchy color inconsistencies from me scraping the paint off. This was also toward the end of my renovation, and I was feeling rather impatient, so I ended up just spraying it gloss black. It doesn’t really really have as much WOW factor in the photos, but in person it was still pretty. Here’s a pic of the mantel all cleaned up!
The living room shares a wall with the dining room which also has a mantel. The two mantels are back to back. This room had an even bigger, crappier mantel.
I ripped the mantel off the wall, and that’s where I found that amazing tintype of Gertrude and Alfred. 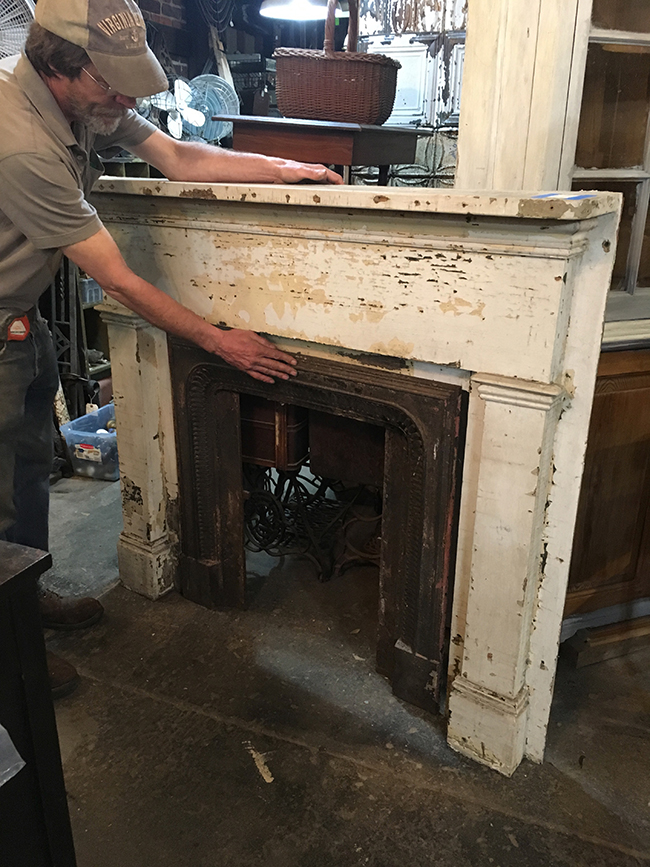 pin it!
There was really no limit to how big this mantel could be, so I considered really tall mantels and really ornate mantels, but eventually I settled on one that was classic and inexpensive. I think it was about $125. I opted against doing a metal fireplace surround for this room. Again, trying to keep the project as on-budget as possible. I saw a lot of pics of faux fireplace mantels online with nothing inside them, and I thought that would look fine.
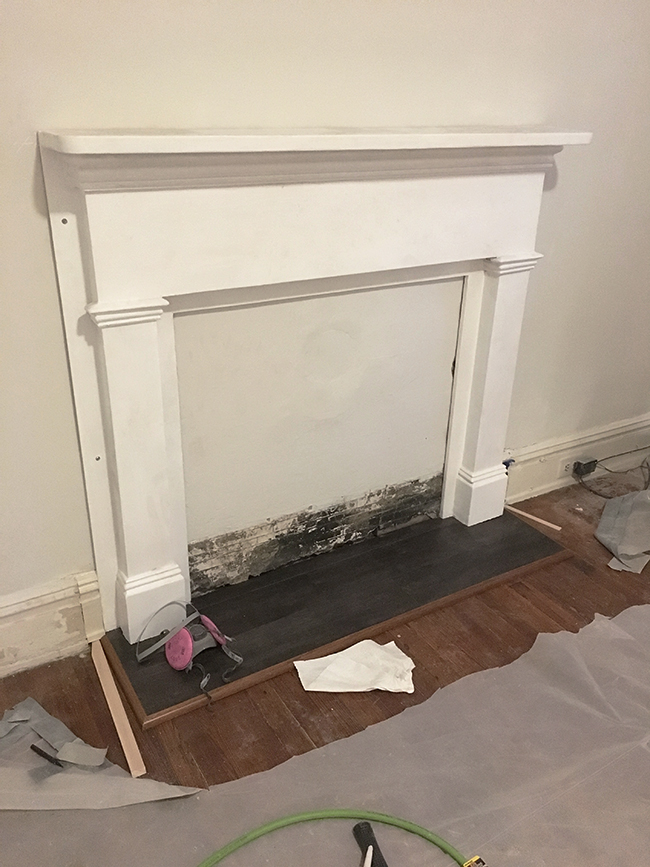
After I patched and painted the walls, I used plaster screws to secure this to the wall. The old mantel was attached to a crappy wood hearth that was covering some damage on the floor, so I built a new hearth and installed some quarter round edging that matched the floor perfectly.
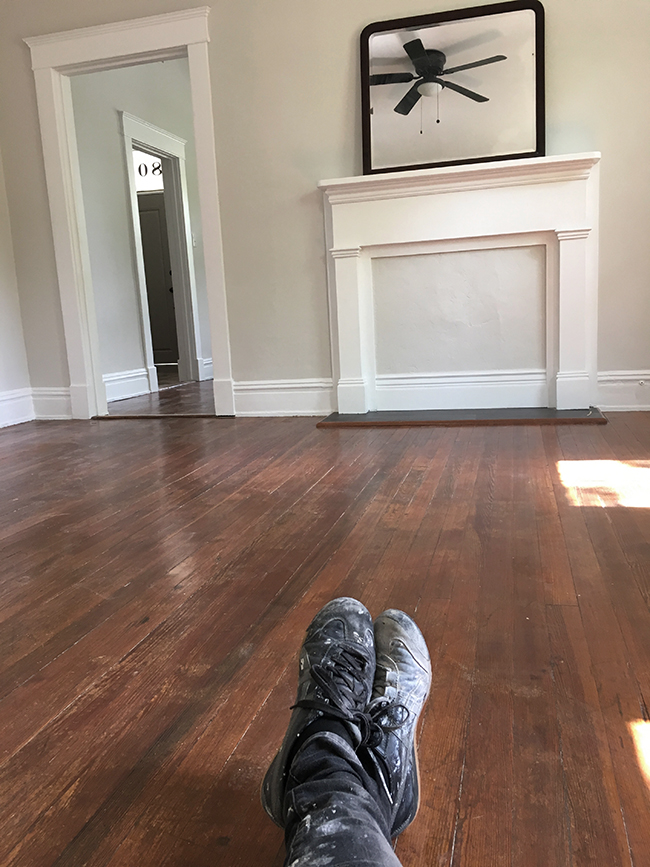
I found this simple mirror for $15 on Craigslist (thanks for lugging it for me, Christine!) I cleaned the floors and for the first time in weeks I was able to sit on the ground because it wasn’t covered in filth. Only a few more projects and I’ll be done with #jensrichmondreno! Eeeek! Up next…upstairs bathroom.

Based on what I can make out of the clothing and hairstyle of the lady in your tintype I’d place the date somewhere around 1895. Very cool find! I wonder if it might be a photo of the couple who had the house built?
Love, love, love!!! If you want some help, I’d LOVE to learn from you!
Hit me up!
Tay
It feels good to finish a task that you worked hard for and then see the results with awesomeness..
Very Fastest Way To Earn Money On The Internet From $7457 per day: https://jtbtigers.com/get10bitcoins6947