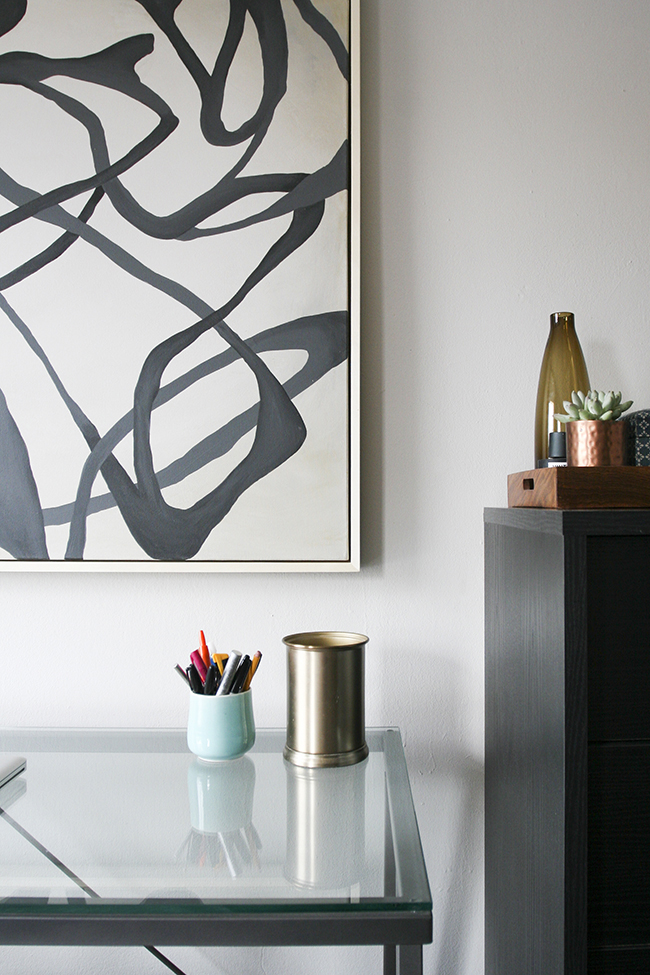
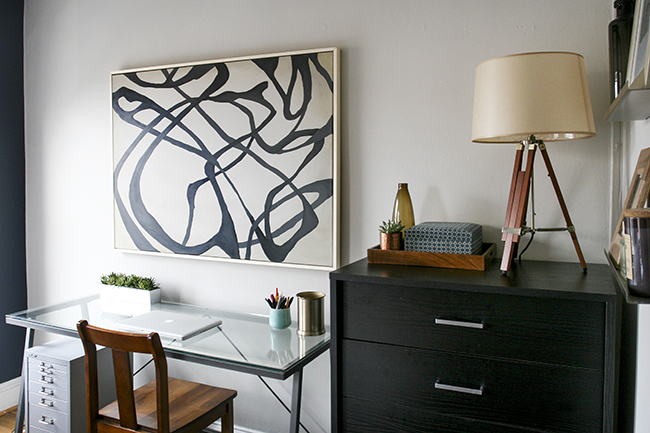
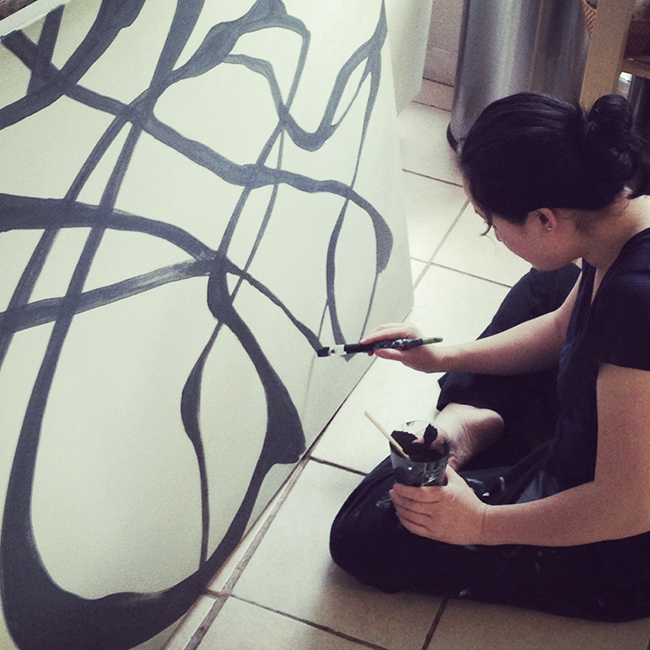
I have a ton of wall space over my desk so I decided to dust off the ol’ paint brushes and make something really high impact to eat up the space. The canvas is 36″ x 48″ and it was only $65 at the Blick canvas sale. Aaron made me a skinny frame, which I love because the canvas “floats” inside the frame and it looks high end and fancy. I really enjoyed making this so I went back to Blick and bought 20 canvases (buy 20, save 70%!) I know… 20 canvases sounds nuts, but here’s the secret: if you buy 5 big canvases, you can buy 15 teeny tiny canvases which come out to $1.28 each and that drives the price of your big canvases way down. You’re welcome! Now I need to not be a loser and actually paint these canvases rather than let them sit around for 3 years which is what I did the last time I went to the Blick sale.
Decorating My Apartment for the Holidays.
Tweet Like
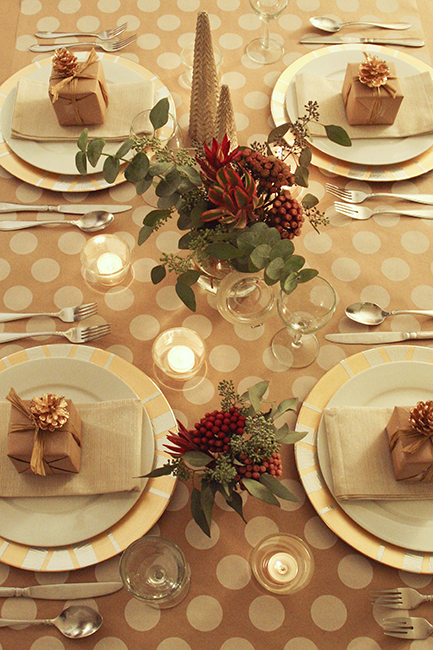
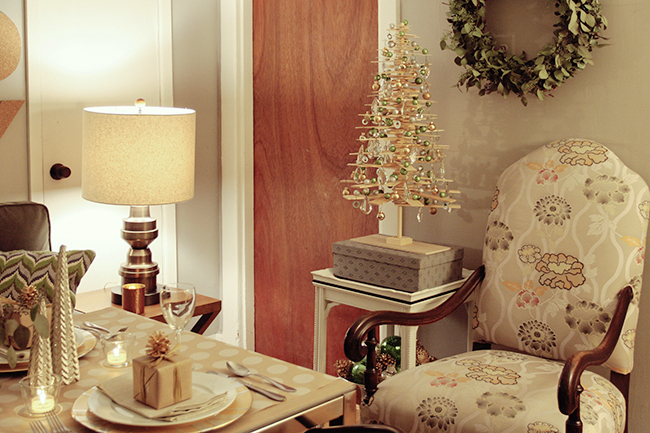
Sometime in October I was approached by Brooklyn Exposed magazine to contribute to a feature about small space holiday decorating. It had been a while since I did anything arts and crafts-y, so I jumped at the chance. I usually don’t decorate my apartment for the holidays because I travel to California to see my family, so I took this as an opportunity to host a pretend holiday dinner party at my house. It was the middle of October and no one was selling fresh evergreens, so I had to get clever and use unconventional materials.
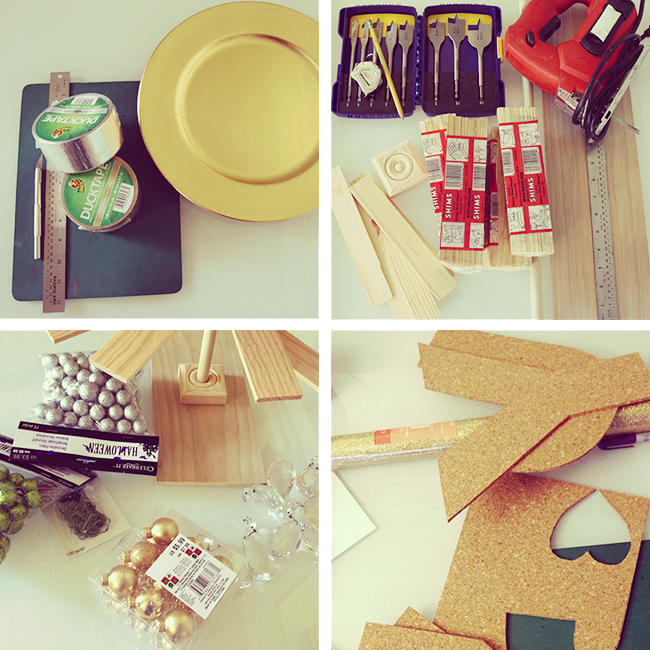
I had seen lots of DIY Christmas Trees on Pinterest and decided to make my own mini-tree out of wood shims from Home Depot. I took a long wooden dowel and screwed it to a base, then drilled holes in 50 shims of decreasing length and stacked them on the dowel. I decorated my “tree” with leftover crystals from my chandelier, metal washers, and small glittery balls that I just glued on.
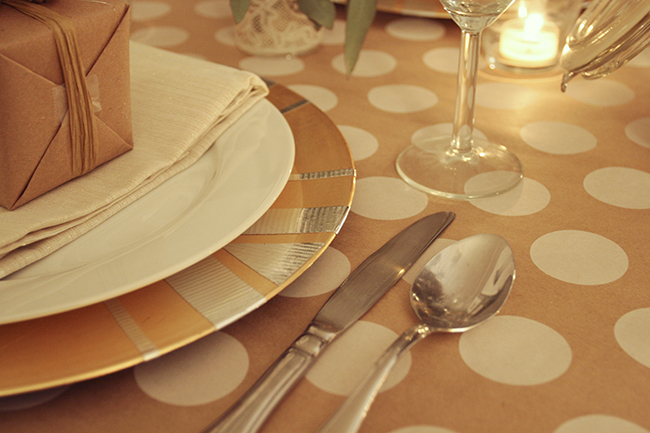
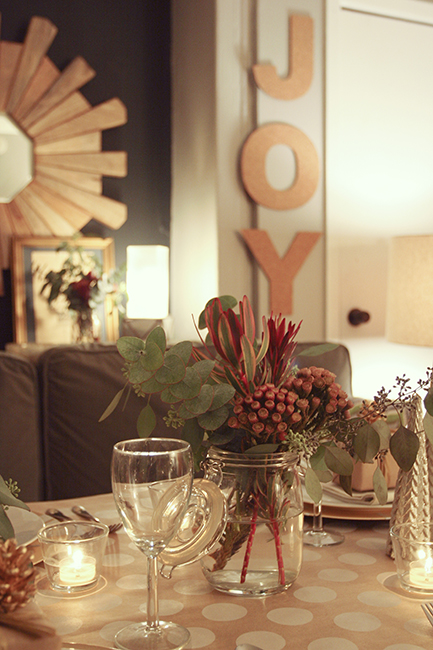
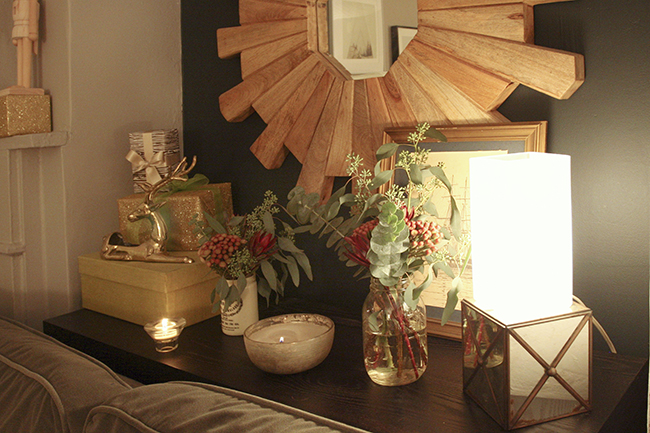
I customized some $1 gold chargers by adding an art deco motif with different shapes of silver duct tape. Instead of using evergreens for a wreath, I bought a bushel of eucalyptus from the farmers market and tied the branches together with wire. I cut the word JOY out of cork sheets.
My new favorite trick is using wrapping paper as a table runner. There are SO many awesome wrapping papers nowadays and it’s a really affordable way to transform your table for only $5.
The December issue of Brooklyn Exposed is on news stands now! I’ll post scans of the spread soon.
Happy holidays friends! Wishing health and happiness for you all. XO


My First Pumpkin!
Tweet Like
It’s autumn in NYC, which in my humble opinion, is the BEST season. Everyone is back to business, working hard, looking mucho sexy in their jackets, hair blowing in the wind, fire-colroed tress aplenty.
I’m going on 7 (!!!!!) years in Brooklyn and still happy as a clam and lucky to be here. I made a middle-of-the-year resolution to be more outgoing and take advantage of what this city has to offer to balance out the fact that I work too much.I’ve been actively knocking items off my NYC bucket list and that list includes a trip to the Catskills to see the autumn leaves (I’ll post pics of that in a few days), and carving a pumpkin for the stoop.
I’ve never carved a pumpkin before. I don’t recall if it ever came up during my childhood, but my mom is a super practical lady, and somehow I have a hard time imagining her going out of her way to buy a $15 in-edible vegetable just to cut holes in it and toss it in the trash. But now I’m a freelancer! All I do in my spare time is come up with impractical/expensive arts and crafts projects! Ok, this one wasn’t THAT expensive. Aaron bought me a super attractive pumpkin for $10 at the fancy market by our house. The carving kit was $6 from Michaels. Time commitment: approx 4 hours.
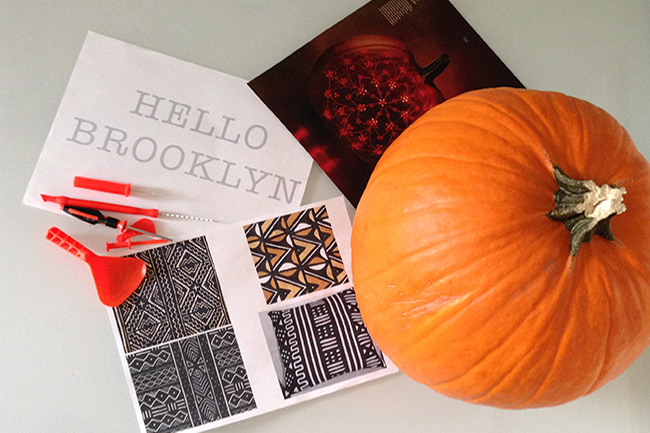 pin it!Since I graphic design everything in my life, I figured, why not graphic design my pumpkin. A little type…some triangles and dots, and BAM. Hipster pumpkin!!!
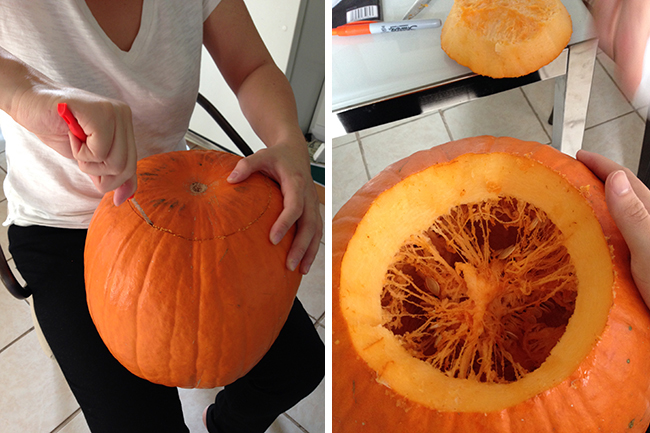 pin it!Apparently these days, the cool kids are cutting the hole in the bottom of the pumpkin. I support that. Keeps the top looking clean. I scraped the inside then scooped out the guts.
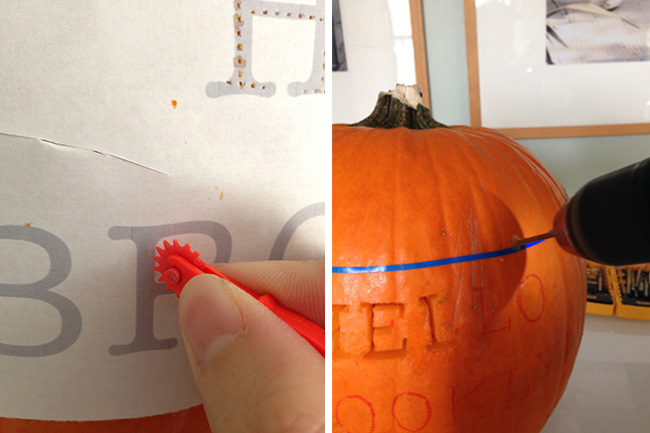 pin it!My pumpkin carving kit came with this nifty wheel that you can use to poke through paper and easily transfer your designs onto the pumpkin using the little holes as guidelines. I used 3 little serrated knives and a drill to make all my holes and shapes.


Looks way better in the dark.
The Making of my Bedroom. Plus Video Tour.
Tweet Like
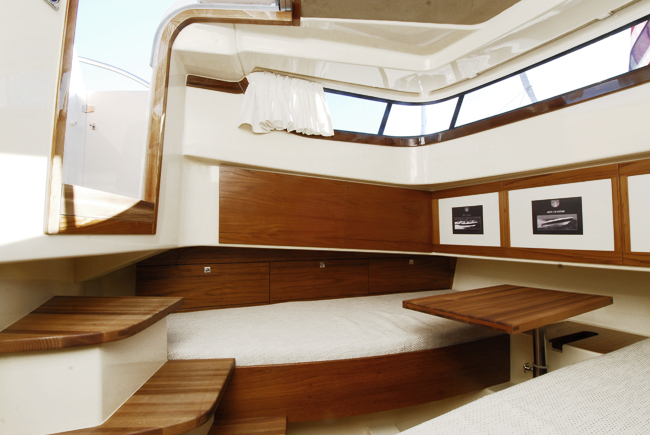
 pin it!When i was a kid I wanted to live on a boat or an RV. My dad used to take me to boat shows where my brother and I would crawl in and out of every crevice of the tricked out custom interiors. I distinctly remember being 7 years old at a boat show, hanging out in a dim, snug, well ventilated crawl space with a tiny gnome door and a mattress on the floor. I could have stayed there forever and literally dreamed about that nook for years.
Boat shows are like space planning heaven to me. On a boat, every component flips up, drops down, doubles as a bed, and has hidden storage. My fascination with tiny homes on wheels/water turned into a fascination with small space living.

I could live here forever. No joke.

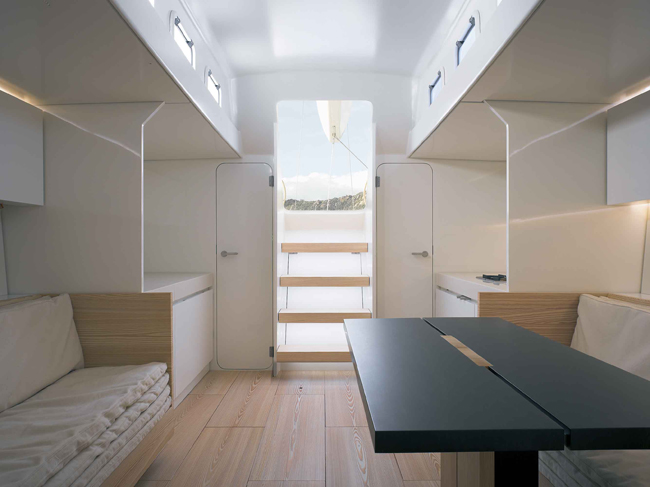 pin it!Scandinavian style yacht? Yes, please!
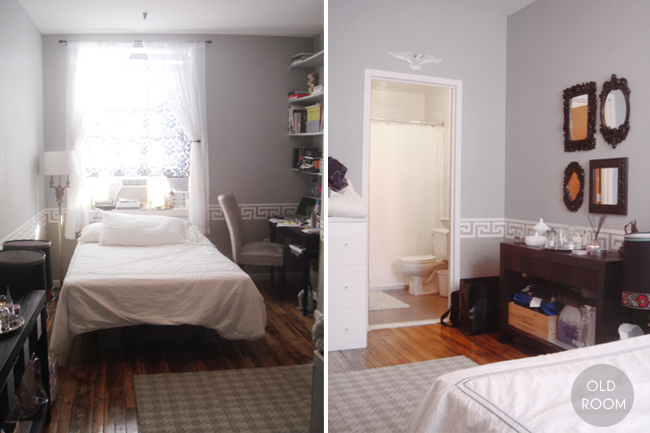
My first Brooklyn bedroom was roughly 12’x20′ which is HUGE by NYC standards. I even had my own bathroom and laundry in the building. So fancy. I put work into trying to make it pretty but ultimately I didn’t have enough storage so the room was always a mess. I came to the conclusion that I was one of those people who needs a designated spot for everything or I will never put anything back.
At the time, I was working on an office makeover for Tyra Banks where I met a furniture designer/builder named Mark. We were chatting about life in Brooklyn and I mentioned that I was considering downsizing from my huge room in Clinton Hill to something more affordable. It just so happened that his upstairs neighbor was about to move out. The mention of a “tiny room” piqued my interest so I got the landlord’s info and went to check it out.
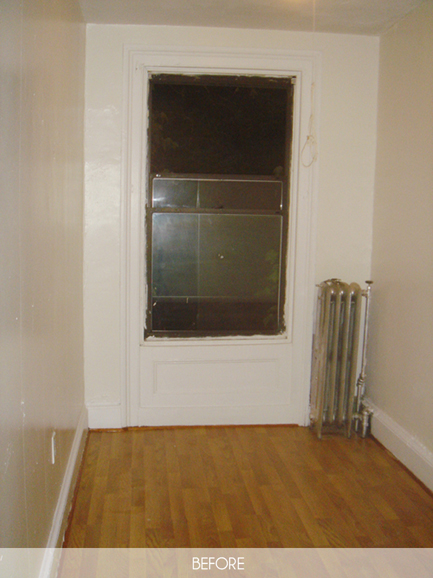
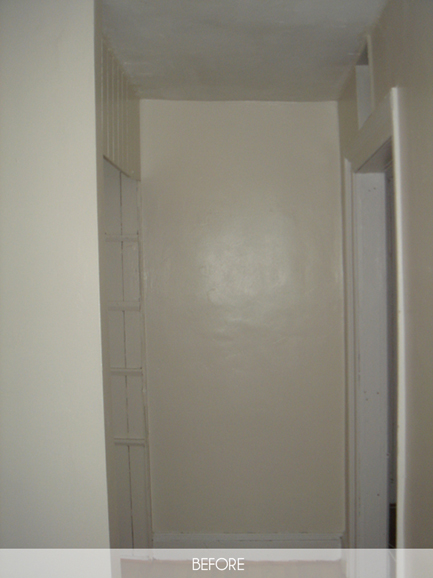
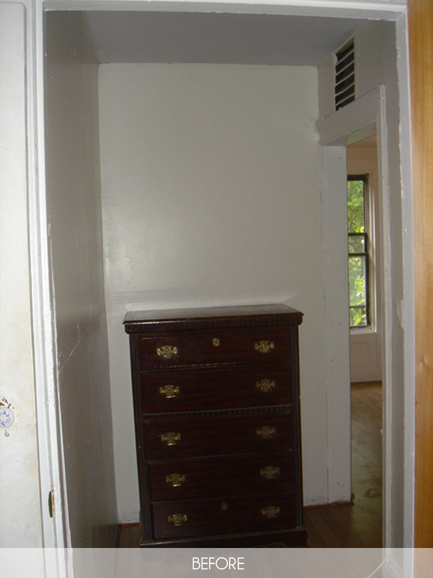
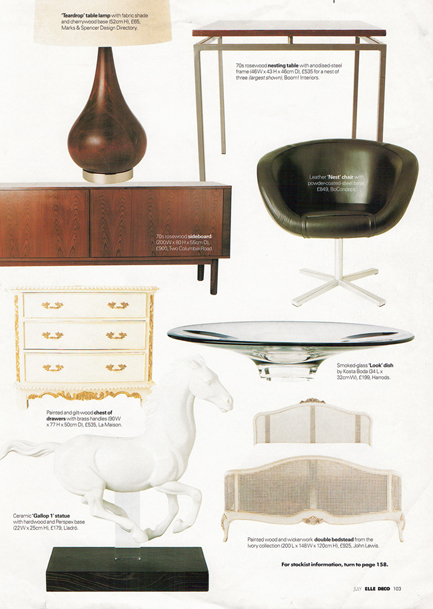
The room was rough around the edges, but had no major issues, which was perfect. I decided right away that I wanted to take the place and managed to finagle a 6 week window where I would come in after work and on weekends to fix up the place. I was determined to make this tiny room fancy yet functional so I started pulling inspiration images from magazines (mostly Domino…cutest mag ever, I miss it) and these two pages were the tearsheets that influenced me the most. I’m glad I saved them after all these years.

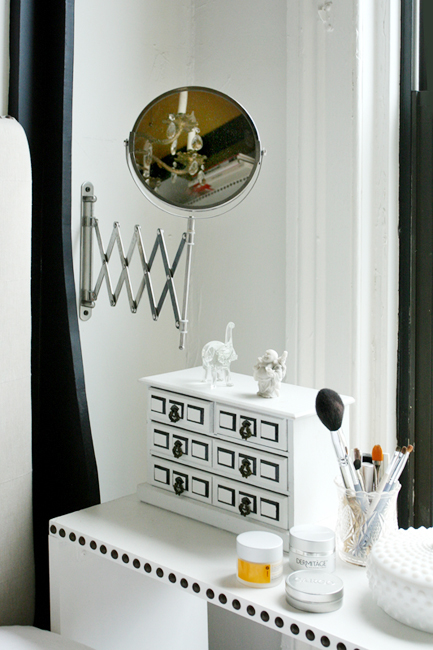
I decided on black, white, brown wood, with a touch of brass as my palette. Timeless and classy IMO. In comparison to these rooms, I’d say that my style is a little more “global eclectic.” I love gaudy crosses, Moorish tiles, statues of Buddha and multi-armed Hindu deities. So yea, like French castle guest room meets antique market in Bali…for a secret girly girl who hates girly things and color. Yea.
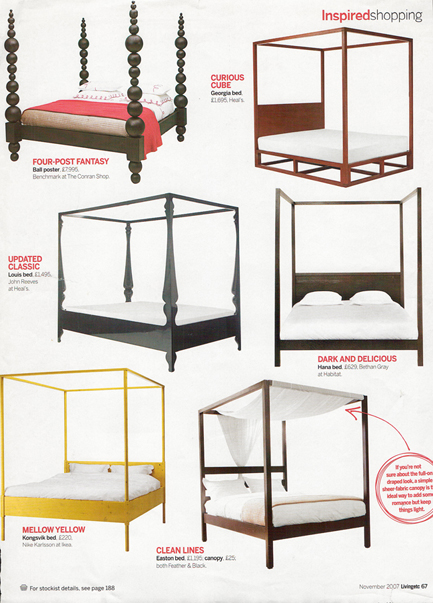
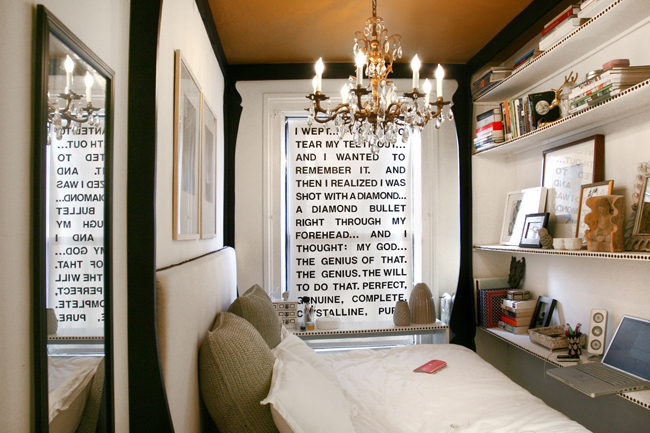
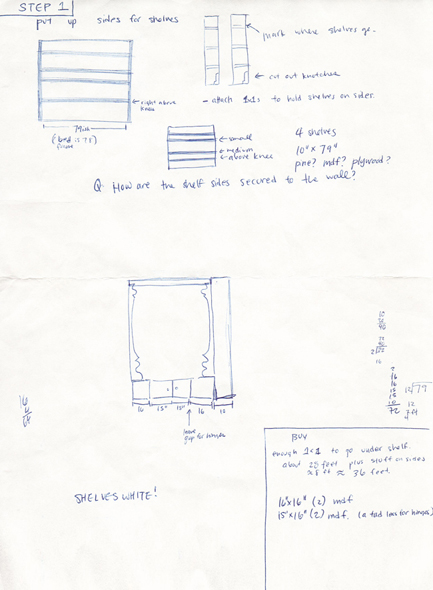
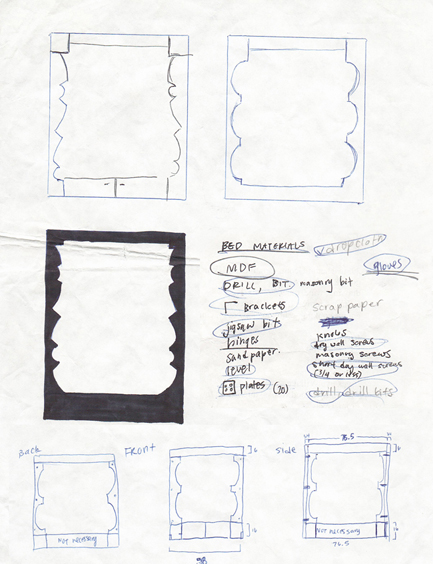
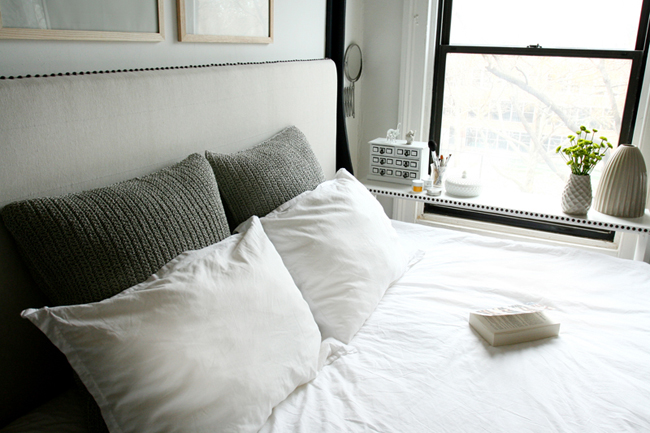
Every secretly fancy girl has to have a regal, disproportionately large bed. I fancied the Louis bed the most but I was poor at the time and had no idea if it was even possible to get European designed furniture to my neck of the woods. I studied wood sculpture in college and had an itch to make some 3D sculpture anyway, so I decided to build a Louis bed replica. Initially, I assumed a full sized bed with canopy frame would eat up the whole room, but realized later that I would have about 12″ of space to the right of the bed that would be perfect for shelving. I saved my mad-scientist sketches from this project. I love revisiting my art sketches and marveling at how bad my handwriting has gotten over the years.
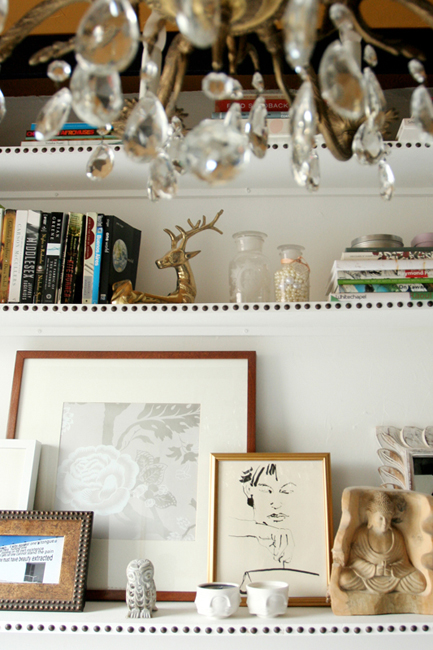
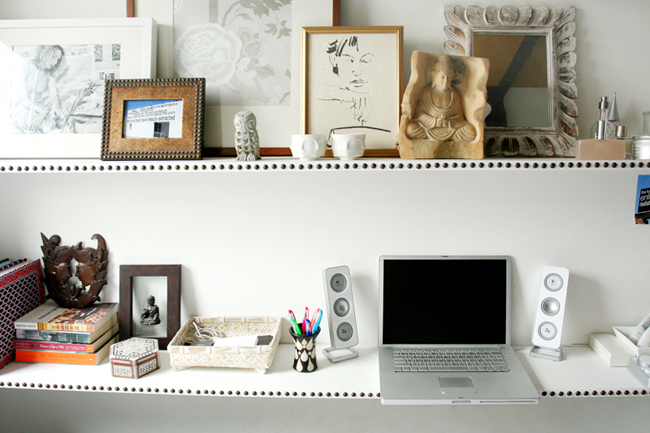
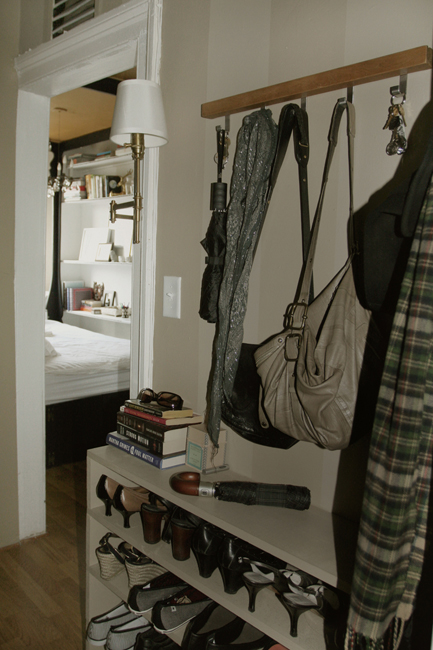
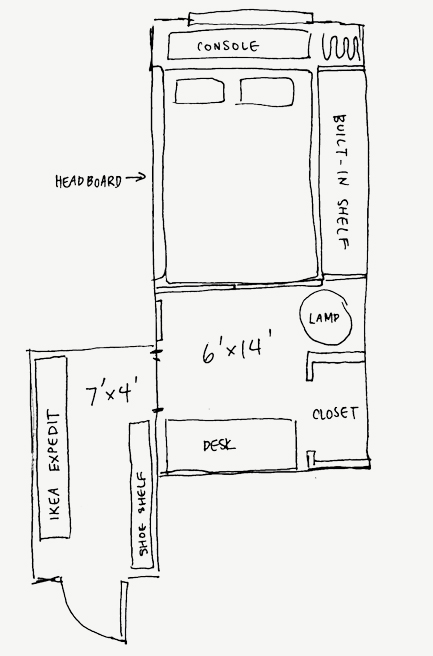 pin it!I built the bed, built-in shelf, console, headboard and shoe shelf from scratch.

I don’t have any photos of me actually building because I did everything by myself and just didn’t have my act together to document it properly. In a nutshell, it was a BEAST of a project. I didn’t have a car. I didn’t have any tools with me at the time. I basically hired sketchy guys with vans to shuttle me back and fourth between Home Depot and the house, and I cut all the wood propped up on two folding chairs with a $30 Black and Decker jigsaw. I had to patch the walls, ceiling, and trim and probably inhaled a huge amount of spackle and saw dust. I made a TON of noise cutting the curvy shapes and nailing all those furniture tacs into the shelving. My neighbors must have HATED me.
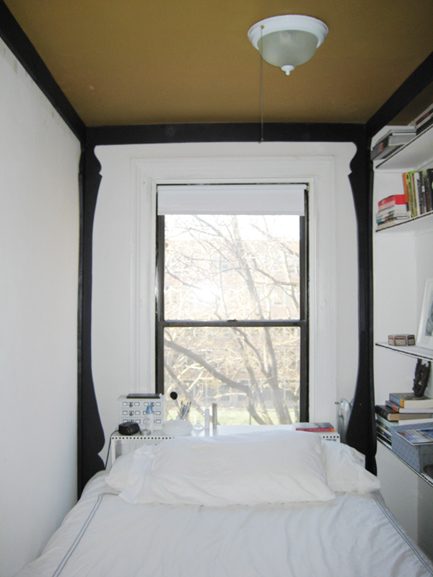
This is the closest thing I have to a “during” photo. After days of agonizing over color options, I settled on chalky white walls, a dark semi-gloss navy for the bed, and what I call “old man mustard” for the ceiling which is for some unexplainable reason my favorite color that’s not related to black or white. The room was coming together and the right side looked great with the built-in shelves, but the left side was really unbalanced, so I made a headboard/sideboard and mounted it to the left wall.
Also, a chandelier was desperately needed. Unfortunately, the original light fixture was not centered on anything (neither the window, nor the bed, nor the room). It was also a pull-chain fixture with which I had no experience and didn’t want to get electrocuted. I wound up splurging on a Craigslist electrician who charged me $250 to move the box and install my newly obtained vintage chandelier from the Brooklyn Flea which is conveniently located 2 blocks from my house. It seems secure; I’m pretty sure I won’t be impaled in my sleep.
It’s odd that I never posted a full set of pics on the blog, but there they are!
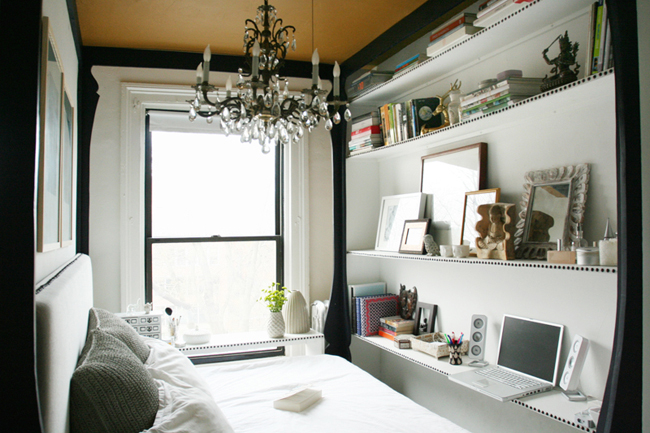
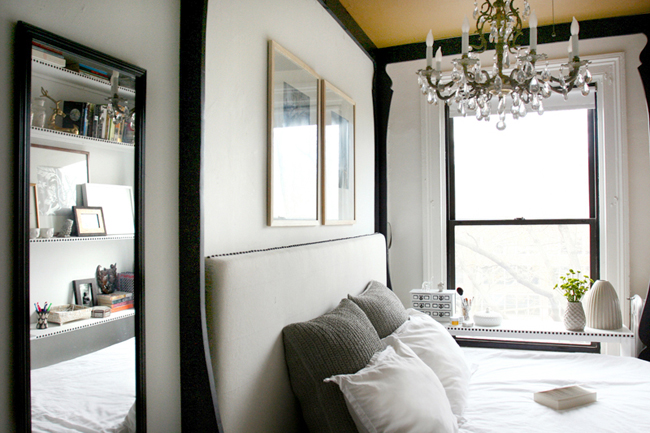

 pin it!By this point, the room has gotten some press. It started with a feature in Apartment Therapy’s Big Book of Small Spaces, and since then it’s been in Design Bureau magazine and on a bunch of blogs. Youtube has a web series called Tiny Eclectic Amazing Spaces and they recently stopped by to shoot a little interview. Awkward!
Aaron Made It Dot Com.
Tweet Like
My boyfriend Aaron is super talented and makes all kinds of amazing stuff from custom furniture to custom cars. We met while working on a TV show and we’ve created all kinds of stuff together, some of which has been featured on this blog. He’s been building custom stuff since he was old enough to hold a hammer, so we thought it was about time to put together a website showcasing a sampling of his handiwork.
He’s a freelancer, so if you need a dog mansion, a master bathroom, a treehouse, a chicken coop or a china cabinet… feel free to drop him a line. Way more pics coming soon. Check it out! www.aaronmadeit.com
Thank you Lowell for getting this site up and running so quickly! I owe you 50 burritos.


