Hi guys. I’m alive. My dumpy cottage is looking pretty awesome (at least to me), but it probably looks so-so to everyone else because most people didn’t see how tragic it was before I started the renovations. (SO tragic, that my friend Sue insisted that I refer to it as a “shack” rather than a cottage.)
My roommates and I recently had some people over for a BBQ and a lot of folks asked me, “So what kind of renovations have you been doing?” My response: “I’ve basically been spackling for 12 hours/day for the last month.” NO JOKE. Allow me to share some details shots of the the general crustiness and you’ll get the gist.
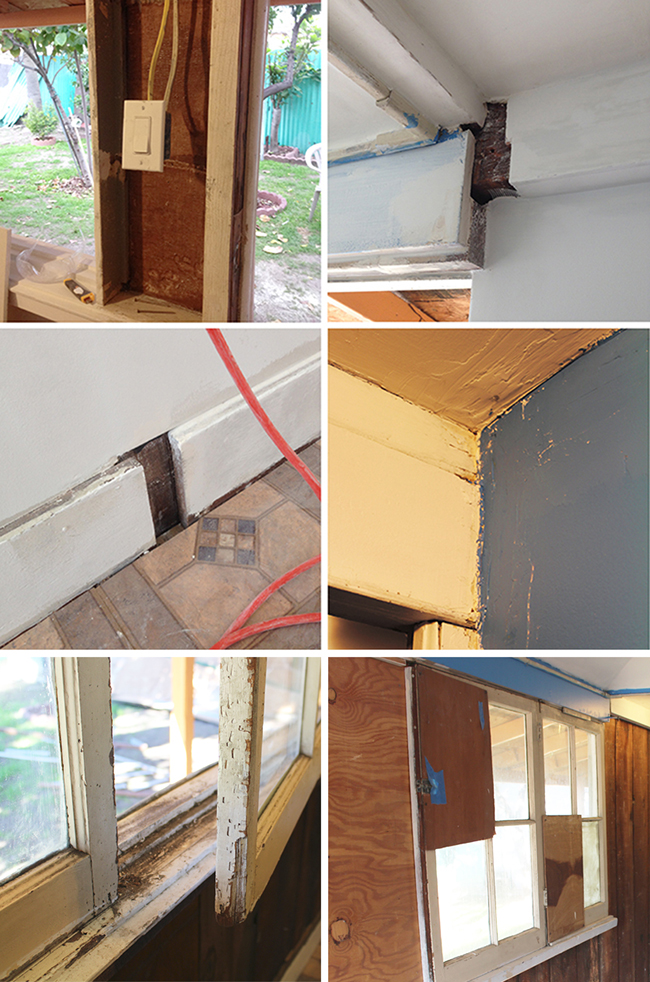
I can’t tell if the people who built/renovated this place cared a lot (by installing a cove ceiling, bay windows, etc), or just didn’t give a s**t (as illustrated by the images above). I knew what I was getting into when I bought the place, and I am comfortable with “extreme cosmetic repair,” so that’s what I’ve been doing for the last 2 months. It’s really not fun at all, but it’s satisfying enough that I’m willing to do it just to see it done.
I’ve been wanting to share some progress pictures, but the truth is… for a long time there wasn’t really much to see — just a bunch of bad iPhone pictures of dirt and spackle. I’ve been doing a lot of what I call “invisible work” — meticulous, mundane, time consuming, not-exciting work that includes:
-demo and cleaning
-installing new drywall
-smoothing out lumpy walls and trim
-re-hanging doors and windows so they open out, rather than in,
-repairing busted windows
-spackling, patching, painting, and repeat, repeat, repeat until my arms fell off
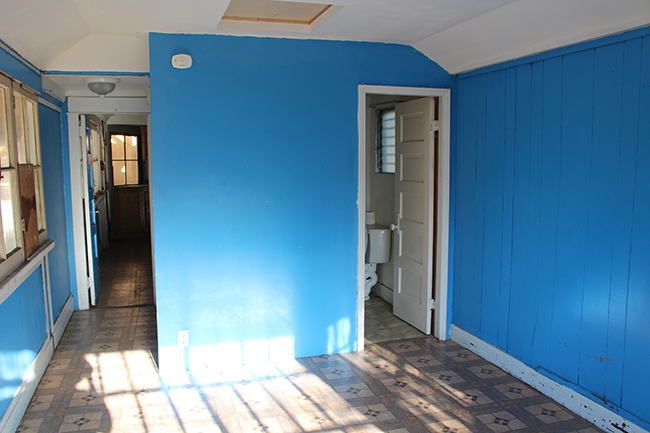
At this point, the bedroom is 80% done, the living/dining is 65% done, and the bathroom is just terrible, so let’s not talk about it. Since the bedroom is looking the most presentable of all the rooms, I’ll start by showing you some pics of that first.
If you read my last blog post, you may remember this “before” photo. The paneled wall on the right was kind of spongey and I couldn’t resist peeling back the layers to see what was back there.
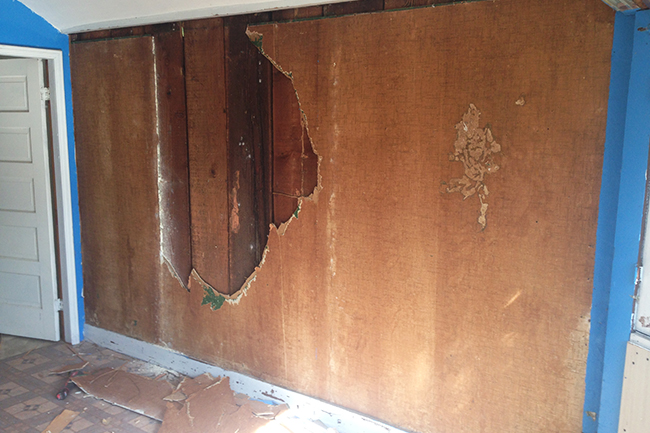
Behind the wood paneling was… 50’s drywall? I’m not sure what they used to make walls out of, but this stuff was kind of soggy and crumbling too and covered in 2 layers of textured wallpaper, so I took a crowbar to it and found…
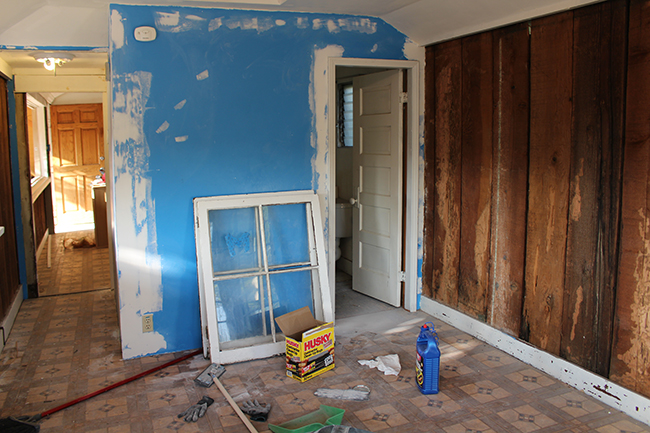
The original wood plank for the cottage! This is both the interior and exterior wall. Obviously, this had to stay, but there was definitely some termite damage, so after I demolished all of the old drywall, I rolled on 3 coats of this green foamy wood preservative that is supposed to inhibit termite damage and rot. It seemed to cover really well, but it smelled like death, so if you plan on using it indoors you definitely can’t live in a space and use this stuff at the same time.
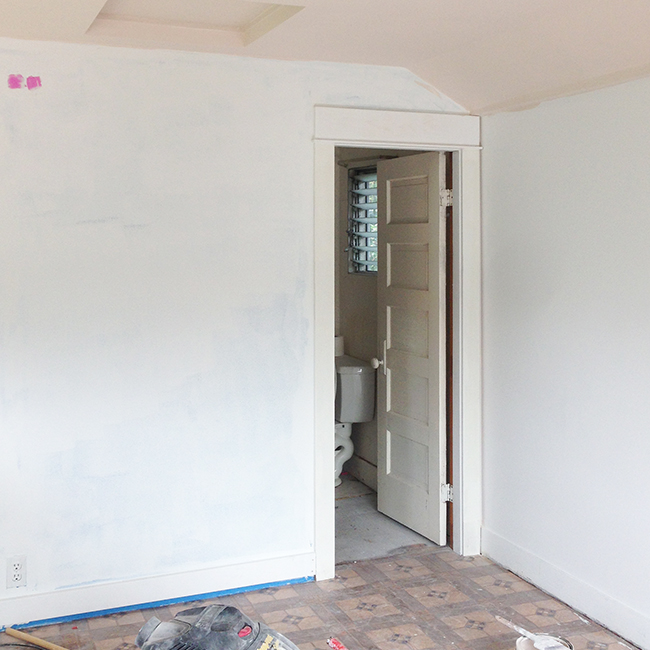
After a few rounds of DIY termite damage control, I hung brand new drywall. Basically all the walls around the perimeter of the cottage had to be re-done, but the interior walls (bathroom/wall separating the bedroom and cottage) were fine and just needed some patching. Oh! I also built a new door frame for my bathroom door. That’s the fun stuff that I actually enjoy doing.
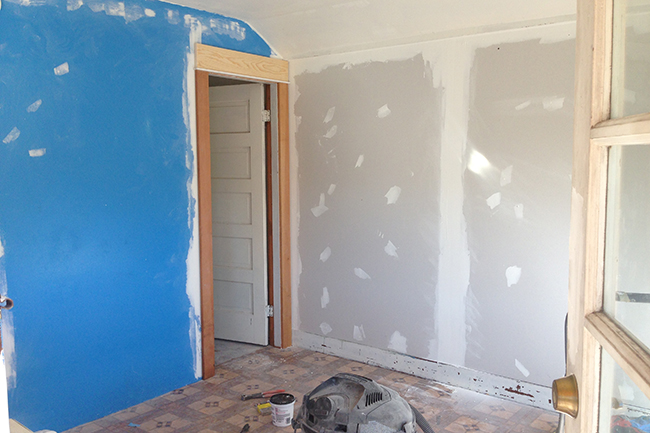
Now that everything is primed, it looks and feels so CLEAN. The new walls basically took 45 years off this place. Oh, and I painted my ceiling pink! WHO AM I?! Don’t worry, I’m wallpapering this room, so don’t judge my poorly cut paint lines.
Annnd… that’s all I have for you for this side of the room. It hasn’t really evolved much since. In fact, I took the door off for repair and painting, so in a way, this corner is looking even worse than it does in this pic. MOVING ON!
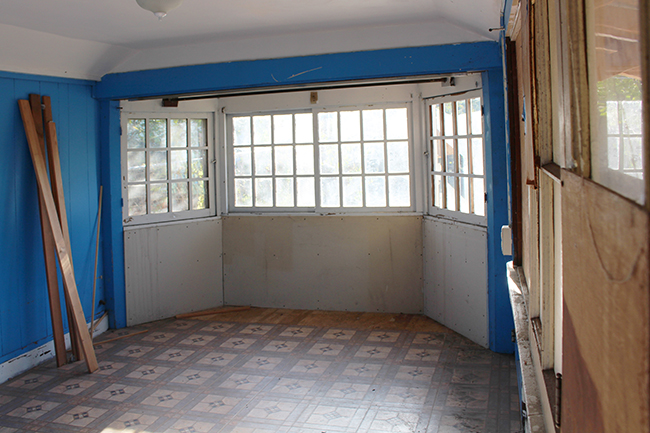
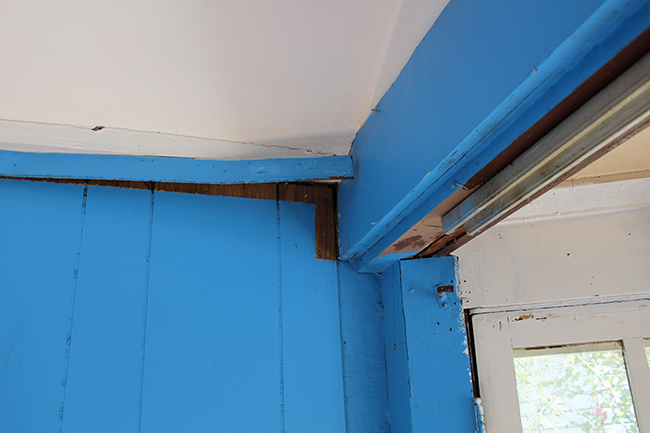
This is the other side of the room. Whoever installed the bay window stopped short of completion and it just sat there looking sort of sad for decades. At some point someone used this nook as a closet, which is creative, but… NO. This little corner needed A LOT of love.
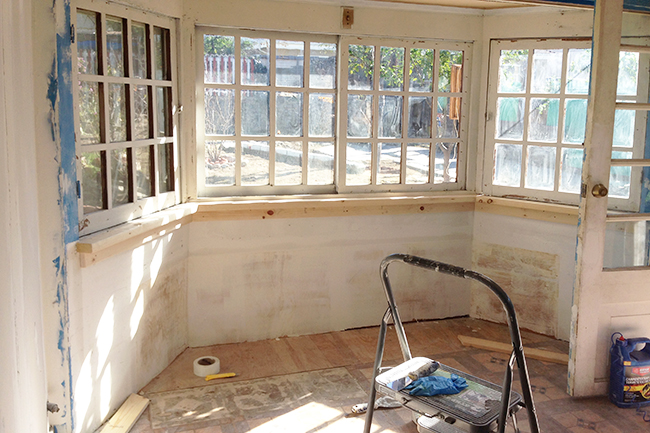
First, I took off the drywall to see what was underneath. The bay was encased in plywood that was relatively flush and in okay condition, so I slathered joint compound on it, sanded, slathered, sanded, then built a little window sill.
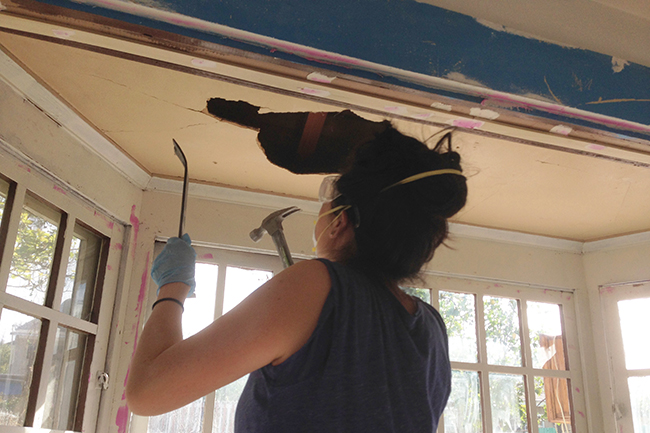
The bay window had a soggy ceiling that had some small holes and cracks. I briefly contemplated just patching over it, but then curiosity got the best of me and I decided to smash my hammer through it just for kicks and before you know it, I had to rip the whole thing out and re-drywall that too. More spackle, more sanding, more paint. OH THE JOYS.
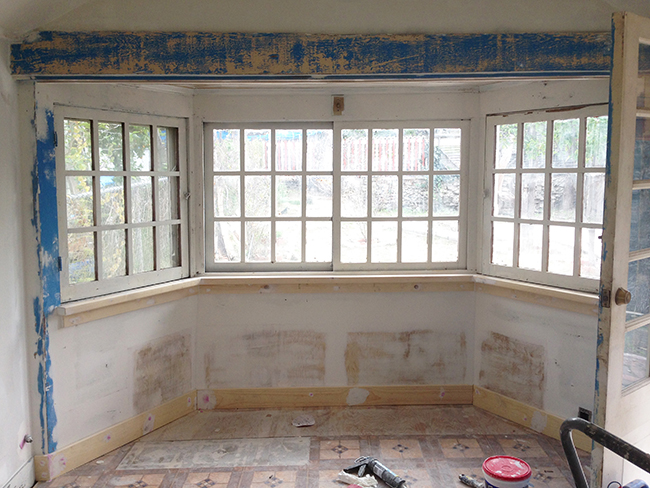
This is the bay, nearly ready for paint. I sanded down the blue because it was lumpy and the blue paint had poor adhesion to the layer of paint beneath it. I added baseboard, ripped 1000 staples out of the windows, and patched those too.
BUT LOOK! As you can imagine when I FINALLY got to prime this wall, I nearly jumped for joy.

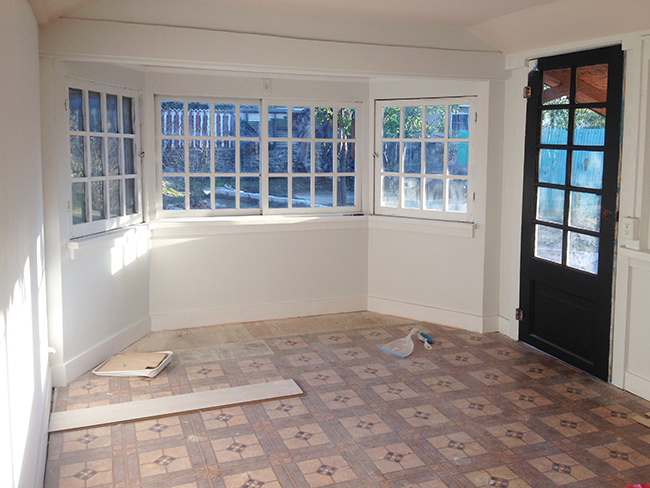
And then, friends, this is why I do what I do. By the time the patching and painting was done, I was feeling zen and decided I could handle installing floors myself. I took my time with it and made sure to be super precise with my cuts, and it was actually not a terrible project to take on by myself. I bought the flooring from Best Laminate after auditioning literally 25 different shades of white/gray and I am LOVING the color. This is exactly what I wanted. Something a little rustic, but also a little modern and Scandinavian.
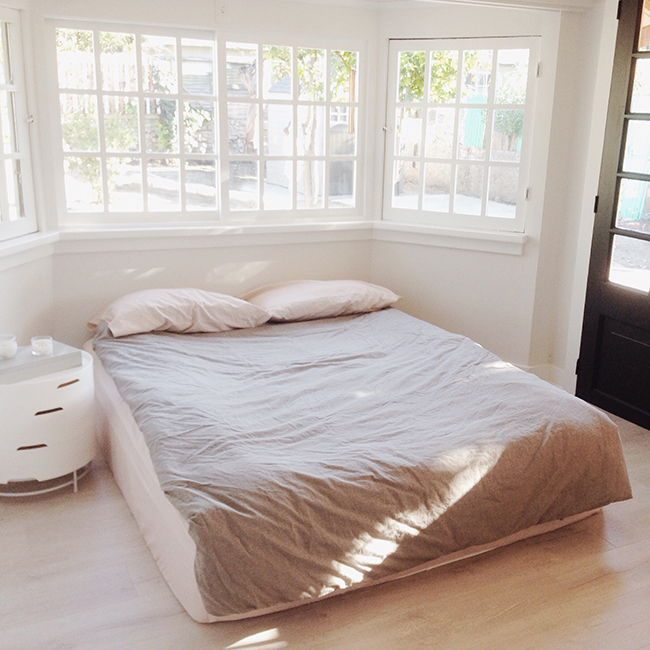
I moved my bed in, and though it still needs furniture, curtains, and wallpaper, it’s totally cozy and livable. I don’t want this post to get ridiculously long, so I’m going to stop there and post updates on the living/dining area next time.

Woww that looks like amazing progress. Great choice putting in that flooring because even with the mattress on the floor, it’s looking stylish. Also, the glorious wall of windows was previously a closet? Boooo!
Hello!!!!!!
I just stumbled across your blog and am DESPERATE to find out the name of the laminate you used. For some reason it won’t pull up on the link you posted. It is so so gorgeous & I’m in need of a budget friendly option like this for my upcoming house reno. Thank you thank you!
Want more visitors for your website? Get tons of people who are ready to buy sent directly to your website. Boost revenues super fast. Start seeing results in as little as 48 hours. For additional information reply to: walter3519rob@gmail.com