May 7

Homepolish and Hawkins Int’l PR.

When people ask me what I do, I usually describe myself as a “set designer for TV and interior designer for regular people.” In a way, those two things go hand in hand, so it feels perfectly natural that I bounce back and fourth between the two. That’s why I was so excited when a friend turned me onto Homepolish, a company that pairs designers all over the US with clients looking to improve their homes and offices. If you haven’t heard of them, you should check ’em out! They’re really reinterpreting the designer <> client relationship by offering affordable and flexible design packages for anyone that needs a little (or a lot) of help with their space. I really feel like this is the future of interior design, so I applied to join their team.

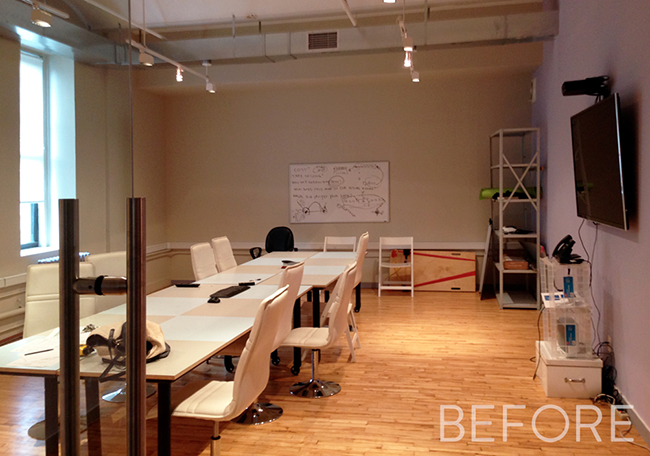
My first commercial client with Homepolish client was Hawkins International, a public relations agency based in NYC. They had recently moved into a new office and did a fantastic job outfitting the place but they were stumped when it came to the conference room. It was a huge and  cavernous, with no focal point, no storage, and no personality. Jen, the client, wanted the room to be as flexible as possible. Translation: Create a conference room/party room/screening room/dining hall that can be easily transformed at at any time. I LOVE a good spacial challenge, so I came up with this plan of action:

1) Partition off 3′ in the back of the room for storage.

2) Create an attractive yet utilitarian nook to house the TV and conference room equipment.

3) Make frosted pocket doors over the kitchen cutout for privacy during events.

4) Design a one-of-a-kind table that appears monolithic, but can also be broken down and stored.

5) Find a clever way to conceal all the cables and conduit that run across the bottom of the room.

If you follow me on Instagram you’ve seen some progress pictures over the last couple months. This is a beast of a project so I’m going to blog about one project at a time. First up… wall o’ storage.

jen-chu-design-hawkins-1pin it!

I knew that Jen (the client) envisioned having anywhere from 2 to 30 people seated in here at once, so it was essential that we had storage for stacking chairs. Since the room was very long, commandeering a few feet on the end still left ample room for conferencing/partying. This is the first wall that you see when you walk into the room, so I wanted it to look impressive and polished. They also had a huge TV and various conference room thingies (sound system, speaker phone, PC, etc) that needed to be wrangled and reconfigured, so I came up with this concept for the space:

jen-chu-design-hawkins-2pin it!

jen-chu-design-hawkins-3pin it!

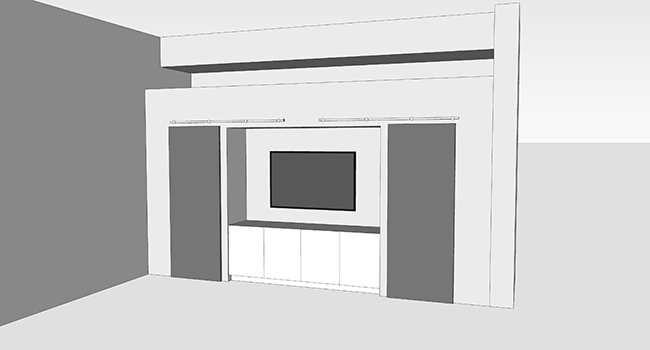
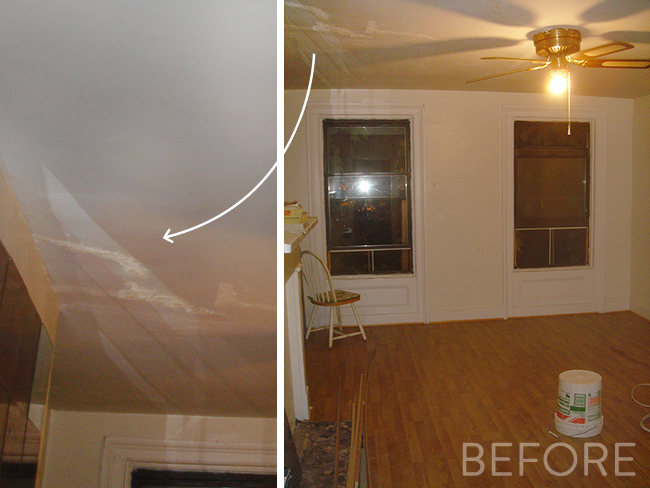
This one wall resolved several of our issues at once. It provided storage, housed the equipment, and acted as a focal point. We started construction right away and I practically jumped for joy when I swung by for a visit and saw this! Of course there were a few snafus along the way, but I’ll spare you the boring details and just show your pictures.

jen-chu-design-hawkins-4pin it!

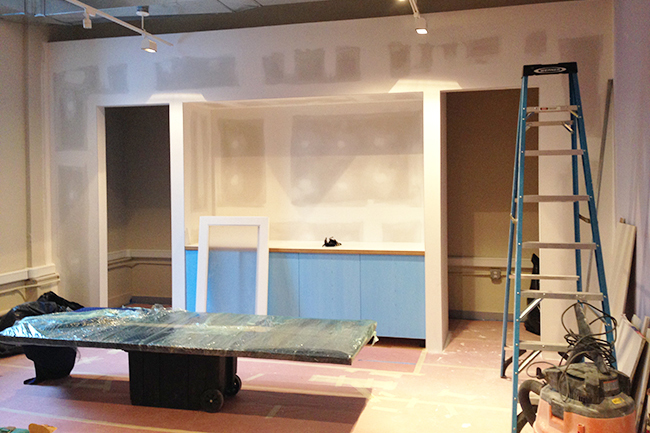
The wall was built around 4 IKEA kitchen cabinets for a custom built-in look. Now we were ready to install doors! I searched high and low for modern barn doors in a light wood color, but all the vendors I came across only manufactured them in birch color, or dark black-brown. Our doors also had to be extra tall so I decided to have them custom made and handed this project off to Aaron because he can make pretty much anything.

jen-chu-design-hawkins-5pin it!

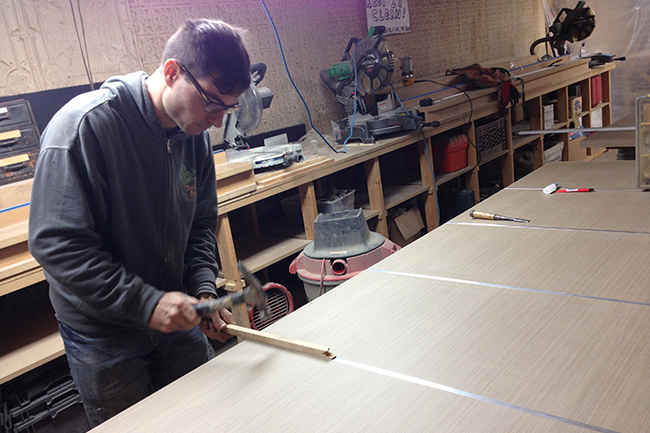
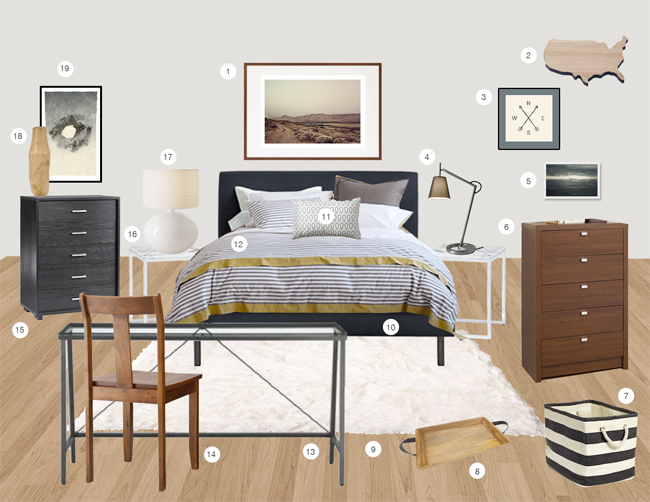
Can we just take a moment to drool over this wood veneer? It’s not fake wood folks, this is real wood grain and it’s fabulous. I want to clad my entire bedroom in this veneer, but that would cost zillions of dollars, so for now, I shall just appreciate it in context of this room.

jen-chu-design-hawkins-7pin it!

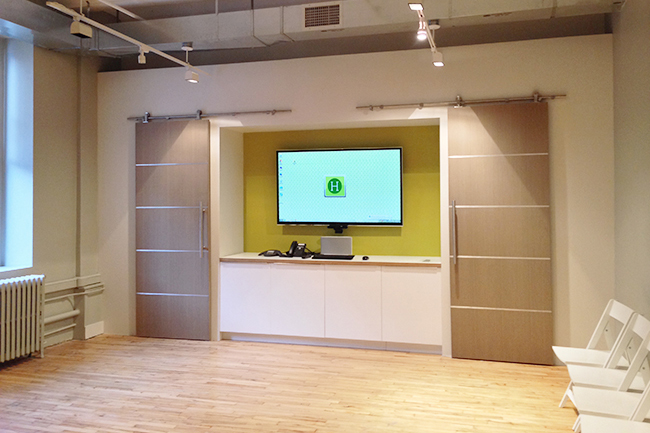
And there she is! Looking all symmetrical and modern and high-tech and stuff. I loved seeing this project come to life—the room looked 100x better after we finished this wall, and I’m super excited to show you the rest of the room. And of course thanks to Homepolish for connecting me to the ladies at Hawkins International who have been a dream to work with! More posts on the way, I promise!

Posted by Jen at 8:45 am — comment
Categories: ,
Apr 21

Chicago on a Whim.

I was born in Chicago, but my family moved to California when I was 7, so I don’t remember much. I decided to take a mini-vacation there and I was pleasantly surprised. What a clean, efficient, beautiful city! And everyone we met was SOOO nice. Here a few of my favorite instagram pics.

chicagopin it!

Posted by Jen at 9:38 am — comment
Categories:
Mar 31

Master Bedroom Before & After!

Since Design*Sponge recently posted a house tour of my place, I thought it would be a good time to share some progress pics so y’all can see how the master bedroom has changed over the course of the last 6 years.

My apartment has one tiny bedroom and one really large bedroom. For 6 years, I voluntarily chose to live in the tiny bedroom and I was perfectly happy there until my boyfriend moved in. 78 square feet is not a lot of space for 2 people to share. Sure, people all over the world live in tight quarters, but for the sake of maintaining peaceful relations with my partner, we decided to migrate to the big room.

It wasn’t until I had to relocate that I realized there was no usable furniture in the tiny room that I could drag to the big room. Everything in the tiny room is custom made and built-in, so that created a “shopportunity” to start from scratch. I don’t really like decorating slowly—contemplating furniture and decor for years on end. I need a designated place for everything in order to not lose my mind, so I prefer to just make a plan and get everything at once. Of course, I made a really thorough mood board, and blogged about what I wanted to buy in this post, which you should definitely check out because there’s also an awesome picture of my mom in it.

numberspin it!

Let’s rewind for a minute. The big bedroom has always had good bones. It’s kinda huge (by NYC standards.) It has 2 big windows, a formerly-functional fireplace, and decent looking laminate floors. However before I moved in, there were a few things that REALLY needed to be addressed before I showed off the space to potential roomies. Exhibit A: weird hodgepodge of retro mirrors.

master-bedroom-makeover-01pin it!

For those of you who have never had the pleasure of ripping mirror off… let me tell you…mirror adhesive is no joke. The only way for me to get these off was to break them. I wore gloves, multiple layers of thick clothing, boots, and safety goggles, then crammed a spackle knife under each mirror until the pressure caused them to crack and hundreds of glass shards went flying across the room. It wasn’t ideal—if anyone knows a better method, please do share. After the mirrors were off, I discovered a little MOLD! I immediately scrubbed the wall with bleach and I haven’t had a problem since.  Now, Exhibit B: lots of cracks in the walls and ceiling.

master-bedroom-makeover-02pin it!

Photos never do a scary room justice. The walls had a lot of lumps, small cracks, and unsanded spackle patches, so I took 3 days to repair those. That was no biggie, just your typical patch/sand/repeat. I also used 2 whole tubes on caulk to fill the cracks around the windows and door trim which was a highly gratifying process. Every crack that disappeared made the room look a couple years younger. The ceilings, however, were a HUGE pain. There were some pretty deep cracks, which I knew would be unappealing to potential roomies. Cracks just make it seem as though rain drops or cockroach poop are going to fall on your in your sleep. I could tell that someone tried to patch the cracks, but they didn’t use mesh tape, so ever the years, the cracks continued to split.

Ceiling repairs are my least favorite home-related thing to do. I hate doing any overhead electrical, anything that requires looking up for hours on end (I’m talking to you, Michelangelo), and I especially hate drilling and sanding ceilings. The process of repairing the cracks was simple: smooth down old spackle, cover cracks in mesh tape, apply more spackle, wait, sand, repeat. Unfortunately, I was dumb and I didn’t have a ladder so I was doing everything on my tiptoes on a chair. I also had no idea at the time that they sell equipment specifically for ceiling sanding. (Such a fool!)

master-bedroom-makeover-03pin it!

Anyway, the room came together nicely. I rented it to a series of lovely roommates, the last of whom was Katie. I adored this girl so much that when she was out of town, I teamed up with my friend Andrea and we gave her a full-on room makeover while she was out of town (with her blessing, of course.)

master-bedroom-makeover-04.5pin it!

I loved her bright and cheery room, but when she left to move in with her boyfriend, she took her bright and cheery furniture and accessories, and the room just looked kind of sad without her. I decided to start over completely and I started by painting the walls Collingwood by Benjamin Moore.

master-bedroom-makeover-04pin it!

master-bedroom-makeover-05pin it!

I “wallpapered” the fireplace surround with a curtain and liquid starch. A full tutorial on that process here. I also took down the ceiling fan blades and spray painted them white.

master-bedroom-makeover-06pin it!

master-bedroom-makeover-07pin it!

I purchased a bunch of furniture, and shortly after we moved in, the room looked something like this picture above. It was ok but aside from the cool fireplace surround, it was a little bland for my taste. That wall behind the bed needed something, but I didn’t want to clutter it up with junk since there’s so little wall space to begin with. The obvious solution? Accent wall!

master-bedroom-makeover-10pin it!

I don’t know where I got the idea, but I was feeling experimental, so I decided to paint the wall navy, but rather than stop the navy at the corner, I would bring the line into the room about 18″. It SEEMED like a really cool, hip thing to do.

master-bedroom-makeover-11pin it!

Except when it was done i HATED it. It’s not that it looked terrible, but when I was laying in bed, it felt like there was a dark cloud hovering over me at all times. It was literally making me depressed. I lived with it for a few days, but it drove me nuts, so repainted the 18″ strip and now all is well. After the navy wall done, it motivated me to finish decorating, so I got some roman shades, a new rug, made a big painting, and now the room looks like this!

master-bedroom-makeover-12pin it!

master-bedroom-makeover-00pin it!

master-bedroom-makeover-14pin it!

master-bedroom-makeover-15pin it!

master-bedroom-makeover-16pin it!

For sources, check out my mood board or my Design*Sponge house tour.

Posted by Jen at 10:10 am — 3 comments
Categories: ,
Mar 27

Words on Wheels: Extreme School Bus Makeover.

Sometime last fall a new client, Tina, contacted me needing help with design and space planning for the ultimate small space—a library on wheels. The WOW Bus is basically a reclaimed school bus filled with thousands of books and comfy seating that parks itself in various spots of Fort Worth, TX for the community to enjoy. I checked out her website and pretty much immediately decided I wanted to be involved. I love tiny spaces and have always secretly wanted to live in a pimped out R/V so I thought designing a bus would be right up my alley.

wow01pin it!

wow02pin it!

By the time Tina contacted me, she had already purchased a bus, gutted it, put hardwood floors in, and even had an air conditioner installed. This lady wasn’t messing around!

wow03pin it!

She already had a branding package put together by Mint Ink which was adorable and the perfect jumping-off point for a festive and fun design. Tina sent me the key measurements and I got to work right away.

wow04pin it!

I drew a 3D rendering of the interior of the bus and sent her specifications for the shelves, benches, bookcases, etc.

wow05pin it!

wow06pin it!

I knew the design I proposed was not going to be easy or cheap to execute, so when I emailed the final drawings to her, I wasn’t sure if it would be a couple months or a couple years before I heard from her again. One day in February, I opened my email and I was so happy to see these pics!

wow07pin it!

wow08pin it!

wow09pin it!

All of these pics were taken by Tina, because we live thousands of miles apart. But man…I wish I was here to check out the progress in person! I’m so impressed by Tina’s gumption and determination—I know how hard it is to get a project like this off the ground.  There have been several instances when I collaborated with folks with really wonderful ideas, and the projects either lost steam or changed course and the project got put to rest indefinitely. I’m so glad that this project is thriving and looks AWESOME so far.

wow10pin it!

Great job Tina & the WOW Family! I can’t wait to see the bus when it’s all done…


Posted by Jen at 5:20 pm — 5 comments
Categories:
Mar 26

Design*Sponge Sneak Peek!

I had been thinking about approaching Design*Sponge to do a house tour for at least the last 3 years. I always hesitated because I thought my place was too stylistically schizophrenic—each room with a different style. I don’t consider myself a designer with a “signature style,” probably because I create sets, so I just do what is right for the show. As a result, I enjoy experimenting with different styles in my home.

Two weeks ago Amy from Design*Sponge approached me about doing an interview/article about my career as a set designer and I happily obliged. I’m a huge fan of their blog so I was also totally excited (and a little surprised) when they suggested doing a full tour of my humble abode! It’s funny because they wound up titling the post “A home where each room has its own personality,” which is VERY fitting.

I photographed the master bedroom for the first time about a week ago just for this house tour, so in the next  couple days I’m going to do a big blog post on the evolution of the master complete with really scary “before” pics. For now, you can see a few pics of each room here.

design-sponge-sneak-peekpin it!

Posted by Jen at 9:33 am — comment
Categories: ,